I’ve mentioned that I make my own hand bound sketch covers on comics before but I don’t think I’ve ever written about exactly how I make them. As a kid I remember figuring out how to fix badly damaged comics since I always ended up with some hand-me-down comics that were in bad shape. It was mostly figuring out how to use Scotch tape in the most unobtrusive manner but one of the things I figured out how to do was to reattach a cover.
I would take the smallest piece of tape possible, maybe a half an inch tall by a quarter of an inch wide, and tape over the staple holes on the inside of the detached cover. Then I would open the comic to the centerfold and use needle nose pliers to bend the staples back into their nearly original state. With the prongs of the staples straight I could pull them out of the spine of the book.
After that I would poke holes with a pin in the tape that I put on the spine. The holes go right where the staples were originally. To finish up the repair I would wrap the cover back around the comic and then, by hand, put the staples back through their holes and bend them down again in the center. The cover we reattached and the comic ready to be read. Using tape on a comic is frowned upon these days but when I was a kid in 1977 a little bit of tape was far preferable to a detached cover.
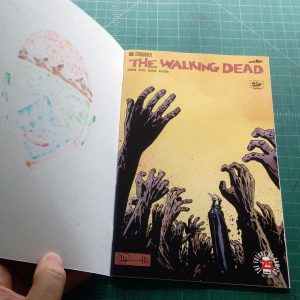
When I draw one of my hand bound sketch covers I to use that very method (minus the tape) except that I prefer to draw the whole thing on a flat piece of paper first and then bind it rather than bind it to the comic and then draw. The first thing I have to do is figure out what comic I’m going to bind my new sketch cover onto. I’ve used a lot of 25¢ comics, such as The Walking Dead 144, as well as some old World’s Finest issues from the early 1980s that I’ve had lying around. Anything cheap is good with me.
The second thing I have to do is figure out the correct size paper to draw on. I measure the comic (comics from different eras and companies are slightly different sizes), print out a box to those measurements on an 11×17 inch piece of paper, cut the box out, fold it in half, and wrap that piece of paper around the comic. In a perfect world that would be all there is to it but usually the piece of paper isn’t the exact right size so I have to go back and adjust the size of the box in my template and print out another copy. This is why I use plain paper and not my good drawing paper to figure out the correct size. It takes a couple tries.
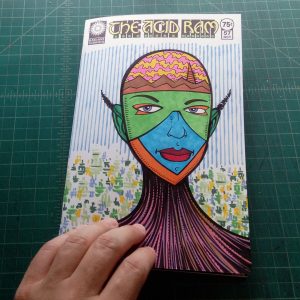
After I have the paper size right I go in and make my logos. If I want it to look like the book underneath, say The Walking Dead, I digitally recreate the Walking Dead logo. Sometimes I use my own logos, such as my Acid Ram one, and the sketch cover has nothing to do with the book it’s bound around. After I have the size set and the logo placed them my template is done. At this point the “Chose your own adventure” can go in either of two directions.
I usually like to draw and ink on separate pieces of paper. So if I have a drawing done already I scan it in, convert it to a non-photo blue line, and place that blue drawing onto my template to be printed out. After I print it out I ink over the blue pencil lines. I don’t always have a drawing done first though. In some cases I print out the logo and box on a blank piece of drawing paper and pencil and ink right on the same page. Either way I do the finished drawing on a flat piece of paper.
After I finish the drawing, sometimes it’s in black and white and other times I color them with markers, it’s time to attach it to the comic. As part of my template on the outside of the box I have small lines where the middle of the box is. That’s where I have to eventually fold the paper. So I hold the paper up the the light, transfer those marks to the back of the paper, and then draw a line between the marks on the back of the paper so I know exactly where to fold it.
It’s at this point that I trim the paper to size using an X-Acto knife and a metal ruler. Since my template consisted of the correct size box I just have to line up the ruler with the inside edge of the box and cut off all four sides. There should be no black line when I’m done cutting just the art I drew. Then I flip the paper over to where I drew the center line, line up my ruler along that center line, and (I learned this part from a friend) run the round edge of a paper clip along the line (and ruler) to compress the paper a little along the fold line. This makes it easier to fold. I then fold the paper along the edge of the ruler and after its folded run a burnisher along the fold.
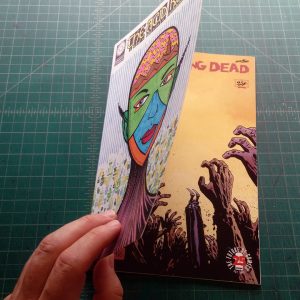
For the final step I’m back to my childhood. I use pliers to unbend the staples, straighten them out, and pull the staples out of the comic. After that I remove the cover an set the cover inside my folded drawing. With the drawing wrapped around the cover I take a pencil and poke it through the four staple holes of the cover to make four corresponding pencil marks on the inside of the drawing paper. I then remove the cover from inside the folded drawing, unfold the drawing so it’s flat, and use a pin to poke holes in the paper right where the pencil marks show where the staples have to go. Then it’s just a matter of lining the drawing, cover, and inside comic up and putting the staple back through the holds and bending them again.
Be patent when putting the staple back in. It takes a steady hand to get them back through their holes and it can be frustrating at times. They don’t always want to line up as they should. But I’ve done it and so can you. Plus at the end you have your own sketch cover.
Discussion ¬