I’m back from the comic shop this week and I got three new comics.
Check them all out here:
I’m back from the comic shop this week and I got three new comics.
Check them all out here:
This week I finally added a new piece of equipment to my art supplies. I got an Apple Pencil for my iPad. I’ve had an iPad for years and though I do a bunch of photography work on it I’ve never done much drawing on it. Before the Apple Pencil was invented I saw examples of artists who could draw with their finger or a regular stylus on the iPad but I was never able to do that. I couldn’t crack it. I wasn’t particularly good at digital drawing in general.
I use a regular Wacom tablet all the time. That’s the one where you use a stylus on a plastic tablet and look at your computer monitor to see what you’re doing. I sometimes draw with it but I mostly use it for digital coloring. That’s sort of a separate thing to me. I make art on paper, scan it in, and them make a finished color piece out of it. Sure there is some drawing involved but not nearly as much as if I drew it all with the tablet.
I just checked and it was way back in 2008 that I bought a 12 inch Wacom Cintiq. I would have guessed five years ago. Time flies. The Cintiq is different from my regular tablet in that it has a screen. As a matter of fact it is a screen that you draw on. So the stylus goes right on the tablet/screen and the drawing happens right under the stylus. No need to look at my monitor. I thought the Cintiq would change my workflow and I would use it all the time. It didn’t and I don’t. Because of various inconveniences with it I barely use it. In the end it was probably my biggest waste of money on a piece of equipment. I still have it but it’s attached to my backup computer and is hardly ever on.
One of the things I never liked about the Cintiq was the feeling of drawing on glass. The stylus was nice and was pressure sensitive but the feel of the plastic tip on glass didn’t feel right to me. I also found the thickness of the glass to be a distraction. The image I was drawing didn’t appear right under the stylus it appear under the glass of the screen so it was about an eight of an inch away from the tip of the stylus. I found that hard to get used to. I know tons of artists who love their Cintiq so it’s always bugged me that I didn’t like mine.
I’ve tried out the Apple Pencil before and it seemed really cool. The iPad has some advantages over the Cintiq. The main one being that it’s portable and doesn’t have to be attached to a computer. That last part is bigger than you could imagine. Both my Cintiq and my Wacom Tablet are old now and take a lot of fussing to keep running. Both Wacom and Apple have abandoned any support for them so I had to look online for ways to keep them running so I didn’t have to buy new ones. At least the iPad and Pencil will run for as long as I have them. Even if Apple abandons support for them and I can no longer upgrade them they’ll still work.
I’ve bought a few different drawing apps for my iPad over the years. None of them grabbed me but I didn’t have the Apple Pencil then. The two I’ve been trying out for the last couple of days have been Procreate and Affinity Designer. Designer is a vector based app like Adobe Illustrator is on the computer. That means it makes lines by connecting dots. I like making vector based art because that means I can “Build” things. It’s all about constructing shapes. I’ve been trying to get things goings in Designer but so far haven’t been able too.
Procreate I’ve had a little more luck with. It’s a bitmapped based program, like Photoshop is, and does its best to duplicate the feel of working with pencils, ink, and paint brushes. It’s really deep with a lot of tools to choose from. Too many for me at this point so I’ve been sticking mostly to the pencil as I learn to draw on the iPad.
So far my problem with digital art on the iPad comes down to technique. Turns out when it comes to digital drawing I have none. I’ve been drawing with a pencil all my life. It’s second nature to me now. On my drawing table I have at least ten different pencils that I use for many different tasks. When I need to draw something I grab the appropriate pencil. I don’t even think about it. With digital drawing I have a thousand pencils at my fingertips. But which ones do I use? And where are they? There is one pencil tool but it has lots of adjustable settings. Which one is best for the task at hand? I don’t know. It’s frustrating to have to learn something that is second nature to me with real tools.
Then there is actual technique. I know how to paint with gouache, watercolor, acrylic, and oil paints. Not to mention markers and inks. I know which one to pick for the outcome I want and how to physically paint with them to get to where I’m going. With digital I have no clue. Do I want a fake oil painting? Watercolor? Ink? I don’t know. Even after I choose I don’t know what brushes and colors to pick. I don’t know the destination or the road. It’s very confusing and I’m not used to that.
The final thing I think I’m having trouble with is the size of the “Paper” I’m working on being virtual rather than real. I’m used to a 5×7 inch piece of paper being 5×7 inches. It doesn’t change. Of course with digital I can zoom in and zoom out to my hearts content. But that makes the drawing constantly change size. It’s weird. Plus one of my habits of drawing is that the first thing I draw is a border around the paper. My most nature artistic talent is for composition so I like to define the edges of the paper to compose against. With a digital drawing that I can zoom in on the edges are constantly different. I find that a bit disconcerting.
So far the best thing about the Apple Pencil is that I like the feel of it. Everything else is going to take time and practice.
I’m back from the comic shop this week and I got seven new comics.
Check them all out here:
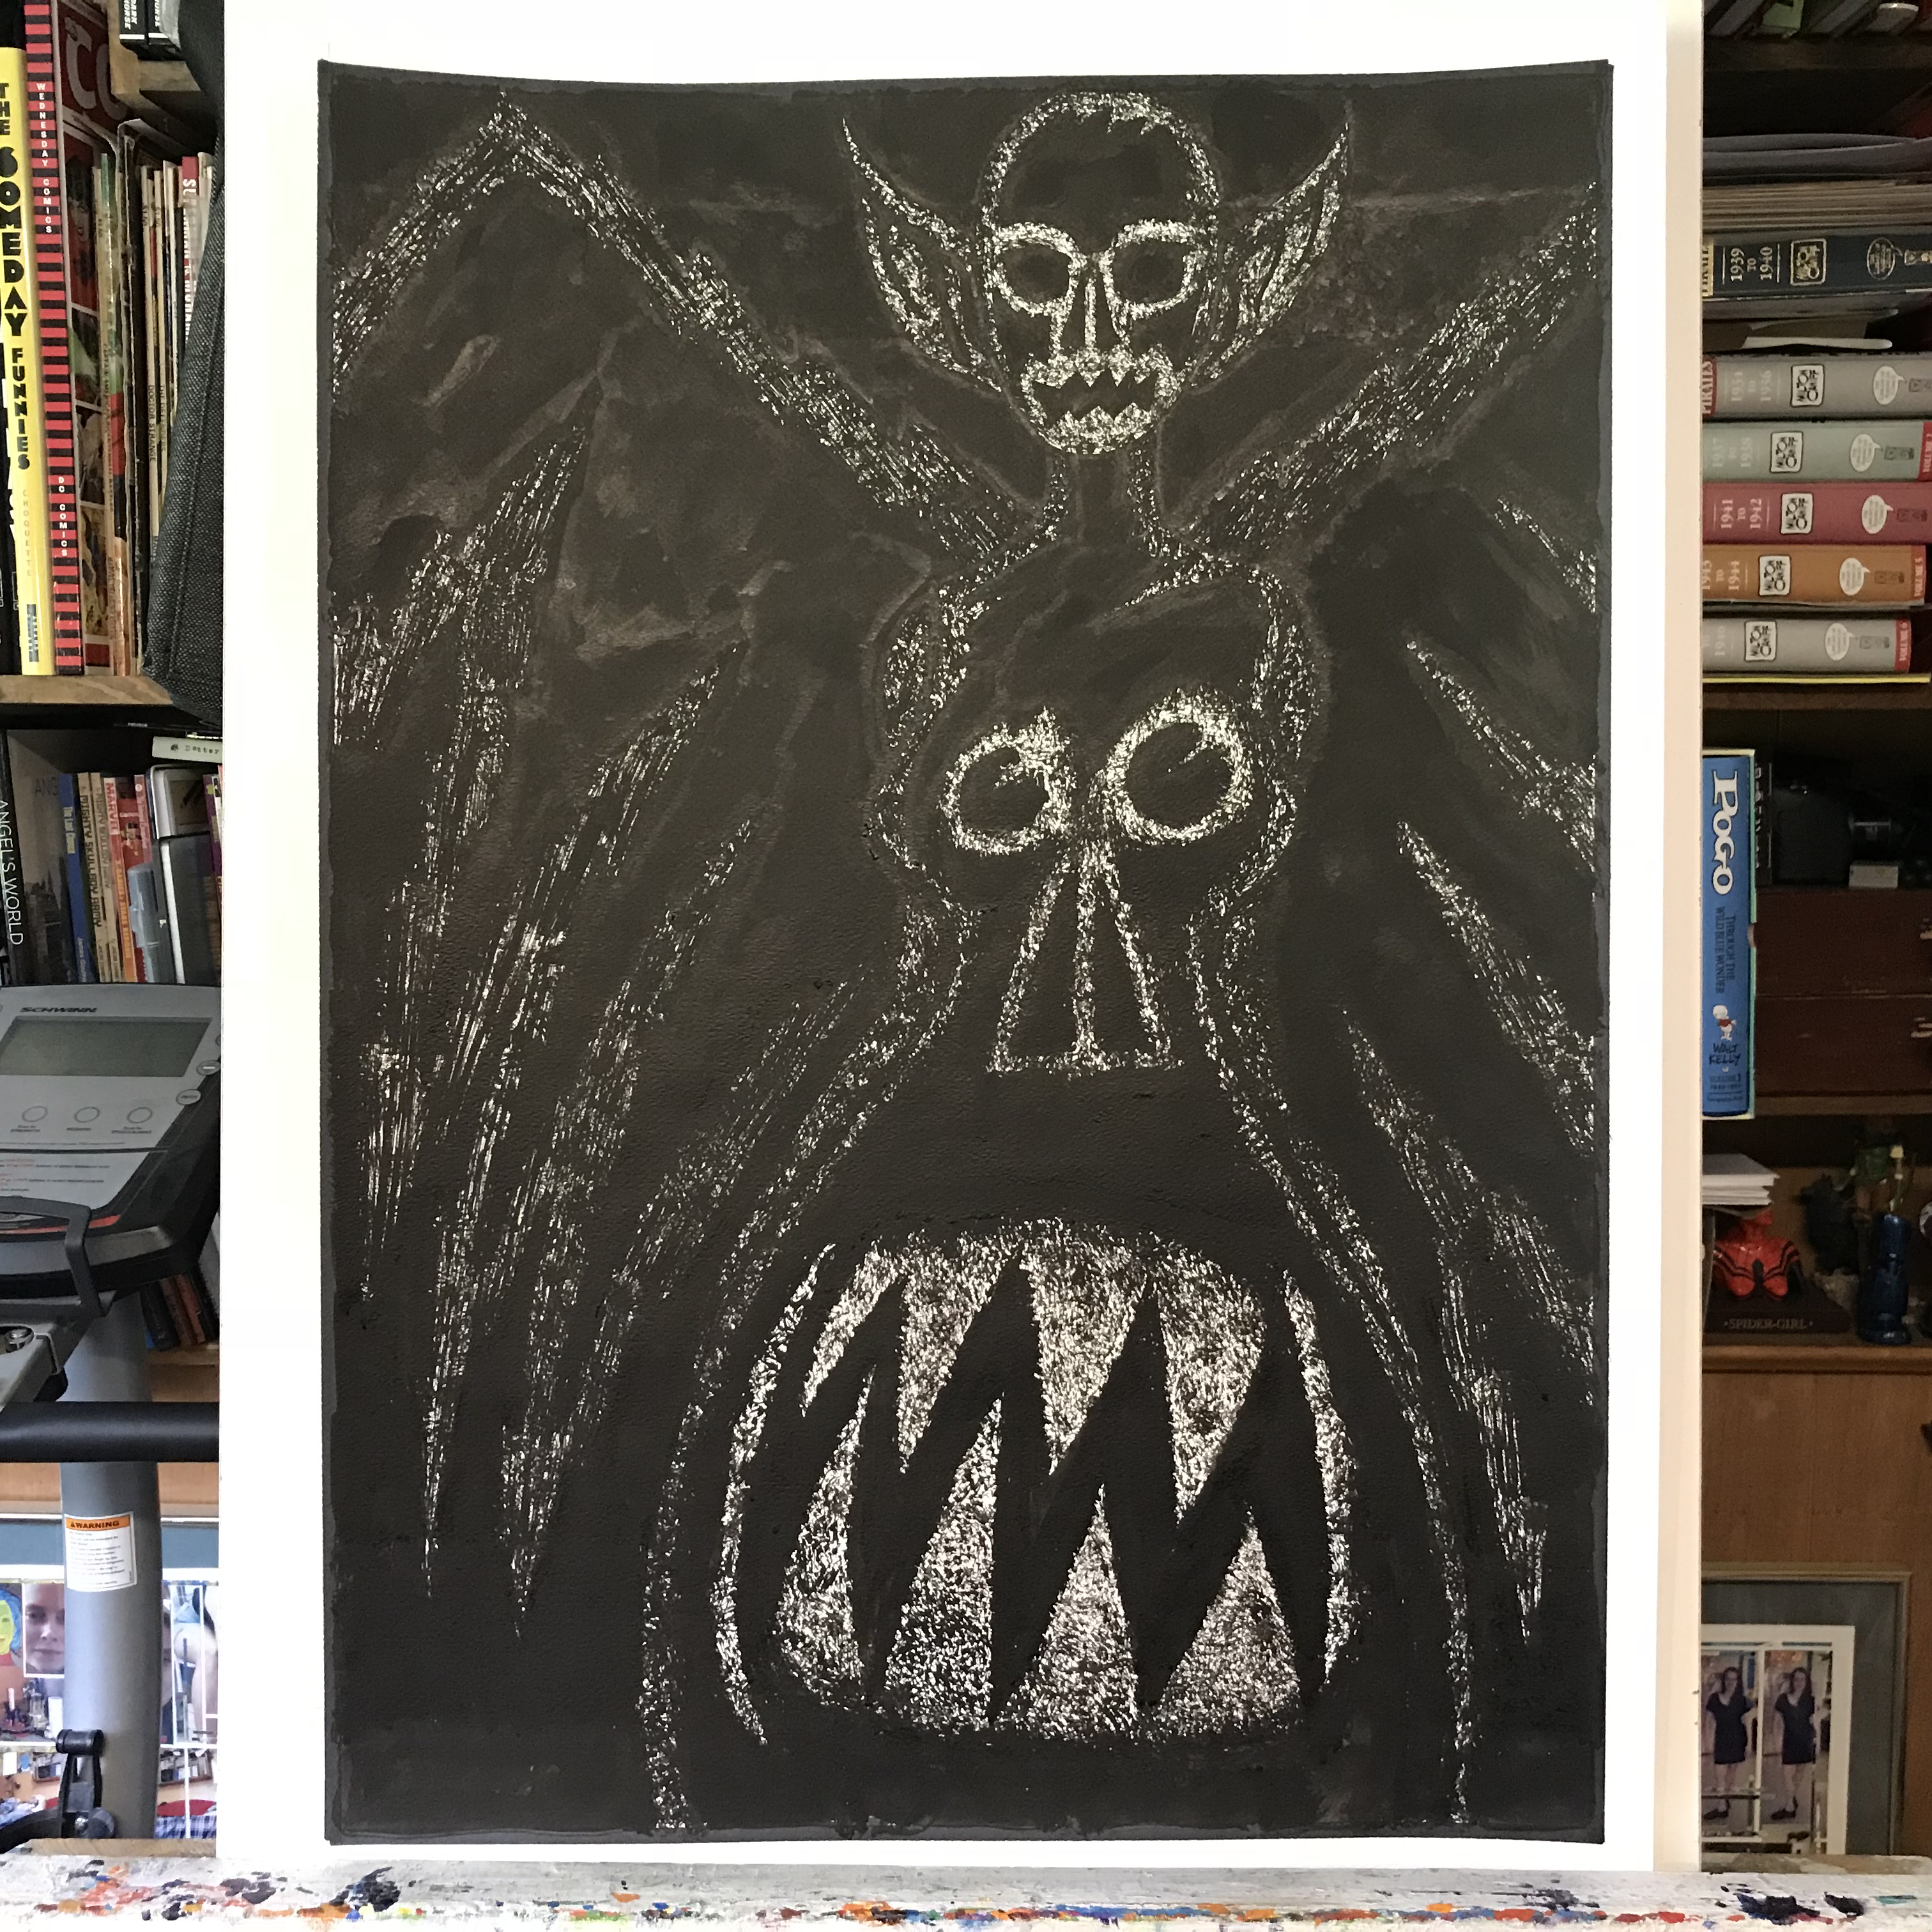
It turns out that size does matter and I can creep myself out. I found that out after making a large ink drawing this week. I’ve written about two big ink drawings I’ve done recently, the scary clown face “Face Seven,” and the monster face “Big Monster One”, and this one “Glory Days” was the third big ink drawing in a row that had a horror theme to it. Big and horrific. That’s what got to me.
“Glory Days” started it’s life as a small 6×9 inch drawing that I made back in 2012. After that made an 11×17 ink drawing of it but neither of those satisfied me. The were both swings and misses. I liked parts of them both but neither of them as a whole. Still I liked something about the drawings so I decided to give it another go but this time as a large ink drawing.
As I drew a new 6×9 inch drawing of the monster I noticed that the part I didn’t like was the teeth on the monster’s dress. I did a double face thing where not only did the monster have a face but there was a weird abstract face in her dress too. In the original drawing I made the teeth and mouth too abstract.
In general I have two ways that I make teeth in my monster faces. The first way is to make the teeth into sharp triangles that I then make a little more irregular and the second way is to use the many lines my busted brush technique generates to gesture in teeth without strongly defining the edges. In the original ink drawing I used the triangle teeth but instead of keeping them white I blackened them in and put a white outline around them. This messed up the positive and negative space of the mouth and obscured it in a way that didn’t work for me. So in the new drawing I worked out the teeth so they would be white.
The second thing that I changed was that I gave her big monster ears. In the original drawing she didn’t have any ears at all. I’m not sure why that is but I found that not very scary at all. It was even a little bit elegant looking. I guess I was going for a more skull-like look but I don’t think it worked. The big ears say “Monster” much more clearly.
After I worked out the new drawing at 6×9 inches I blew it up and transferred it to a 22×30 inch piece of paper. That was easy enough but as I started drawing it in ink I ran into a problem. How I originally made the drawing wasn’t working at the larger size and it was confusing me on how I should proceed. The original 11×17 inch ink drawing had hard edges. It was all about the shapes and how the positive and negative spaces played off each other. But I had to redraw and simplify a lot of those shapes to get the dress-mouth correct plus the hard edges at the large size didn’t look very scary. So I abandoned my regular brush and grabbed my multi-pointed busted brush.
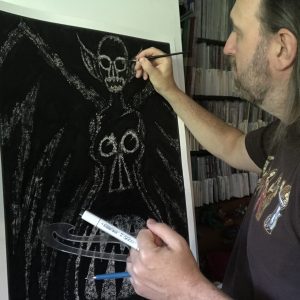
I was planning on using my busted brush with this drawing but it turned out that I really hadn’t thought out how I was going to use it. Usually it’s easy to use. I use it to define the forms of a drawing. The roundness of an eye or the shape of a nose. But with this drawing I had mostly graphic shapes that didn’t define forms but defined positive and negative shapes. It was different so I had to take some time and think about it. I started with the face but only got so far before I switched to the other parts of the body.
I ended up not defining the forms but obscuring them. This drawing is almost all black with only a little bit of white showing through. This white defines the forms but in a subtle way. Little hints of edges stand out to us and give the body its shape. I actually had the hardest time with the wings because they basically have no form. They were such a graphic element that it was impossible to bring any sense of form to them. I tried to define them using various direction brush techniques but in the end found that obscuring them was the way to go. I kept making them darker and darker until they sat back in space the way I wanted them to. That sounds easy to do but takes a remarkably long time to figure out and execute. In the end this large 20×28 inch drawing took me about ten hours to finish. That’s not too bad for one of these large drawings but it’s not a short period of time.
The different thing about this one was that by the time I was done it was creeping me out. I’ve done a lot of monster drawings over the last half a decade or so but they were all 5×7 inches or 11×17 inches. Sure they were some creepy ones but I guess them being smaller made them less creepy. I even like to take a few dozen of these small ones and line them up to take photos or look at them. They’re cool when they’re all in a group.
After I finished “Glory Days” I didn’t want to look at it. Normally after I finish one of these big drawings I leave it on the easel for a couple of days to think about it. This one I left up for a shorter time. It creeped me out. It didn’t help that the two before it were also creepy drawings but this one seems especially bizarre. It’s odd that I can make a drawing that can creep me out. After all I’m the one who made it and know how it’s done.
After making this one I had to clear my brain by making a larger drawing that was pleasant and fun. I went back to my clean edged style and made a drawing where the main figure was a smiling woman. Much less creepy.
I’m back from the comic shop this week and I got four new comics.
Check them all out here:
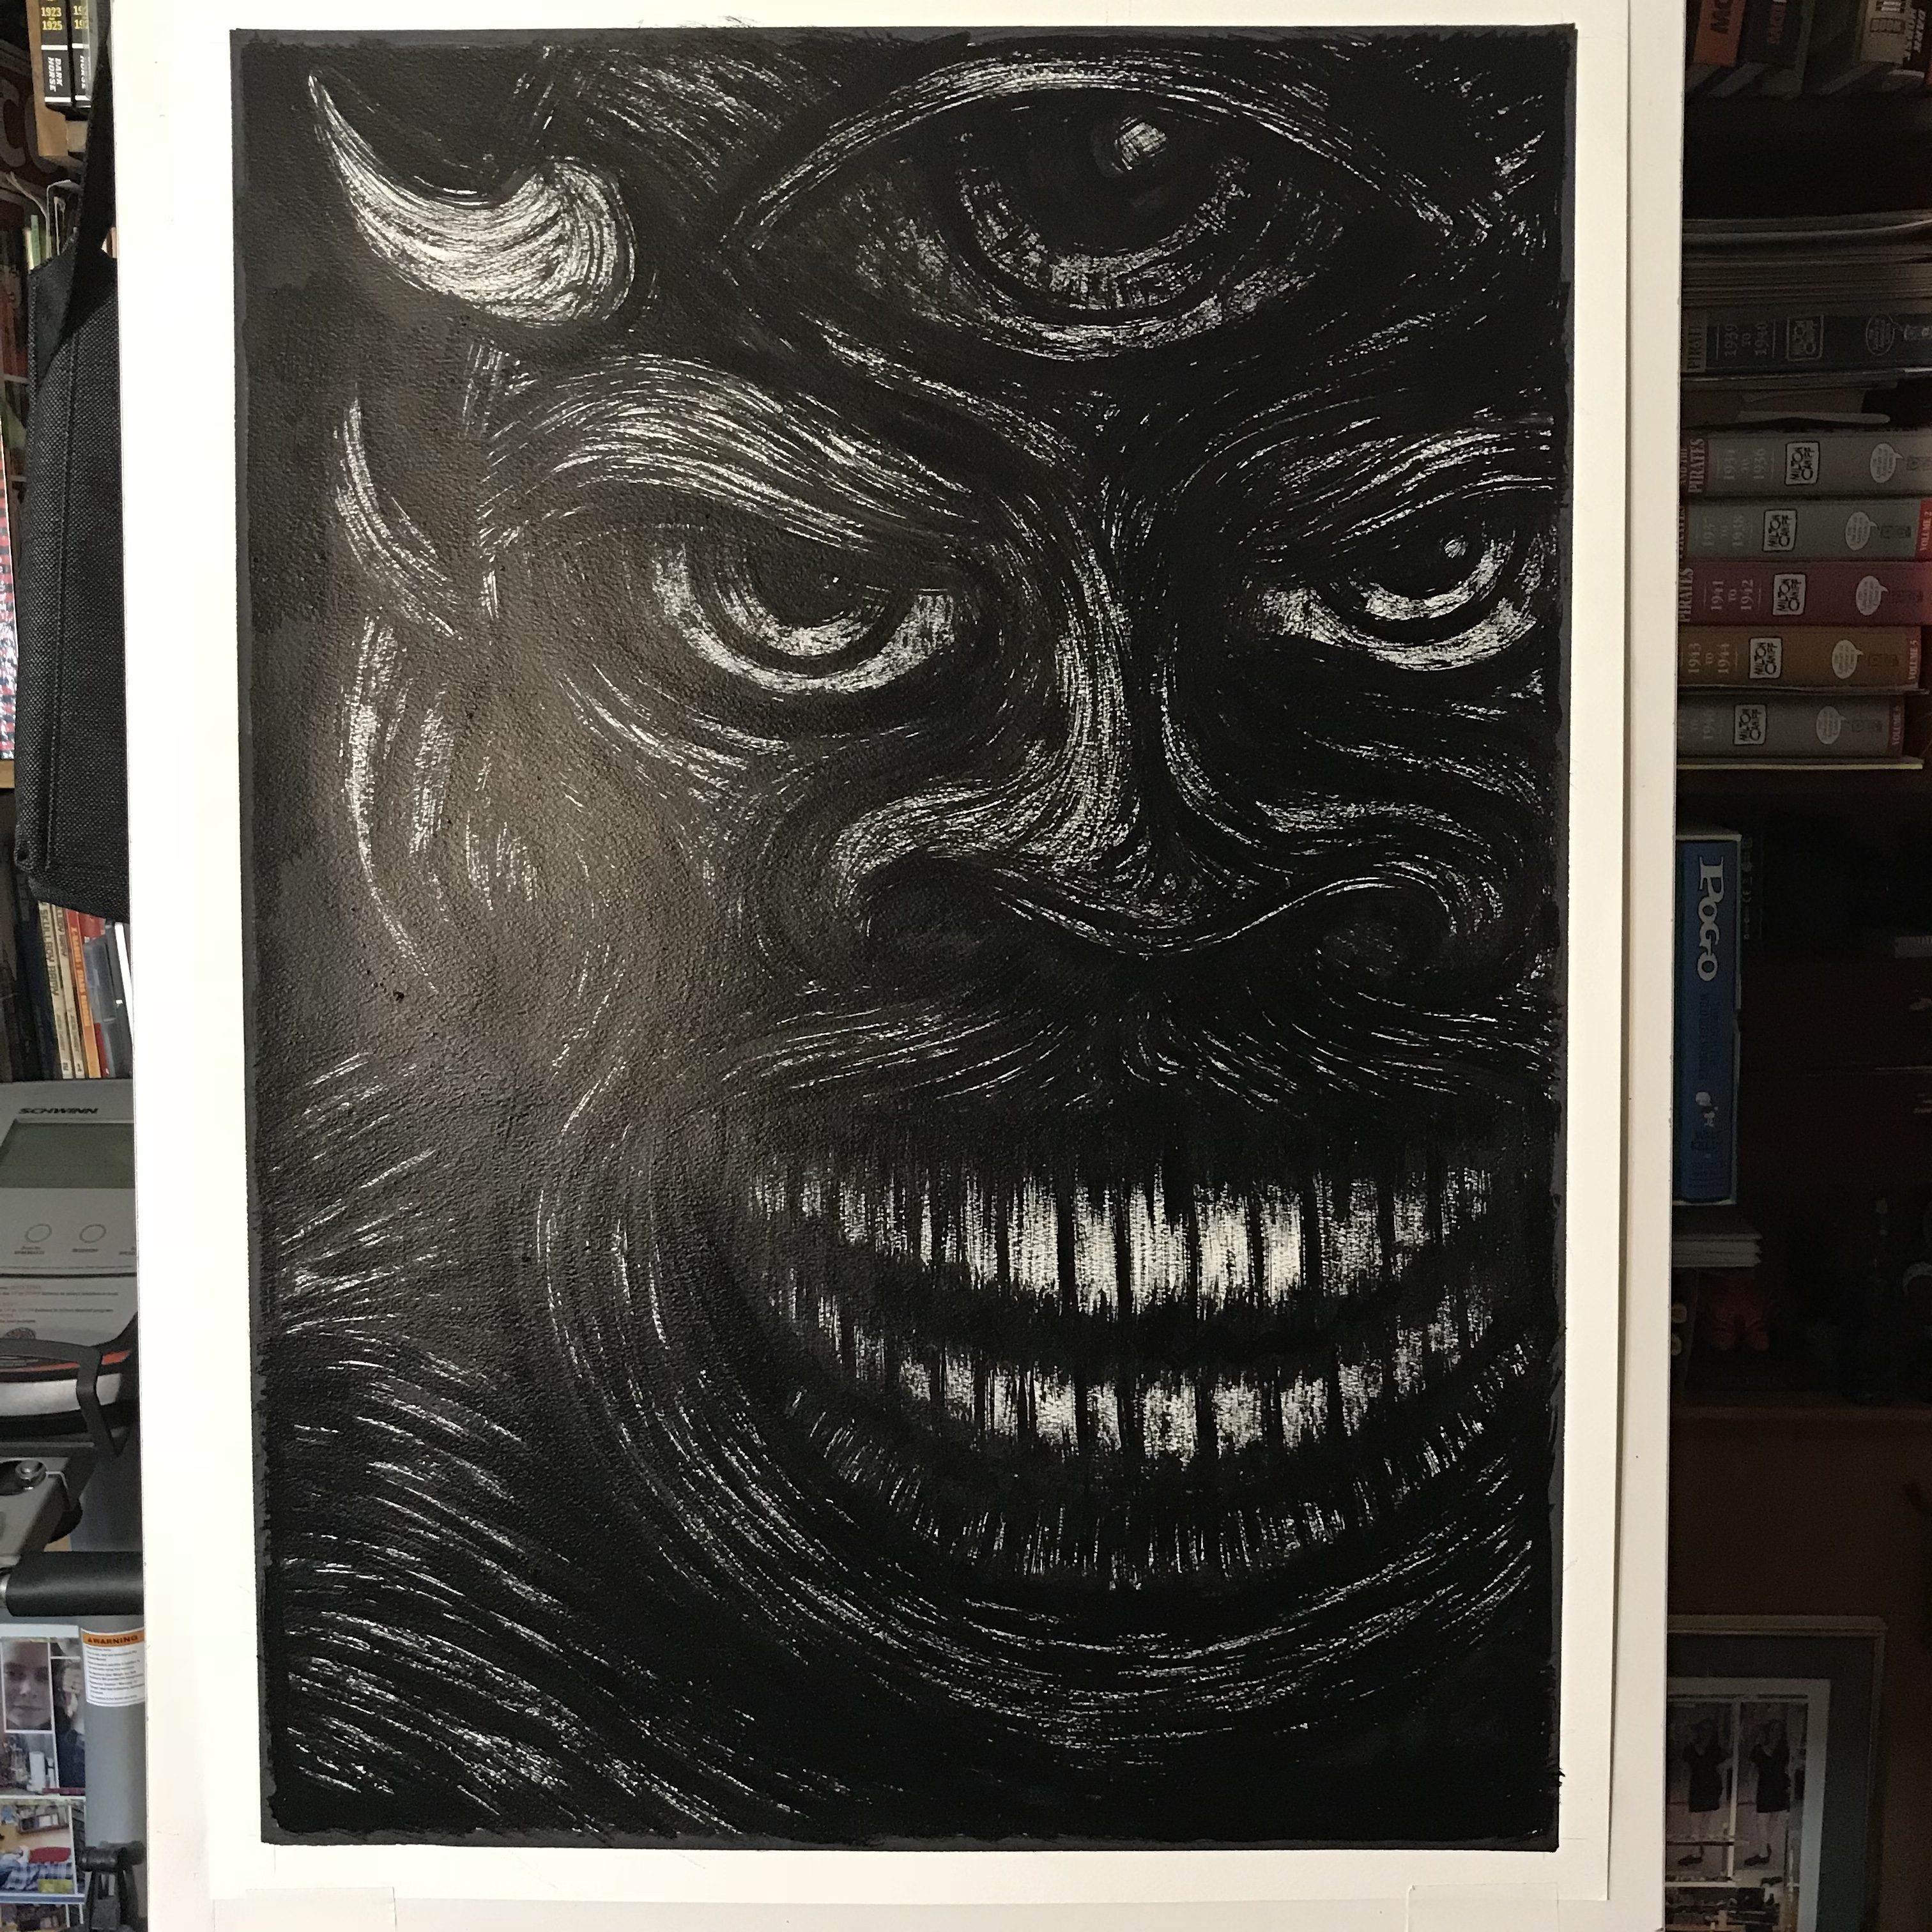
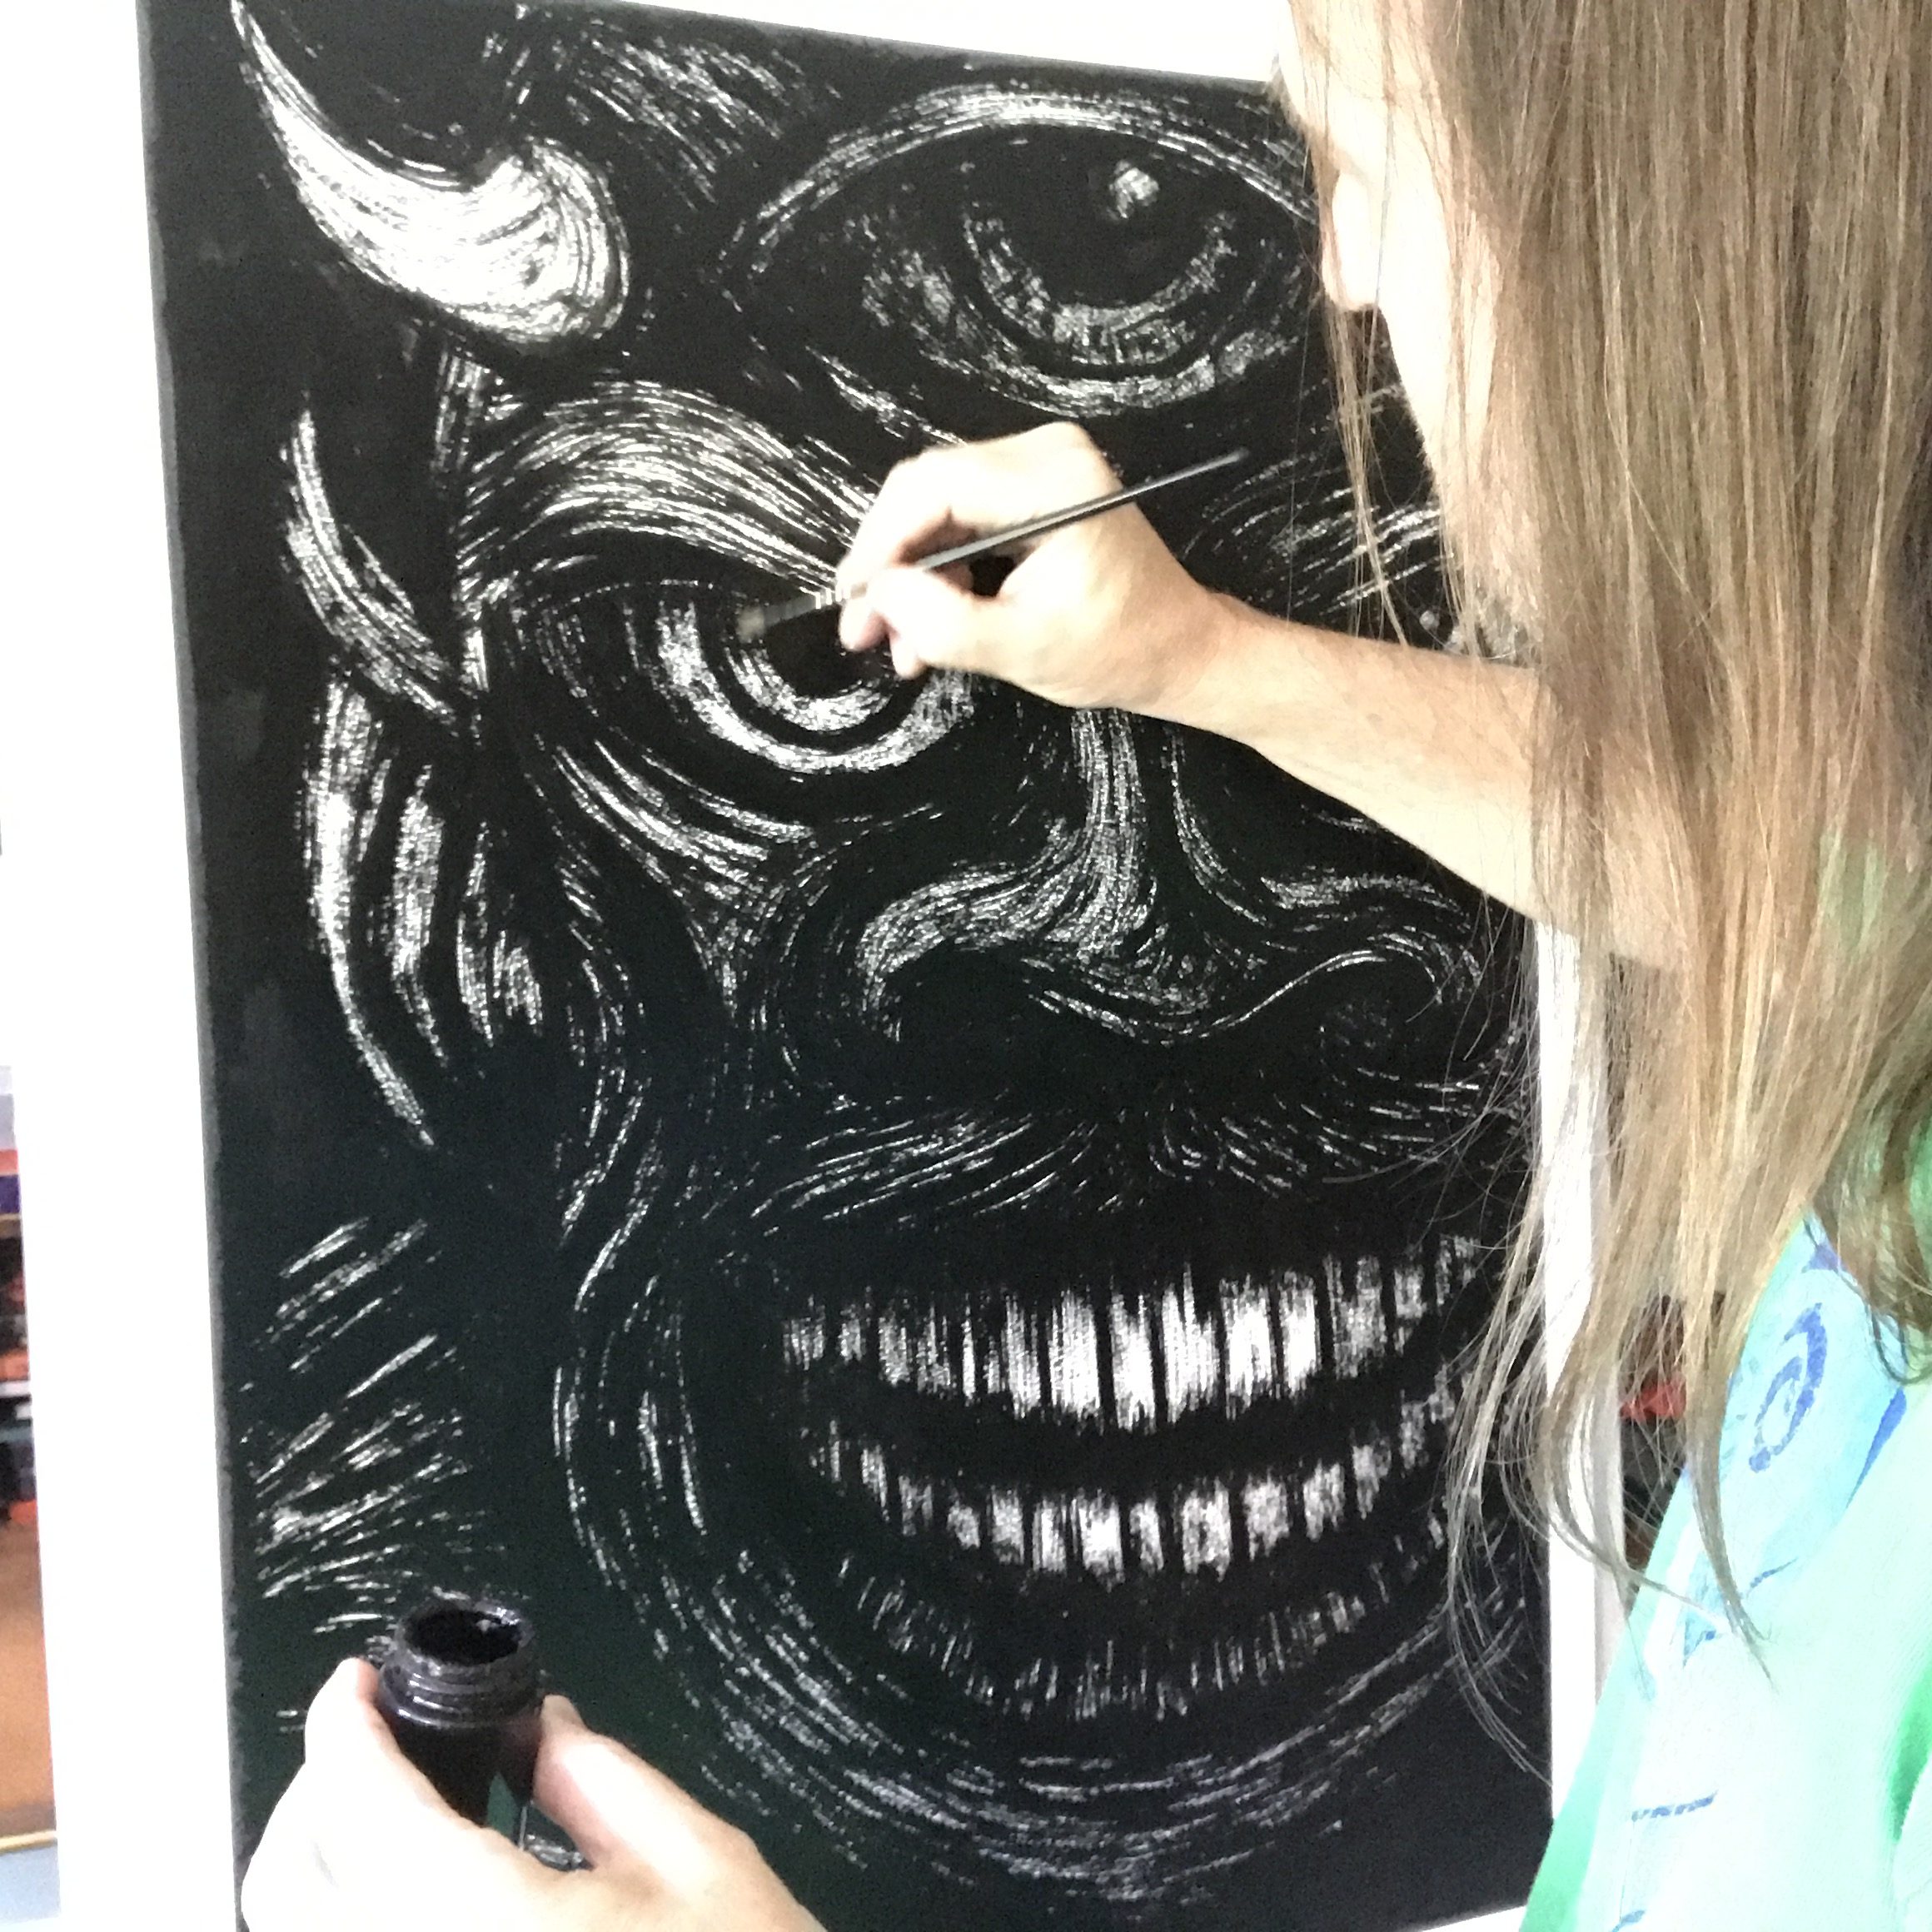
I tackled another big 20×28 inch ink drawing today. I’m on a roll with them. This one was giant monster face. Unlike my other big ink drawings the monster face didn’t involve any markers, French curves, or straight edges. This one is all brush and ink. And it was a broken down and busted up brush instead of my usual good one.
My busted brush technique developed over the years due to happenstance. I use sable hair watercolor brushes with my ink and they serve me well except for the fact that India ink eats away at the brush and degrades it over time. Usually a brush is good anywhere from months to a year. Not a terribly long time. And those watercolor brushes are expensive; $20 to $30 a pop. I hate to throw them out. So I have a lot of old brushes lying around.
When a sable round brush goes bad what happens to it is that it no longer comes to a point. It splits into two points which is pretty useless if you’re looking to make one line. But eventually I found a reason to want to make two lines. Around five years ago I bought some 5×7 inch watercolor paper. The problem was that it was the roughest watercolor paper I had even seen and I found it impossible to draw on. So that paper sat around for months. Then I got the idea to try drawing on it with one of my busted brushes. Two out of control tools might add up to something that neither one of them could do alone. It ended up being a success and my “On the Rough” and “Monster a Day” series of drawings were born. I’ve been doing busted brush drawings ever since.
I’ve probably drawn monsters of some kind all my life but it really didn’t become a theme until I came up with this technique. I can trace my monster drawings back to two sources. One is obvious. Comic books. There have been lots of monsters in comic books and I have been reading comics all my life. The second source is more obscure. I was in college in 1988 and we went to a show at the Brooklyn Museum called “The Art of New Ireland”. New Ireland is an island in the Pacific near Papua New Guinea. The show had in it a small sculpture of a monster. It was about a foot high and scary looking. We were told that the people of New Ireland would make such sculpture in order to remind them to be morally straight. Otherwise monsters were waiting for them. That idea and that monster stuck with me.
Most of my busted brush drawings are small. Somewhere around 5×7 to 6×9 inches. I’ve made some 11×17 inch busted bush drawings but in general I think they work better at a smaller size. After all the brush isn’t very big. So when the idea popped into my head to make a large scale busted brush drawing I wasn’t sure I could pull it off. That’s a lot of paper to cover with one small brush but I’d have at it.
I don’t do much preliminary drawing when it comes to these monster faces. Since so much of the drawing is done with the brush there isn’t a lot of use for an extensive under drawing. Instead I will either make a quick small drawing to work out some details or I will pull out a bunch of my old monster drawings and look at them to get some new ideas. Then I sketch in the broad strokes of the face in pencil. Since there ends up being so much ink on the paper there isn’t a whole lot of room for details anyway. I’d say the pencil stage only takes about half an hour. This is considerably short compared to the pencil stage of most of my work.
One of the little drawing tricks I did with this monster face was to duplicate one eye twice. Often with a big face drawing that’s symmetrical I find myself spending too much time making sure the eyes match each other. If I’m no paying close enough attention one can be slightly higher, lower, smaller, or bigger than the other. The easiest way to avoid this is to draw one eye, get a piece of tracing paper, trace that eye, flip the tracing paper over, use the graphite of the drawing to transfer the flipped eye into place as the second eye. This is an easy way to insure that second eye is right. I did that here and it saved me a lot of time especially since the eyes were drawn in a sketchy manner. It’s actually tougher to match loose sketched eyes than fully drawn ones.
After I finished the pencil sketch I just went at it. Brush and ink. This is what takes all the time. It’s tough to describe what it takes to make one of these drawings since it takes so much building up of brush strokes. It’s all about trying to figure out and build the forms of the face but doing in such a way that they’re defined by darkness as much as or even more than light. I’m always making the drawing darker and darker.
I try to work all over the drawing all at once. I can’t finish one area and then move onto the next. I have to draw all over until it reaches a level of darkness and then start again working on the next stage of darkness. I have to do this four or five times until the overall drawing is finished enough to start working on individual areas like the eyes, nose, or mouth. It’s a method that takes a lot of patience and I have to psych myself up to not get discouraged. I have to trust that it will all come together in the end.
The end was about six hours later. That’s a long time to be putting ink down on a single piece of paper. There is so much ink on the paper that there is actually a bit of surface to it. I can feel the ink when I touch the paper. That’s unusual. But it did come together in the end and that makes me happy.
I’m back from the comic shop this week and I got seven new comics.
Check them all out here:

Tape around the front fork of my bicycle.
Y’know what’s on my mind tonight? Tape. That sticky stuff that’s really useful for holding other stuff down temporarily. Yeah, I know a lot of people think duct (or duck as the case may be) tape is a permanent solution but it’s only permanent for a short period of time. A little too short a period in the case of the roll of duct tape that I have now. I bought it at the hardware store last year. I think the brand is Blue Dolphin and it’s the worst duct tape I’ve ever bought. It just doesn’t stick well enough. It comes off whatever I stick it onto in a relatively short period of time. I’ve still been using it though because I’m too cheap to buy another roll of another brand. I just expect it to fail and have to be replaced fairly quickly. It’s also a reminder that duct tape is in no way a permanent solution.
The tape that I use the most is white paper tape. It’s an inch wide and the paper core is about three inches across. About the size of a slip-on bracelet. I use it for taping paper to my drawing table if I need the paper to stay in place as I draw on it. White paper tape is sort of like masking tape but with less glue on it. Masking tape could rip the surface of the paper as you attempt to remove it but white paper tape won’t. They make a tape called drafting tape that has even less stickiness to it and is specifically made to be easily removable but I haven’t used any of that since the 1990s. I find the white paper tape a little bit more versatile.
I also use the white paper tape to keep my large sheets of paper in place on my drawing board when it’s on my easel. It’s the same task as the tape on my drawing table except the paper is upright rather than laying flat. I only mention this because the white paper tape almost always fails at this task as time goes by. I tape a large 22×30 inch piece of paper on the board, draw on it over a period of time, and then watch as the tape slowly comes off the drawing board. It takes a day or two but it always happens. It’s not the end of the world so I just put up with it.
Another strange thing about the white paper tape is that it sticks to itself too much in the middle of the roll. Since I only go through a role every few years it may have to do with age but I’m not sure. As I get to the middle of the role the tape gets harder to peel, rips, and leaves residue on itself. Then it clears up. I’ve noticed this pattern with other rolls over the years. I have no idea why it does it but I work through it.
I used to have a tape dispenser that hooked onto the side of my drawing table that could hold four or five rolls of tape. I had that thing racked with tape, white paper tape, drafting tape, Scotch tape, removable tape, and acid free framer’s tape. There was a serrated metal strip on the front of the dispenser that cut the tape. The problem was that I cut my hand on strip too many times. I’d bump into it. Couple that with the fact that I really didn’t need such a large variety of tape at my fingertips I eventually retired that dispenser.
Cut to the present day and I was actually wondering recently if I kept that dispenser. I still have a one inch roll of Scotch Magic Tape left from the late 1990s. It’s amazing that the tape is still good. That’s the Scotch tape in the green package and it’s made to last a long time. I bought some mid-1960s comics books at a garage sale in the early 1980s and in which someone had reinforced the spines with that magic tape. All these years later that tape is still good. Most other tape would have turned brittle and yellow by now.
I couldn’t find my old tape dispenser but a week later a friend mentioned to me that he was getting rid of one and asked if I wanted it. I said sure. Turned out it was a smaller dispenser than my old one (one or two rolls rather than four or five) but that didn’t matter. I only wanted it for the one roll of tape so I was good to go. It’s amazing how much more I use that tape now that it’s on a dispenser. The white paper tape is easy enough to use by hand but not so much the Scotch tape. Finding the end of the tape and then peeling it off itself is a pain with the Scotch tape. On the dispenser it’s just pull and cut on the serrated edge.
Another type of tape that I use a lot of is plastic electrical tape. I use that for repairing stuff. Years ago I bought some small rolls of half inch electrical tape in a variety of colors. Red, green, blue, yellow, and white. I originally used it to make rings of decorative color on my bike. I don’t know why I did that but it came to me one day to do it so I did. Ever since then I’ve found other uses for the tape and even bought more of it. I use it mostly for repairing small things like the handles on a laundry basket that broke. I taped them back on.
I used to use removable tape all the time when making my photo collages. Digital photography changed that. Removable tape is a low-tack clear tape that can hold a piece of paper in place for a brief time and then be removed easily and leave no residue behind. When I used to compose my photo collages by hand I’d move the pieces of photos around, tape them down, and then move them again. It was a process that took a while since I was cutting up and using real photos to compose in real time. There was a lot of movement to it so the tape was needed to keep things in place. Then in the early 2000s I went digital with my photography and could compose the photos on screen in Photoshop. No need for removable tape in Photoshop. So my need for it went away.
Well there you go. That’s the mundane world of my relationship to tape. How the heck did this idea pop into my head?
I’m back from the comic shop this week and I got four new comics.
Check them all out here:
I worked on another large 20×28 inch ink drawing this week. That seems to be my habit lately. It’s what gets me by. It can be tough figuring out what I want to do in terms of making art and when I find something I stick with it as long as I can. It’s hard to make art. It’s hard to do most everything which is why people get paid to do work. But imagine if you weren’t getting paid. Would you still do your job? Of course not. And that’s why so many artists stop making art as they get older. Unless they can find a way to make a living doing their art it fades away. Finding motivation to make art is a task. Often the answer to the question “What should I do?” has no answer and so nothing gets done. When I have an answer to that question I try to make the most of it. That’s why I’ve been making these large ink drawings.
“How long is this going to take?” is one of the first questions a person has to ask themselves before undertaking any task. The longer it’s going to take the harder it will be to motivate yourself. Answering that question isn’t always easy with these large ink drawings. The first couple I did took two days each which is what I estimated. That’s not bad but they took less time than they could have because I already had working drawings done for them.
How long does it take to make a working drawing? That’s another tough question. It takes either an hour or two days. That’s quite a spread. I recently made a working drawing for one of these large pieces and it took me nearly an entire day. It took a lot longer than I expected. Normally I work up a few drawings at once. I spend some time looking though one of my sketchbooks, pick out a four or five drawings, print them out in blue line on 6×9 inch paper, work on redrawing them until I have a group of working drawings. But it doesn’t finish there. Some of them need to be blown up to 9×12 or 10×15 inches and have finished drawings made out of them. Sometimes a 6×9 inch working drawing is good enough to blow up and make a finished work out of and sometimes I need a finished drawing. It’s a case by case thing.
The reason the 6×9 inch drawing for the ink drawing took so much time is that I knew it was going to be blown up big. I added a lot more detail into it than I normally would. I should have decided early on to blow it up to 9×12 and work on the detail but I kept thinking to myself that with just a little more time I wouldn’t have to do that. Time caught up with me though.
That brings me to the large ink drawing I just finished. It only took me one day to do and that was my goal with it. I wanted to finish a large ink drawing in one day. That what I had the motivation for. Of course the only way I could accomplish this task is if I already had the working drawing finished. My mind thought back to a small drawing I made that I always wanted to make something bigger out of.
The original drawing was from 2003 and was from a series of drawings that I made of faces. That was back when I was first working with spontaneous drawing and I drew a hundred faces in marker on 5×7 inch paper with no pencil underdrawing. I’ve used some of those faces over the years for different things and here was another opportunity to. They aren’t finished drawings though. That could have been a problem but I remembered attempting to use this face before for something else and having made a finished drawing out of it. I just had to find it. I scan almost every one of my drawings in so I looked through my folder of scans. It took twenty minutes but I found it. I made a finished drawing of the face I wanted back in 2012.
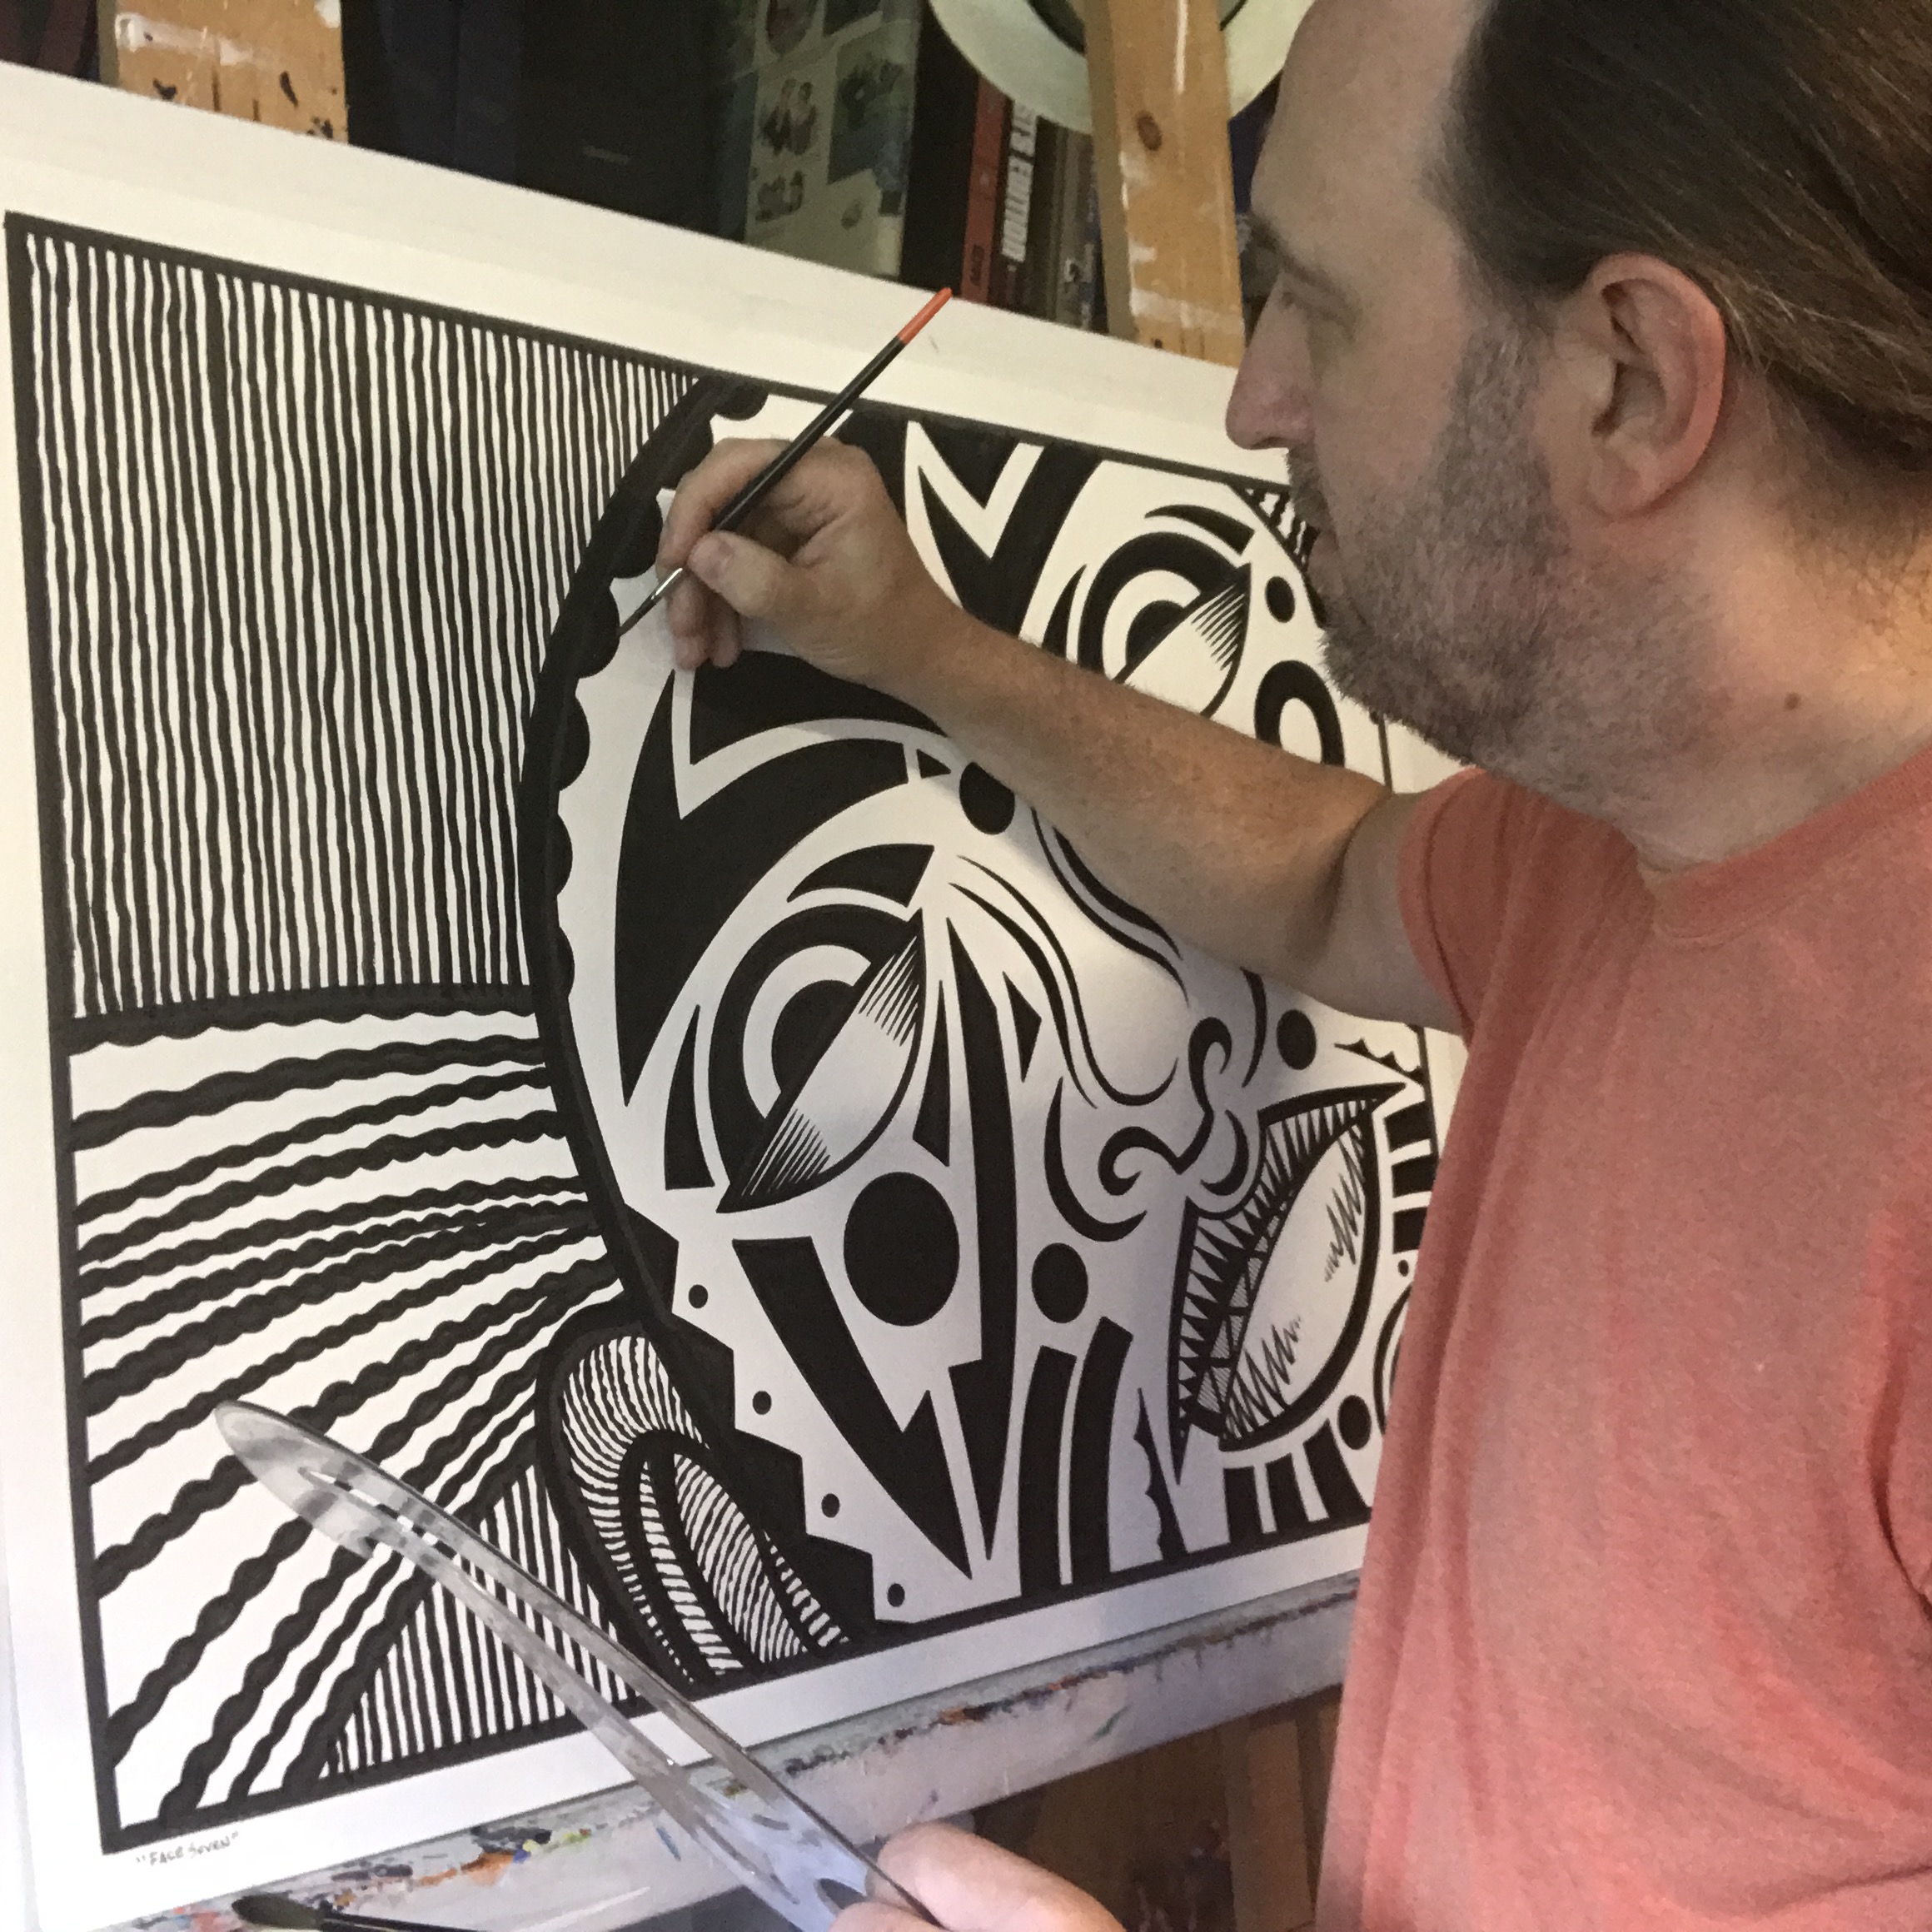
The rest of the drawing was done by my usual method. I blew the drawing up to 20×28, printed it out on pieces of paper, taped the paper together, used graphite paper to trace the drawing onto the big paper, and then went to work making an ink drawing. I use brushes, ink, markers, straight edges, French curves, a ship’s curve, an adjustable curve, circle templates, and eclipse templates to make these large drawings.
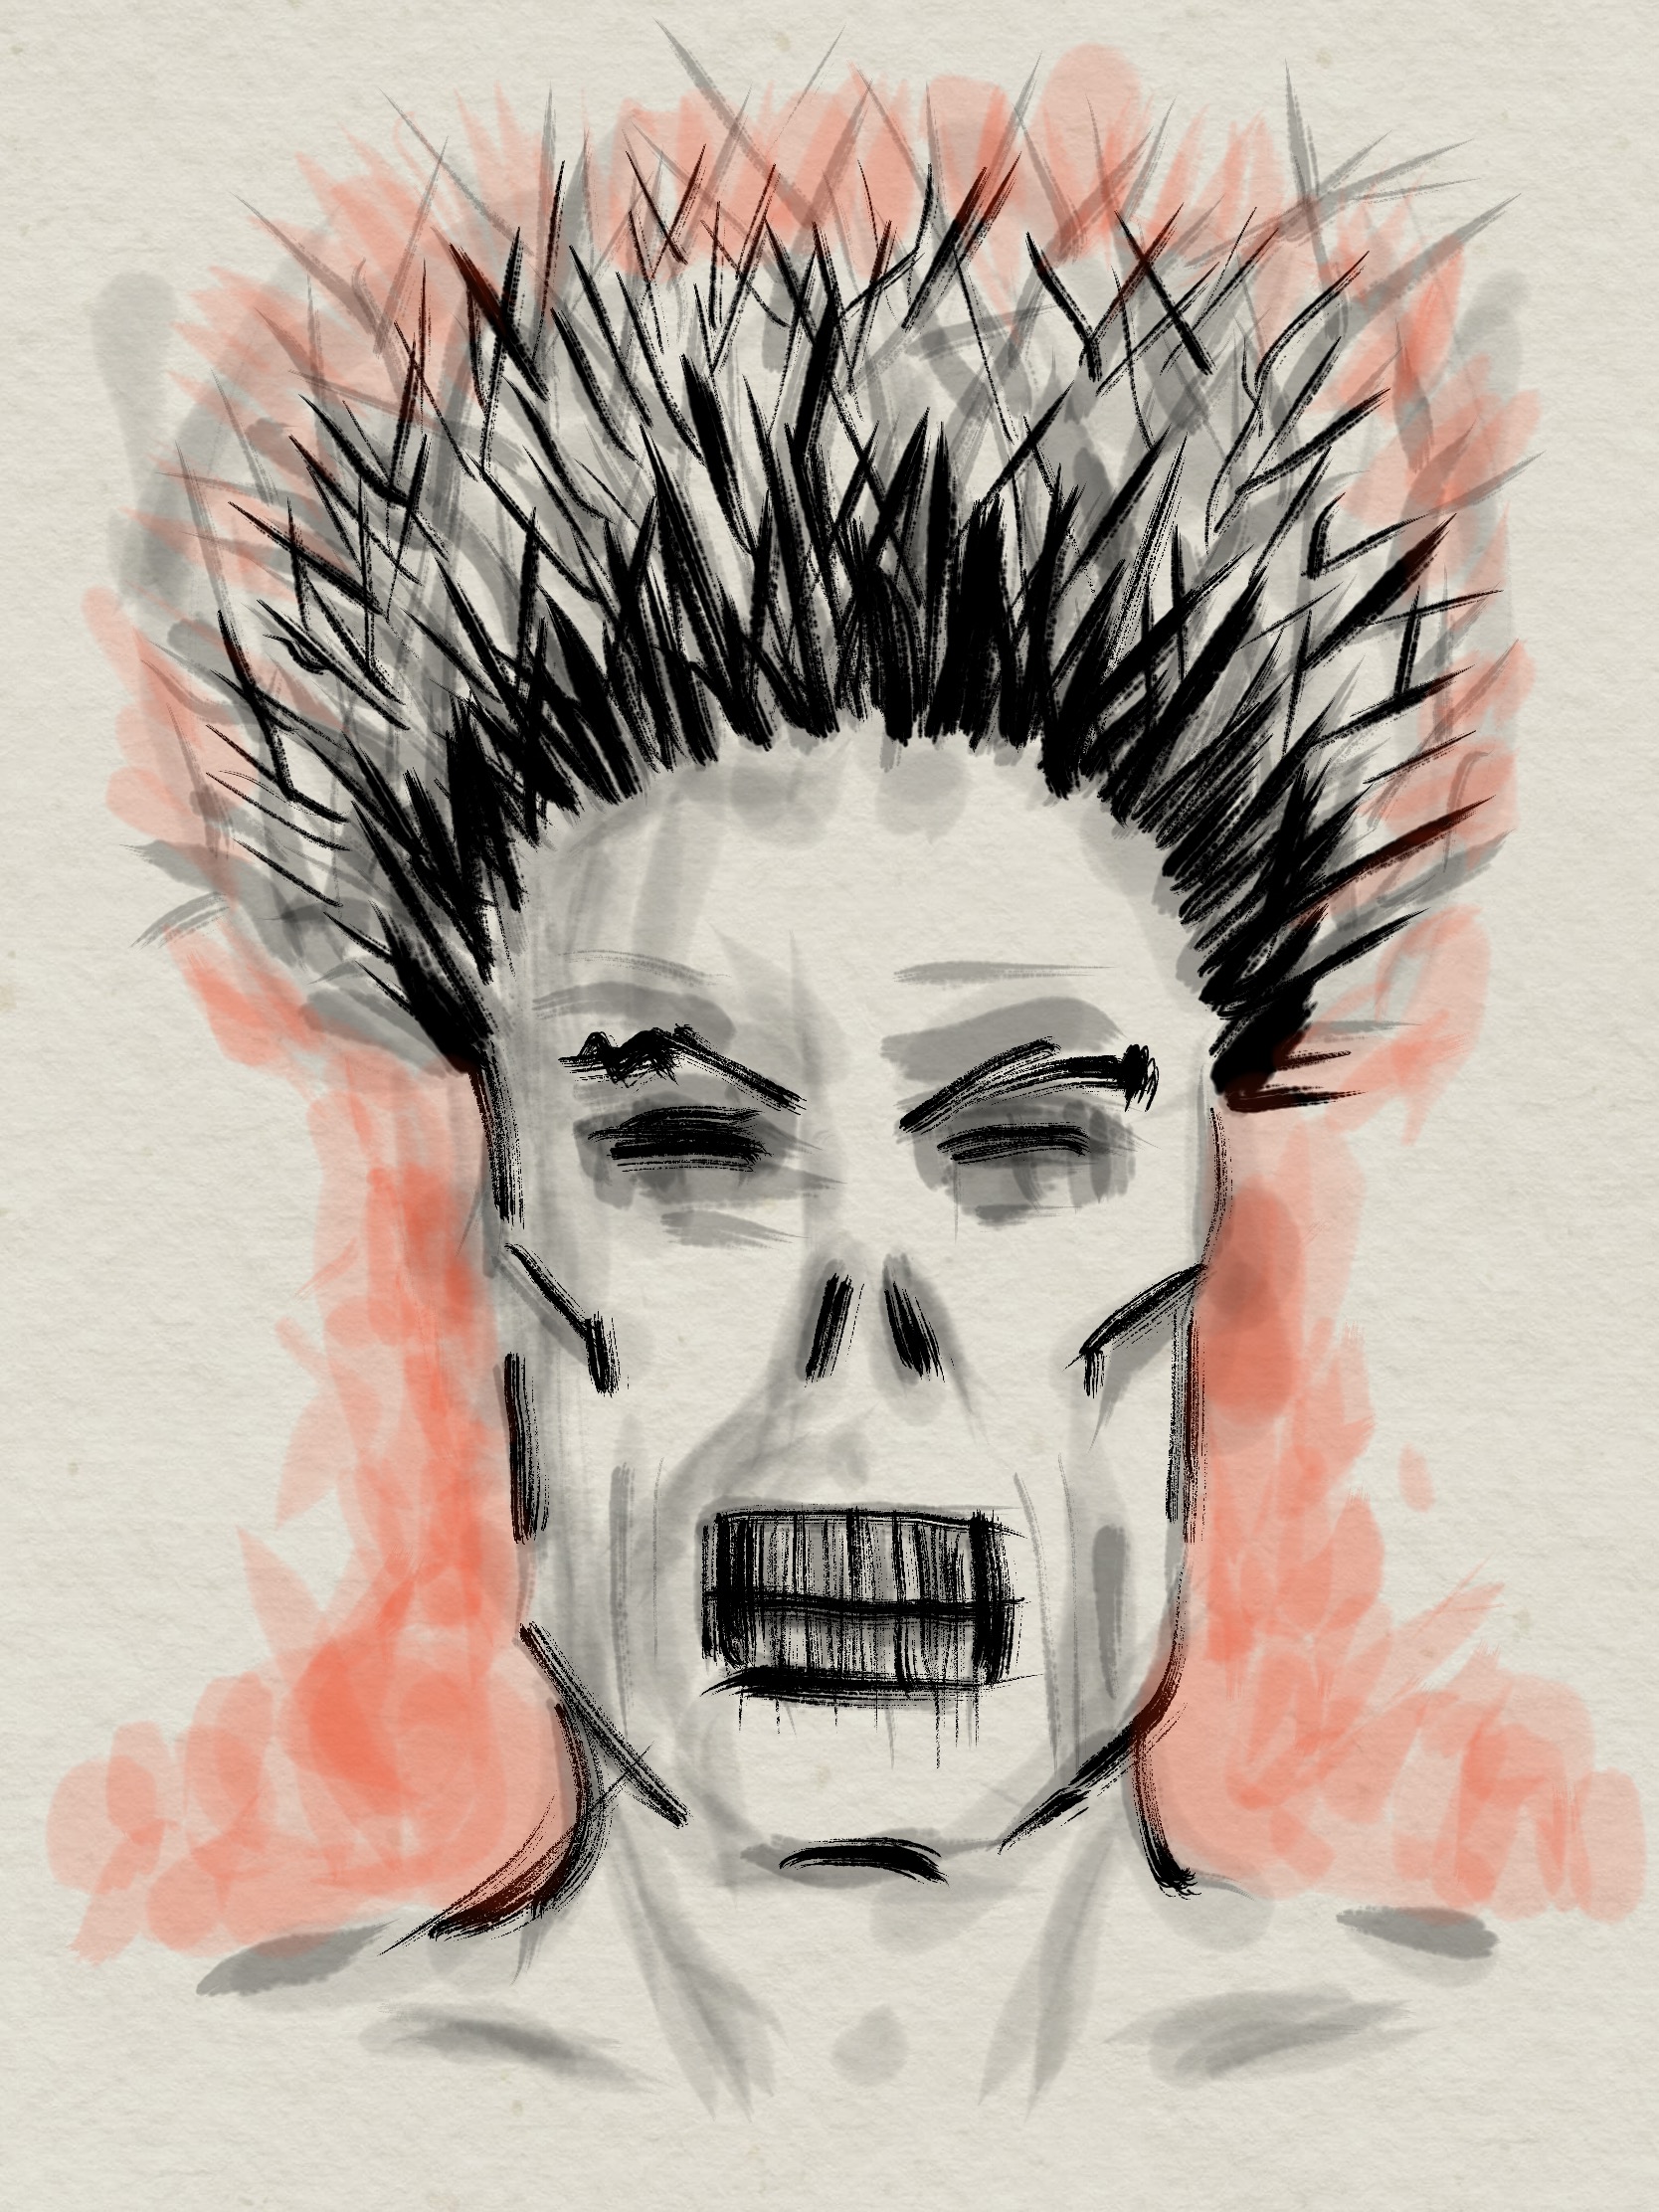
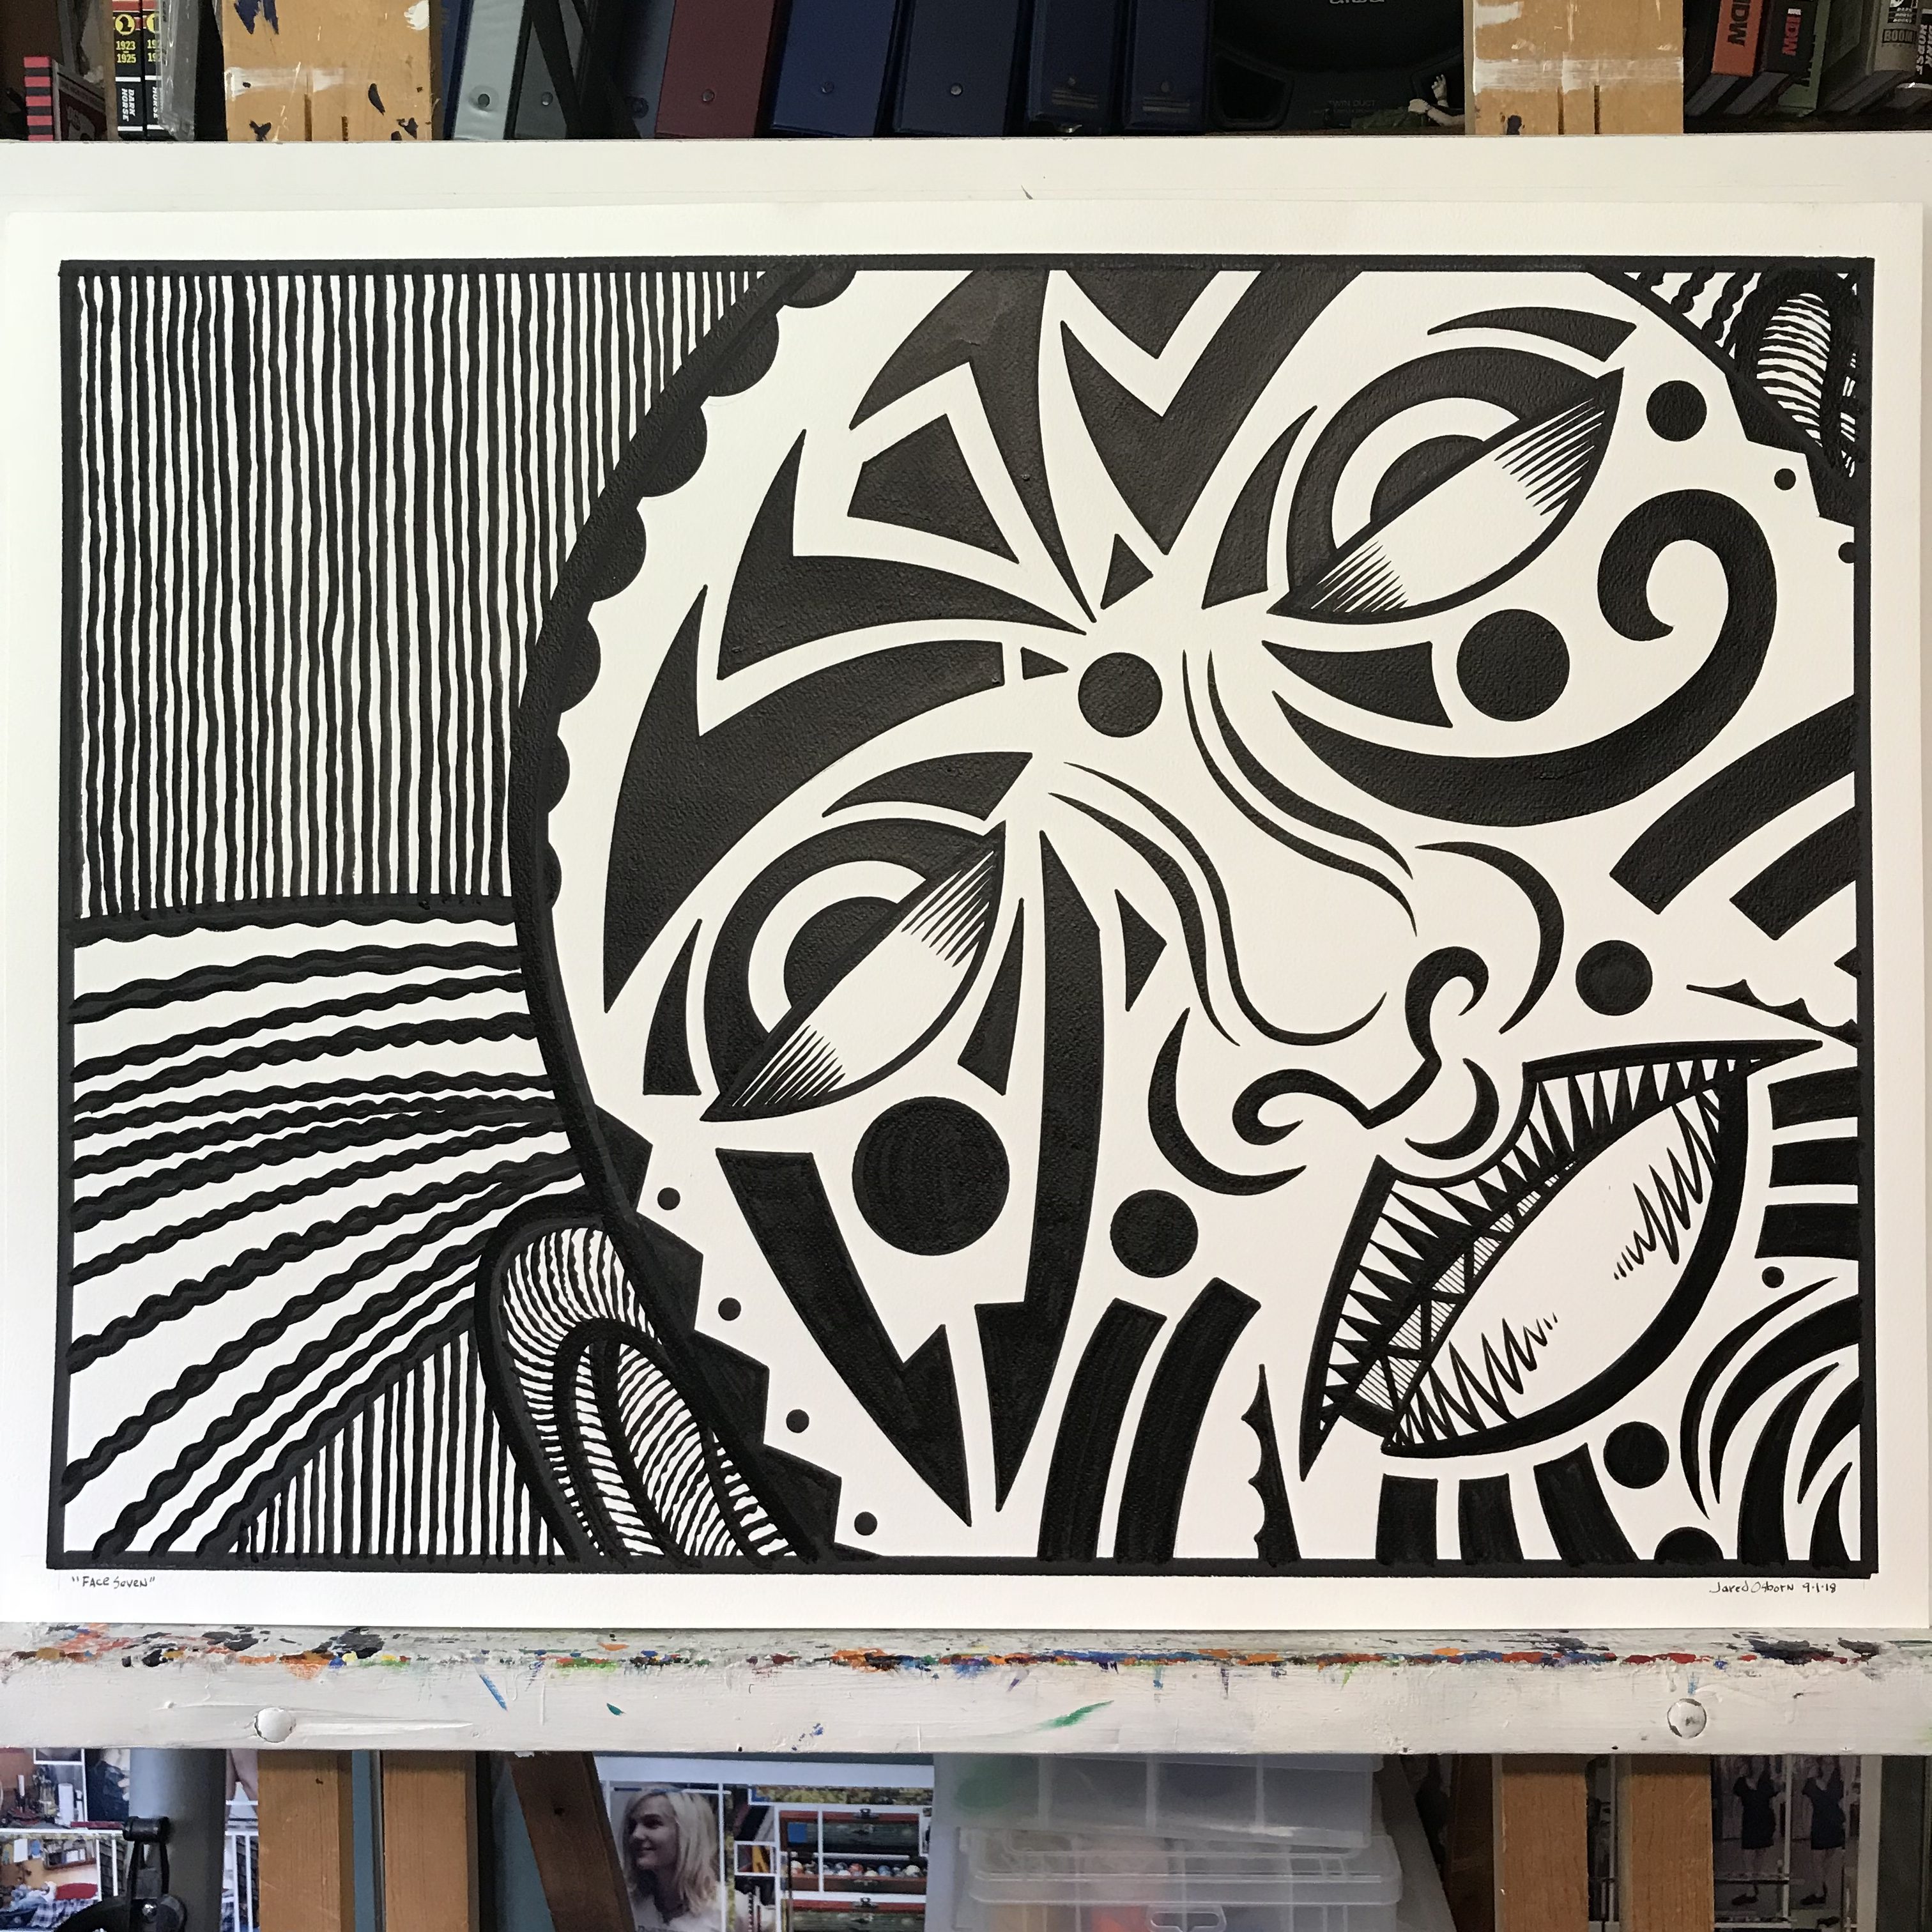
This drawing is of what can only be described as a scary clown. I generally have no problem with clowns. I don’t find them scary at all. But this clown face is definitely weird and unsettling. He’s peering out at us from some place unknown. He might be looking in a window or he might be looking into a camera. The face is on a diagonal and is cropped oddly. It’s cropped in such a way that emphasizes his glaring at us. Its a real strange face that has stuck with me over the years. I’m glad I finally found something fun to do with it.
It turns out the small drawing wasn’t quite finished. Scale is important when it comes to making art and enlarging something small to something big can change things. In this case it was the markings on his face. When I finished drawing what was on the small drawing there was too much negative space on the face. I had put in all the same black shapes that were in the small drawing but I needed more. Small areas of white became large glaring areas of white when the drawing was blown up. So I added more stuff.
One line on the bridge of the nose became two lines. The eyes had bent black triangles drawn around them. The eyebrows on the forehead became an entire forehead design. Under the mouth and chin got some new stripes. The cheeks got some new stripes too. Plus a few more circles were added. Overall the face just got more stuff added to it.
I like this one. I thought since it was a single face I could get it done in a day and I did. It was a close thing though. At the end I kept looking at it and one more thing would suggest itself to me. That’s a process where I never know when it’s going to end. But eventually it did and here we are.