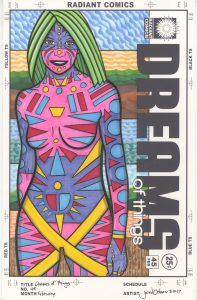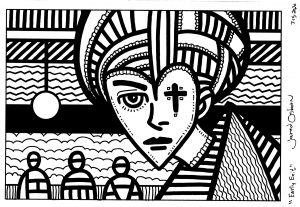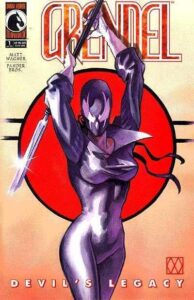
I’m back from the comic shop this week and I got five new comics.
Check them all out here:
I’m back from the comic shop this week and I got five new comics.
Check them all out here:
I’m a big believer in working with what you have. That’s my creative mantra. I try not to worry about what equipment or art supplies that I don’t have and concentrate on the ones that I do have. I’ve seen people get stalled or hung up on something they want to create because they don’t have one of the things they think they need to create it. I try never to get hung up like that and move forward with the tools I got. But it isn’t always easy. The desire for the perfect tools and circumstance is strong in us humans.
I recently wrote a blog about reviving all my gouache paint (a type of watercolor) so I could use them again. “Art Writing: Back to Gouache” was its name. And what did I do after I wrote that blog? I went onto my wish list on dickblick.com and put a whole bunch of new tubes of gouache on my wish list. About $150 worth. I really wanted to buy it. I had just set up all my old gouache, which was still perfectly good, but here I wanted all new tubes.
Why did I want all new tubes? I think because in my head that seemed like an easy starting point. Cleaning up all the old tubes and cubbies of gouache was hard and it was all a bit disorganized in the end. I imagined that if I could start over again with all new tubes I could get more done. I have no idea if that would be true but the very thought was stopping me from getting things done. Even when I know that I should concentrate on what I have and not what I don’t have it isn’t always easy to do.
As I was looking for new tubes of gouache I stumbled upon something I hadn’t seen before. Some gouache (or watercolor) is sold in pans. You get 12, 24, 36, or even 48 colors in small pans in a set. You wet the paint and off you go. I knew about pan sets but I didn’t realize you could buy the pan sets empty and add your own gouache. I though that would be cool to do with all those new tubes of gouache I was looking at. Now my price was up to $170.
In the end I came to my senses and didn’t buy all those new tubes of gouache. But I also remembered that I had a cheap set of gouache somewhere in my cabinets. I looked around and found a Reeves 24 tube set of gouache that had probably been sitting there for half a decade. I ended up ordering an empty pan set for $20 and now I’ll put the Reeves paints I already have in there. I don’t even care about the new tubes anymore. Sure I might get them someday but not today. I can get things done with what I have.
You’d think that all that couldn’t happen to me twice in one month, right? Well it did. This week I decided to do an acrylic on canvas painting. I don’t think I’ve painted in acrylics in at least three years. I have my acrylics in tubes, jars, and in small plastic cubbies. I often mix my colors in the cubbies. They’re fairly air tight but over three years acrylic paint will still dry out in them. Acrylics can’t be revived with water. They turn to solid plastic. I can peel them out of the cubbies but that takes some doing.
The cubbies I like are hard to find these days. In fact I can’t find them. So as I was painting I decided to clean out all my cubbies. About sixty of them. If I was richer or they were easy to find I would have just thrown these ones out. It really is a fair amount of work to clean a cubby of paint. I cleaned out a few of them to use as I was going along but for the most part I used my acrylic paint straight from the tube or jar.
Almost all of my tubes and jars of acrylic were in good shape. A couple of them were dried out but those were ones with little paint in them. The paint in some of the jars was thickened and needed some water added to them but that’s because they were nearly ten years old and had a lot of paint missing from them. I’m amazed they were even still good.
I worked on the painting for a few days and it was a little bit clumsy without all my mixed color in the cubbies. I did have plenty of paint though. I have three 11x14x3 inch plastic bins with tubes of paint in them plus about ten other jars of paint. I estimate I had 75 tubes and jars of paint to choose from. That is plenty. I got the painting done and it came out nice but do you know what? I didn’t enjoy making it. It was a hard process. Sometimes working on art is like that. It could have been because I haven’t made a painting like that in a while.
So guess what I did afterwards? I started looking at new acrylic paints on the internet. Yes, I somehow got it in my head that if I started over and put together a new set of paints things would get easier. I’ve got 75 tubes of paint and I wanted new ones. Before I actually took the time to pick all the colors out I came to my senses. I think I’ll take an inventory of the paint I actually have. That’s probably the way to go before adding more.
One last thing is the canvas I painted on. It’s an 18×24 inch canvas and I bought a bunch of them back when I was doing acrylic on canvas work regularly. I have three of them left but it also got into my mind that I should order more. These three have been sitting around for years and I immediately wanted more before they were even used. Sometimes it’s tough to work with what you have. The allure of what we don’t have is strong.
I’m back from the comic shop this week and I got four new comics.
Check them all out here:
I keep having to buy bike parts and tools. That’s what I’ve been up to. Not only is my own road bike in need of some repair but a friend gave me his mountain bike that’s in pieces and needs work. He told me a whole bunch of things that were wrong with it but they really didn’t sink in until I tried to fix it. Then I realized how much work it would take. No wonder he got rid of it.
Lets start with my road bike. It needs a new front rim. This winter I accidentally went over a curb with the bike and now the rim has a flat spot. I’ve been riding it like that but it really needs a new rim. I finally ordered one and the day after I did I walked out for my bike ride and noticed a bubble on my back tire.
Isn’t that always the way? Fix one thing and another comes up? Or at least order the part you need for the fix. I inspected the tire and the rim was bent out a little and the tread was damaged. I’m guessing it was from the same curb incident but I somehow never noticed. I stripped the tread and tube from the rim and them used some C clamps to bend the rim back into shape. This was an easy fix compared to having a flat spot in the rim. The tread was trashed but luckily my friend who gave me the mountain bike also gave me a tread for a road bike. So I was good to go.
The front brake on my road bike has been malfunctioning for years. It will stop me if I need it to but then it won’t let go. I have to reach down and pull it off the wheel by hand. It’s an emergency brake only. I used the rear brake almost all of the time, I’ve been meaning to replace the front brake but haven’t because all the winter riding I’ve done has frozen it in place with rust and road grime. I feared I’d have to break it off.
Since I ordered a new front rim I decided to order a new front brake too. After I ordered the new front brake I decided too try and get the old one off right then so the new one could go right on when it arrived. It took an hour to get it off the bike and, as I feared, in the end I had to break it off. I ended up grabbing it with vicegrips and snapping it off piece by piece. I had to drill out part of the bolt stem so I hope the new one fits right. We’ll see.
I also ordered a new rear derailleur for my road bike. The gears on the old one are worn down to almost nothing. I should have replaced it a while ago but you know how these things go. Why go to the trouble if it’s still rideable”
The mountain bike isn’t even rideable yet. When I got it the fork wasn’t even on it. I’ve never taken a fork off or put one on a bike before now. Turns out I needed a new headset for the fork. These are the ball bearing parts that go on the top and bottom of the fork that makes it turn. I ordered a new headset.
After I got the headset and went to put it on I discovered that I needed a special tool to remove a part of the old headset from the fork. I also needed a tool to put that same part on the fork. I ordered the part to take the old one off but then decided I could just turn that tool upside down to put the new one on. When I finally go the tool I was right. It was a little clumsy putting the new headset on but I got it done.
I went to finally install the fork and the next thing I discovered was that the star nut that kept the fork in place needed yet another special tool to install. I went online and ordered that tool. A week later it came and I could finally install the fork. I think all that took two weeks to do.
Next I decided to try and install the front derailleur. Turns out the shifter/brake handle was broken. But only the front one and not the rear one. But you have to order them in pairs so I did. Then I turned my attention to the rear derailleur. Turns out it was in pieces and some of the pieces were even missing. I had to order a new rear derailleur.
With all these problems this bike still has yet to get any wheels on it. But I got the new parts in the mail and went to install the rear derailleur. That’s when I discovered a new and even bigger problem. The derailleur bolts right to the frame but the threads on the frame were stripped. I have no idea how my friend managed this but I’ve never seen it before. No derailleur was going to attach to this frame. No wonder he didn’t want the bike anymore.
I did some research on the internet and found a possible solution. I would have to drill out the bolt hole and put in a replacement piece that has new threads in it. Of course I’d have to order the piece and the drill bit. I did but there is no guarantee that it’s work. I also found out that a lot of newer bikes have replaceable derailleur hangers in case this happens but this mountain bike has the derailleur hanger welded right on. Oh well.
Despite all the repairs I’ve been doing on my road bike it has still been rideable all this time. I’ve been putting off all the stuff I needed to do to it because I didn’t have the money for the parts. I finally do so it feels good to be getting it done.
The mountain bike has been a lot more trouble. I’ve never had a mountain bike before and have always wanted one so it’s cool to be fixing it up. I’ve ben patient with it and it has also given me something to look forward to during this quarantine time. I’ll get it up and running sooner or later.
I’m back from the comic shop this week and I got five new comics.
Check them all out here:
I was making some Magic the Gathering Altered art cards today. What are they? That’s when you take a card from the Magic the Gathering game and change the art that’s printed on the card into something new. I’ve been making them and selling them on Ebay for about four years. I’m lucky if I make fifty bucks a month doing it but I can use that PayPal money to get other things.
Some people do original art as their Altered art cards. They paint right over the original image. That takes too much time and energy for me so I do mine by using my printer to print on the card. That sounds easy but there are a lot of steps involved and things can go wrong at any time.
I follow a process that I saw on YouTube. It’s easy to find if you’re looking for it. I stumbled onto it one day never even having heard of altered art cards before. I was a MTG player back in the 1990s and early 2000s but haven’t touched the game much since. I still have a lot of cards sitting around so I had some raw material for altered art cards. One day I decided to give it a try. I found it kind of fun.
The first thing you have to do is strip the art off the front of the card using acetone (nail polish remover). The video shows them doing this with a rag but that didn’t work for me. It took a whole lot of effort and wasn’t very precise. So the first thing I do is mask off the area I want to stay the same with frisket. That’s a thin plastic with one sticky side. I stick it down where I want the card protected and untouched.
After the card has been masked I use a electric sander, a piece of cloth, and some acetone to remove the original ink. This takes a while. Though it’s faster than rubbing the cloth on the card by hand. I do it in a well ventilated area (the garage with the garage door open) and it takes four or five re-wettings of the cloth with the acetone. Often that’s not even enough. I also have to rub a cotton swab dipped in acetone along the edge of the frisket to pick up the ink that gets stuck along that edge. Plus sometimes there is some stubborn ink that just doesn’t want to come up and I have to hit it with some 600 grit sand paper. It takes fifteen to twenty minutes to clear four cards.
After the part of the card I want to print on is white I have to prepare the ground for printing. Step one is to spray the cards with fixative. That’s the easy part because it comes in a spray can. For the next two parts I need a paintbrush. I use a one inch flat brush. First I brush on a thin coat of glass and tile medium and after that dries I brush on a thin coat of inkjet precoat. That’s three coats of stuff before the card is ready for printing. And I don’t want brush strokes showing so I put a few drops of the medium on and them brush it top to bottom and then side to side over and over. This smooths it out and gets rid of air bubbles. I really have to pay attention as I do this.
I have the image I want to print on the card set up in Photoshop. This is a process all to itself. My most popular card (only popular card even) is the Batman slapping Robin meme on a Counterspell card. I had to redraw the meme, scan it in, color it, and set it upon to be printed.
The way I set it up to be printed was that I put the image in the middle of an 8.5×11 inch document. I then print out an outline of the card on a piece of cardstock the same size. After that I take the actual card and tape in inside the outline on the cardstock paper. Now when I print the image it lines up with the card on the paper. Most of the time it does. Things can easily go wrong here and they do.
Things can go wrong at any step but it’s during this printing part when things go wrong most often. I’d say my failure rate is about 25%. One in four cards don’t come out well. Just today I was trying some new frisket. It was old frisket that someone gave me. As I was using the sander and cloth the frisket started to come off the card. I just barely saved the card and had to re-frisket it and seven others.
That was my only problem until the printing stage. Well, besides the ink not easily coming off the cards today. The second problem was when I printed one of the cards it printed poorly. It was not crisp like the others. It looked like it had streaks and air bubbles in it. I took it back out to the garage, stripped off the new ink, prepped the ground again, and reprinted it. Same results. I still don’t know why. Once again I stripped the ink off but this time when I prepped the ground I put an extra coat of fixative on. I have no idea if that really did anything but this time the card printed well.
After the printing is done the final step is to hit the card with some more spray fixative. This makes sure the printing is sealed up and can’t easily be scratched off. I like to use matte fixative rather than glossy because I think it makes the art look batter. I spray out in the back yard.
I sell the cards on Ebay for $15 shipped. I’m still not sure if it’s worth my time but what the heck. I usually only sell five of six of them a month so it’s not like I’m making them all the time. The money came in handy this week as the latest Apple upgrade to my laptop made my 15 year old small Wacom tablet not work anymore. I looked for a used one on Ebay and found one for about $60. I had that much in my PayPal account from selling these cards so I ordered a tablet up. So I guess I’ll make some more cards in a month or two.
I’m back from the comic shop this week and I got four new comics.
Check them all out here:
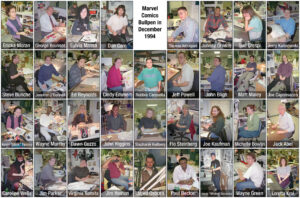
It’s time for another write along with “Friends.” I’m in the mood for one. I’m about to watch episode two “The One Where No One’s Ready” from Season Three. This one first aired on September 26, 1996. I’m going to check my calendar to see what I was doing that day. Right off the bat I know I had just turned 30 about two months before this episode. Looks like I commuted in to Manhattan that day to work in the Marvel Comics Bullpen. I did the prepress on some comic book covers.
I also noted that I went to Pearl Paint that day. It must have been at lunch time. I got $40 worth of paper and $67 worth of gouache paint. I think I was just getting into using gouache right around that time. Coincidentally, just this week, I was just cutting open old dried out tubes of gouache to put them in plastic cubbies. Then I added water to them to revive the paint. I haven’t touched my gouache in decade. A few of those tubes were probably even from 1996.
Before I start the episode I think this is one that annoyed me. It annoyed me because I felt Ross’s pain. I hate it when people are late. I’m considerate enough to plan out my time so that I don’t inconvenience anyone by being late and I expect that in return. It’s basic human manners. It was bad enough when in the episode when Rachel was late by accident but when she started being late on purpose it annoyed me to no end. At least that’s how I remember it. I’ll start the episode now and see how my memory stacks up.
The opening scene is Chandler and Joey being late. The annoyance starts early. Rachel shows up fresh out the shower with her makeup done and Roos thinks she’s close to being ready but she lets him know she’s not. And here comes the theme song. There were some drinking a cup of chicken fat jokes in there too that weren’t particularly funny.
New scene and Ross is nervous about a speech he has to give. That’s right, he has to give a speech and still everyone is giving him a hard time. Phoebe shows up dressed and ready to go. Yay! Now Chandler and Joey fight about who gets to sit in a chair. This plot is going to last the whole episode and is the funniest thing in the show. Or at least it builds to be. Monica shows up and she’s running late. Now some phone answering machine gags. One of the messages is from Monica’s old boyfriend Richard and she falls apart. The boys get a humus stain on Phoebe’s dress ruining her being ready.
This is a long scene. All the friends are in it and it all takes place in the apartment. They’re coming in and out of different doors with different plots and problems. We’ve got Phoebe’s stain, Monica calling Richard and messing with his answering machine, the Joey and Chandler fighting over a seat, and Ross being tortured by it all. I think that’s the whole show. We even break for a commercial and come right back to the apartment.
Monica is now falling apart as she thinks Richard is seeing someone new. Chandler looks good in his tux. He’s ready to go. Except he’s still in a fight with Joey. They have twelve minutes to leave and still the girls aren’t ready. Joey doesn’t want to give up his seat so he takes the chair cushions with him as he goes to change. Ross can’t do anything right as he tries to get Rachel ready.
Joey barges in and he is still not dressed because Chandler took his underwear in retaliation for Joey taking the seat cushions. Joey needs new underwear to wear with his rented tux because at the moment he’s not wearing underwear. This is when the phrase “Going commando” (for going without underwear) entered pop culture. The phrase was everywhere after this episode. Joey says “You hid my clothes and I’m going to do the exact opposite to you” setting up one of the classic gags from this show. Ross and Chandler have no idea what he means and neither did I as a viewer.
Phoebe shoes up with a giant Christmas ribbon covering the stain on her dress. Phoebe’s plot really isn’t especially funny this episode. Ross’s watch stopped and he gets even more stressed. He blows up a little but at Rachel and she reacts by torturing him even more. Monica is still upset and digging herself into more trouble. It’s not funny but it is heartfelt. Chandler has a good Donald Duck observation.
Rachel show up out of her room with sweats on and tells Ross she’s not going to go. She is so high maintenance. Ross is trying to make things better but he can’t. I feel for him.
Joey walks in through the door and we get our payoff. He’s wearing all of Chandler’s clothes. Well, maybe just some of them. He’s got about six shirts on and a bunch of pairs of shorts. It’s a great visual and a classic gag. This episode may annoy me and cause me more stress than any other but this gag makes it worth it. Joey lets Chandler know that he’s going commando in Chandler’s clothes. Heh, heh…
Now we get the climax with Ross trying desperately to make up with Rachel. Joey suggests Ross eat the chicken fat. This is a solid gag but it still doesn’t make me less annoyed with Rachel. Monica is still messing with Richard’s answering machine and it doesn’t go well for her. She looks good in her red dress though. Rachel’s mint green dress looks nice too. But I’m still annoyed with her.
The final credit scene is a solid call back to Chandler’s “You’re sitting in my chair” gag.
Now I’ll hit up http://uncutfriendsepisodes.tripod.com and see what was in these DVD episodes but was cut out of the episodes that are in syndication and streaming. They cut out Chandler yelling “Get up!” at Joey a bunch of times. Not missing much there. But they also cut out a good answering machine gag with Rachel’s sister calling. That was a funny moment. They also cut a “Does this match” scene. No great loss. Hey, they cut out Phoebe’s Crazy Straw joke. I liked that one. Then some small bits and bobs that don’t matter. The last thing the cut out was Ross’s Cro-Magnon PI joke from the final scene. I liked that.
So there you go. Another episode of “Friends.” It may be annoying but at least we got a classic Joey moment out of it.
The comic shop is still closed so I got no comic books.
I made a video though.
Check it out here:
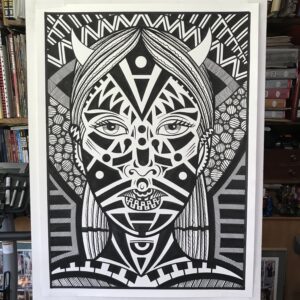
I just finished another big ink drawing. 22×30 inches. I think this is the 12th one I’ve finished in 2020. I’ve gotten about one a week done. I can’t remember if it was the Fall of 2019 or the Fall of 2018 but I was getting two of them a week done during a two month period. That was the most into drawing them that I ever was. They usually take two or three days a piece so I was working on one nearly everyday at that point.
As I’m writing this we’re nearing the end of week two of COVID-19 lockdown. I’ve not been commuting and have been preparing to do remote teaching but it’s been hard getting things done. I’m used to being self motivated and making art on my own but I bet we’re all finding it tougher to get things done these days. I think part of why I’ve been working on these big ink drawings is momentum. I’ve been doing them for a while and it seems easier to continue doing them rather than trying to come up with something new. So I guess I’ll just keep going.
This new one is called “Mystic Barber.” I usually name these randomly but this name was purposeful. That’s because for the last two I came up with stories to go along with them as I was drawing them. This one became “Mystic Barber” because of the hair of the main character. It takes up a good portion of the picture. The smaller guy also has some wild hair so I figure they both must walk the Dreamworld and connect with it through their hair. They’re superheroes in the Dreamworld and make suer that everybody’s hair is working for them and not against them. When your hair turns on you it’s not a pretty sight.
I used quite a few techniques in this one. The blocks on the side were done with my Haff hatching machine and markers. That’s how I get those parallel lines. I used my regular Copic marker plus a Copic marker that I replaced the regular tips with flat calligraphy tips. That way I can get two more thicknesses of line. It gives those parallel lines a little bit more variety.
The wavy part of the background was done with India ink. The thicker lines are done with a brush and ink. I put those in first, near the beginning of making the drawing, but then wasn’t quite satisfied with them. I knew I has too much white space in that part of the background but I didn’t want more brush lines. I pondered it and at the very end of making the drawing I went in with a dip pen and India ink and put in all the thin wavy lines. The dip pen gave me a thin and consistent line. That’s something a marker can’t always do consistently as marker in sometimes bleeds a bit.
After I transferred the drawing to the paper I inked in the outlines of the figures and the shapes in the background. That’s how I usually do things. After the basics are in I figure out my patterns and techniques. The first thing I dealt with was the main figure’s hair. I thought if I could get that right the rest of the drawing would fall in line behind it. I think I was right. The big thick strokes were made with a big #6 round brush.
That was the easy part. I knew I wanted some smaller brush strokes too but I had no idea what kind. After much contemplation I decided on my busted brush technique. That’s when I use one of my old worn out brushes that no longer comes to a point but has many points. It puts down a bunch of thin lines all at once. I don’t usually use that technique in these big ink drawings but it was perfect for here. I like the way it came out and took me longer to figure out what to to than to do it.
The next thing I did was the black pattern on the main figure’s face. That was kind of odd because I usually save that for later on but I wanted to tackle it right away with this one. That may have been because I had no idea what I wanted to do. I usually have 90% of the drawing figured out in a small pencil drawing that I then transfer to the bigger paper but for this drawing it was more like 70%. I took out a pencil and drew right on the face. Since I used a jagged edge for the strange ear horn I decided to use a jagged edge in the face designs. Coming to that decision is what got things rolling. After that it was easy enough to execute.
Maybe that 70% number I mentioned before was really closer to 60% because I had to do a lot of drawing on the main figure’s body too. I had the basic shapes of his shirt but none of the patterns were there. I had to figure out the scales on his back, the stripes on his chest, the boxes on his stomach, and the coils on his arm. That took longer than I expected. I kept thinking that I was close to being done but then there was always more to figure out.
The smaller head at the bottom was the last thing done. At least most of the details. I did the glasses early on but his neck and shoulders weren’t done until the end. After taking so much time with the big guy’s shirt it took me it surprised me how little work it took to finish off the little guy. It shouldn’t have surprised me because it’s so much smaller an are but somehow it did. I was used to things taking a long time by then.
In looking at the finished drawing the little guy’s stare really jumps out at me. Partly it’s the glasses but mostly because it’s the largest area of white in the drawing and hence it’s the brightest part of the drawing. That really draws me to it. I also tweaked the lips on the big guy’s face to give him just a little bit of a closing mouth/crooked smile. It’s a weird expression. Weird is my forte though. I think I’ll go with it. And keep on making some weird big ink drawings.