
Using photo reference for drawing can be a tricky thing. I use it sometimes but not most of the time. When I do use it it’s not to make anything photorealistic. I’ve heard people use the word “Photorealistic” to refer to any painting or drawing that’s based on a photo but that’s a misuse of the word. Photorealism was coined to describe painters from the 1960s.
When you see a painting and ask yourself “Is that a photograph?” that’s what photorealism is. It’s when a painter makes a painting that could be mistaken for a photograph. They are using a camera’s “way of seeing” to make a painting. There are tells and techniques for this, such as painting a camera’s “depth of field,” but generally Photorealistic paintings are paintings that can fool you into thinking they’re photos.
A photo referenced piece of art uses a photograph as a starting point. The artist wants the drawing to look like it exists in the “real” world but no one will ever mistake it for a photograph. Photo referencing is an extension of what artists used to do with live models. It’s just more convenient.
Photo referencing is all about getting the lighting right. How a light source falls across a figure is one of the main ways to make something look “Real.” Having a photo freeze the shadows and highlights on place can be a big help in drawing them. Plus it freezes the folds in fabric so you can examine and emulate them. With something that’s photo referenced you pick you parts you like but not worry about the drawing looking like a photograph.
Another way to reference the human figure is to use a 3D program. This is a newer method and, though I started doing it about 15 years ago (it’s 2022 now), it has gotten easier and easier. I now have an app on my iPad that I use for it. It’s made for artists and you can pose a 3D figure model anyway you like and manipulate the camera angle all around it. It’s a pretty amazing tool.
I’m writing about this because I had two occasions this week to photo reference and 3D figure reference some drawings. I wanted to write down the process. The first one was for one of my Gatsby project drawings. I found a small drawing in one of my Inkbooks that I wanted to turn into a Gatsby drawing. It had a large Daisy head and the figures of Tom and Gatsby above the head.
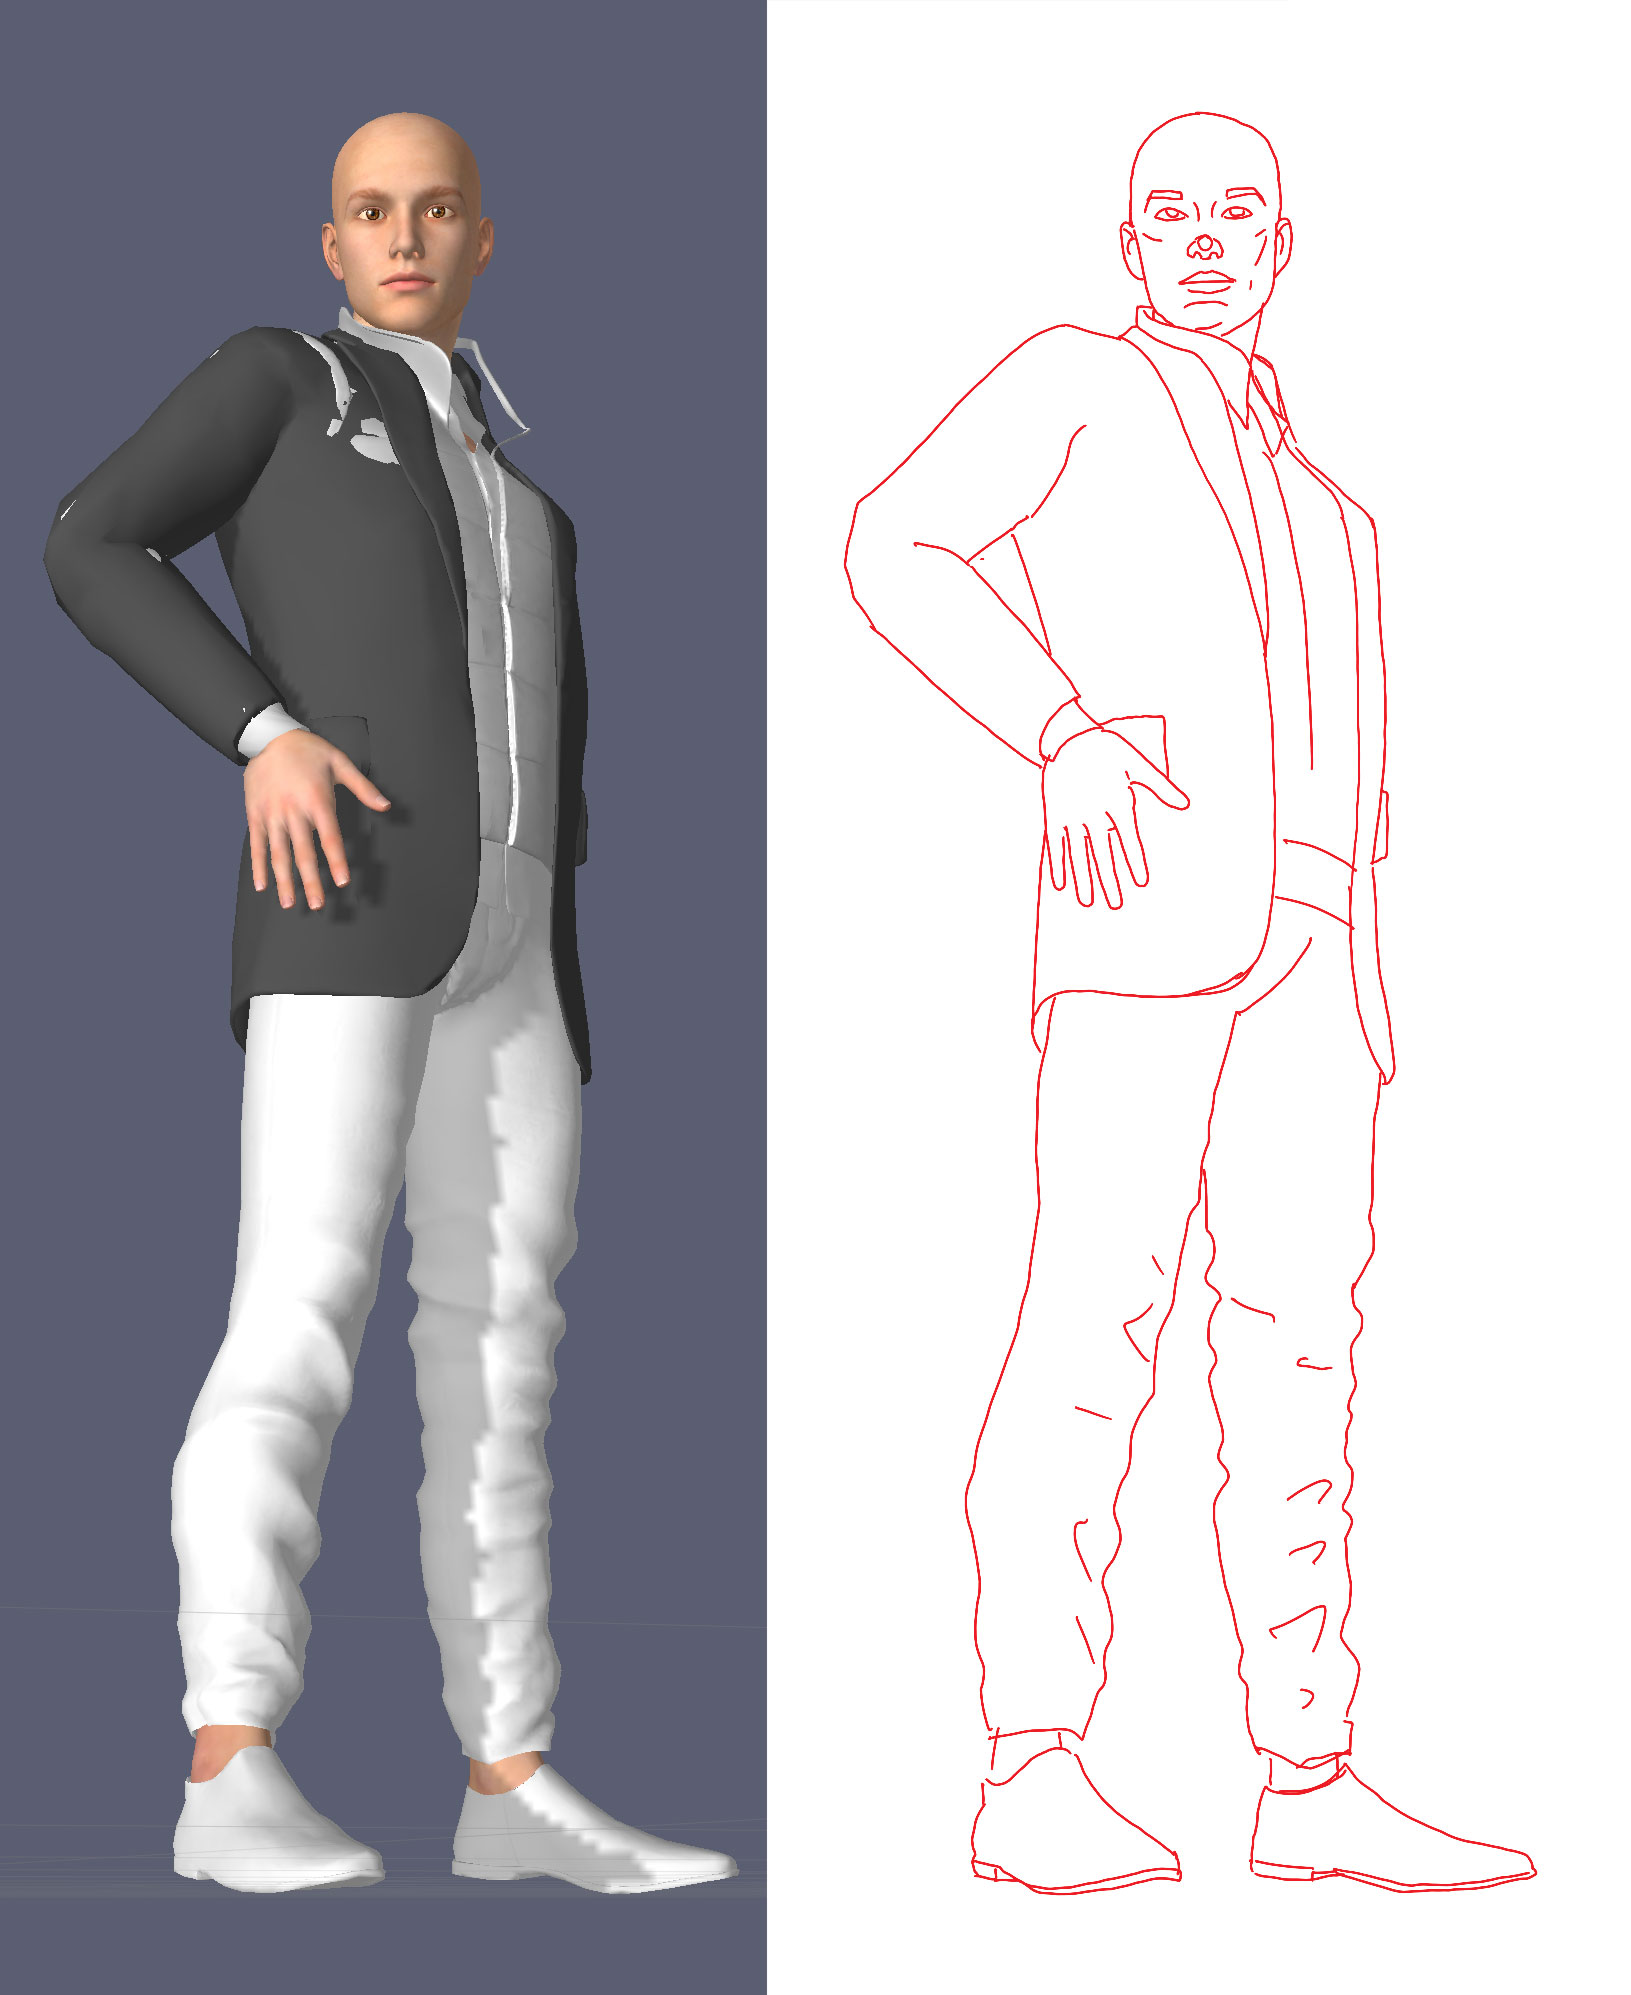
The two figures in the sketch were fine straight on views but I knew I wanted a specific angle for the finished one. I wanted a worms eye view looking up at the two figures. I’m used to more straight on graphic design like figures in a composition like this so I decided to the only way to get the view I wanted was the 3D app. A photo would be too complicated and my imagination too fanciful.
I broke out my iPad and fired up the app. I recommend only using these 3D apps if you know the pose you want to draw. With the app you can move the figure around and bend every joint in the body. There is such endless variation that if I go into the app without a pose in mind I get lost in it. I move the figure around pointlessly and waste a lot of time.
It took me about fifteen minutes to get the pose I wanted. I don’t use the program enough to be able to fly through poses easily. After I got the pose I hit the buttons to add clothes to the figure. That’s easy enough. Then I took a screen shot of the pose, brought that screen shot into Procreate (another iPad app) and drew right over the 3D model to get my underdrawing.
After I do my digital drawing I like to draw on paper. That’s how I finish drawings best. So I took the two digital figures, printed them out in blue line on drawing paper and drew them again. Then I scanned those drawing in, used Photoshop to put them in a composition with all the other parts of the drawing, and them printed the whole drawing out in blue line to be inked. Then I inked it. That’s the finished drawing and that’s the process from sketch to digital model to finished ink drawing.
I started on the photo referenced drawing only this morning. Once again it’s for my Gatsby project. I can up with an idea for the cover of the book and had been drawing various parts of it. Four different hands holding wine glasses and a balloon with an eye on it. I also had a sketch of a figure for Gatsby but I was unsure of how I wanted to move forward with it or not. To reference or not to reference?
I started by using the 3D figure app and made a drawing of a 3D figure but I didn’t like it. That way looked like a dead end. Then right before bed I got an idea for a better pose and made a quick sketch of it so I wouldn’t forget. When I woke up in the morning I realized I needed the details of the suit the figure was wearing so a 3D model wouldn’t work.
I have only myself for a model so I put on a coat, collared shirt, waist coat, and tie and pulled out my iPad to take photos. I ended up having to stand on a stool to get the angle I wanted. I originally wanted the figure to have his arms raised but I ran into a problem. My bad suit doesn’t look good with the arms raised. It’s not picturesque at all. So I messed around some more until I finally got a pose I liked.
That’s where I’ve left that one for now. I’ve got my photo so I now I have to do a digital drawing. I’m just a little burnt out at the moment. I’ll get to it later.