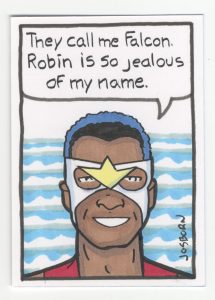
This week I’ve been making some more art cards. Baseball card sized drawings. Ones of my cartoon art card variety. Those are a drawing of a person with a word balloon above them and an amusing saying lettered in the balloon ( at least I aim for amusing). Except instead of my usual drawings of made up faces I decided to draw some super heroes. Mostly Marvel super heroes but a few DC ones too.
I’ve found it takes me a remarkably long time to draw a super hero head. With my own cartoon art cards there are very few rules. I grab a pencil and draw whatever comes to mind. Sometimes I even skip the pencil and go right to ink. Since I’m filmed myself drawing some of those cards I know they take me about 15 minutes to draw, ink, letter, and color one of those. But super hero illustrations take much longer.
When I make a drawing of Captain America the number one thing I have to get right is that it looks like Captain America. His face has to be the right shape, his mask has to be the right mask, and all the other details have to be correct. People who look at it have to immediately recognize the drawing as Captain America or I’ve failed. Not to mention that a lot artists have made good drawings of Cap so I don’t want to make a bad one. People know what bad ones look like so I want to stay out of that lane.
So the first thing I do is grab a pencil and start to draw the face. An oval for a head, then I gesture in the placement of the eyes, nose, and mouth. After that I sketch in the details of the costume and then slowly bring the drawing along until I have a finished face. With my own random faces this pencilling proves takes about two minutes. When trying to draw a specific super hero this process is more like ten minutes. Or even a few more if I don’t get it right the first time.
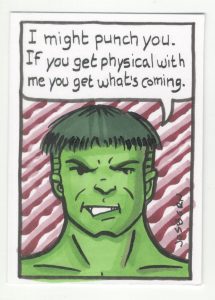
I also have to find reference for all these superhero faces. That takes time. Not a lot but another few minutes a drawing at least. I have to decide on a character and then, either online or in one of my digital reference books, look for a drawing of that character’s head. There is not always a good one available so I have to dig a bit. So now just pencilling a head take just as long as making a finished cartoon art card of my own design. It can be a little frustration.
One thing I did do with the pencils is I scanned them in. In order to try and save some time I can now print out the pencils and ink over them if I want to make another card of the same character. I even erased the mouths on the pencil drawings so I could draw a new expression on the character’s face to keep it fresh and have the character match what he or she is saying in the word balloon. It would be nuts to draw a card of Batman over and over since they would all generally be similar anyway so this will say me some time.
The next step is inking the drawings. I found this step tricky. The drawings are really small. For most of my own cartoon art card drawings I inked them with a sign pen (a cheap marker) refilled with India ink. I did the same with some of the superhero cards but I found I didn’t like the results. It was a little too thick lined for this style. I tried using a brush and various art markers but didn’t like any of them. The brush was also a little too thick lined and sometimes the black ink of the markers smeared when I added the color markers on top off them. That’s a problem with markers.
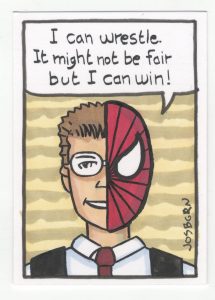
I ended up using a technique I’ve seem other inkers use but I never have before. I started with a dip pen and India ink. Most inkers use a Hunt 102 to ink with. It’s a solid pen with a bit of flexibility to it so they can vary the weight of the ink line. Instead I used a Hunt 107 which has almost no flexibility to it. It puts down a solid single weight line. I inked the whole face with a single weight line figuring I’d add in some line weight after the color.
The good thing about using India ink is that it won’t smear into the color markers. So after I had my single line weight down I added color to the drawings with the markers. Once again I had to pay attention to my reference to make sure I got the color right. This takes more time. The one good thing about these drawings taking more time is that as I was working in the various stages ideas for the writing would pop into my head. So there wasn’t really a writing step as with my own cartoon art cards. That step would happen as I was in the middle of other steps.
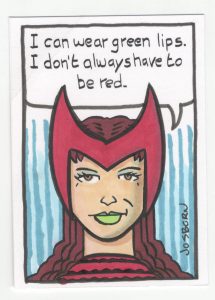
After the color was in I went back to add to the black line. I used a brush and India ink to thicken up some lines and generally get the drawing to look like I wanted it to. I tried to not overdo things and leave some of the thin lines in there. I’m used to working in all brush so this took some trial and error to get the look I wanted. I instinctively wanted to overwhelm the thin ink line so I had to restrain myself.
After I finished pencilling, inking, coloring, and writing the cards the last step was lettering. It was usually after the pencil stage that I would pencil lettering guide lines into the word balloons. That way if an idea popped into my head I could write it in pencil directly in the balloon. When the lettering stage came around I would letter the words in ink.
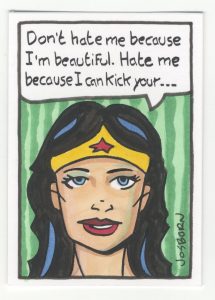
I’ve been using a .5mm black art marker for my lettering in recent years but I’ve never been happy with it. So for some of the art cards I decided to go old school and use a filed Hunt 107 for my lettering. A filed Hunt 107 is different than a normal one in that the letterer (in this case me) uses a piece of wet/dry fine grit sandpaper to file the point of the pen into a angled line. That way using the side of the point you can get thicks and thins into the lettering. It’s much trickier than using a marker but I like the results.
In the end I liked the way the cards came out and put some of them up on Ebay. For $12 you can have one of your own.
