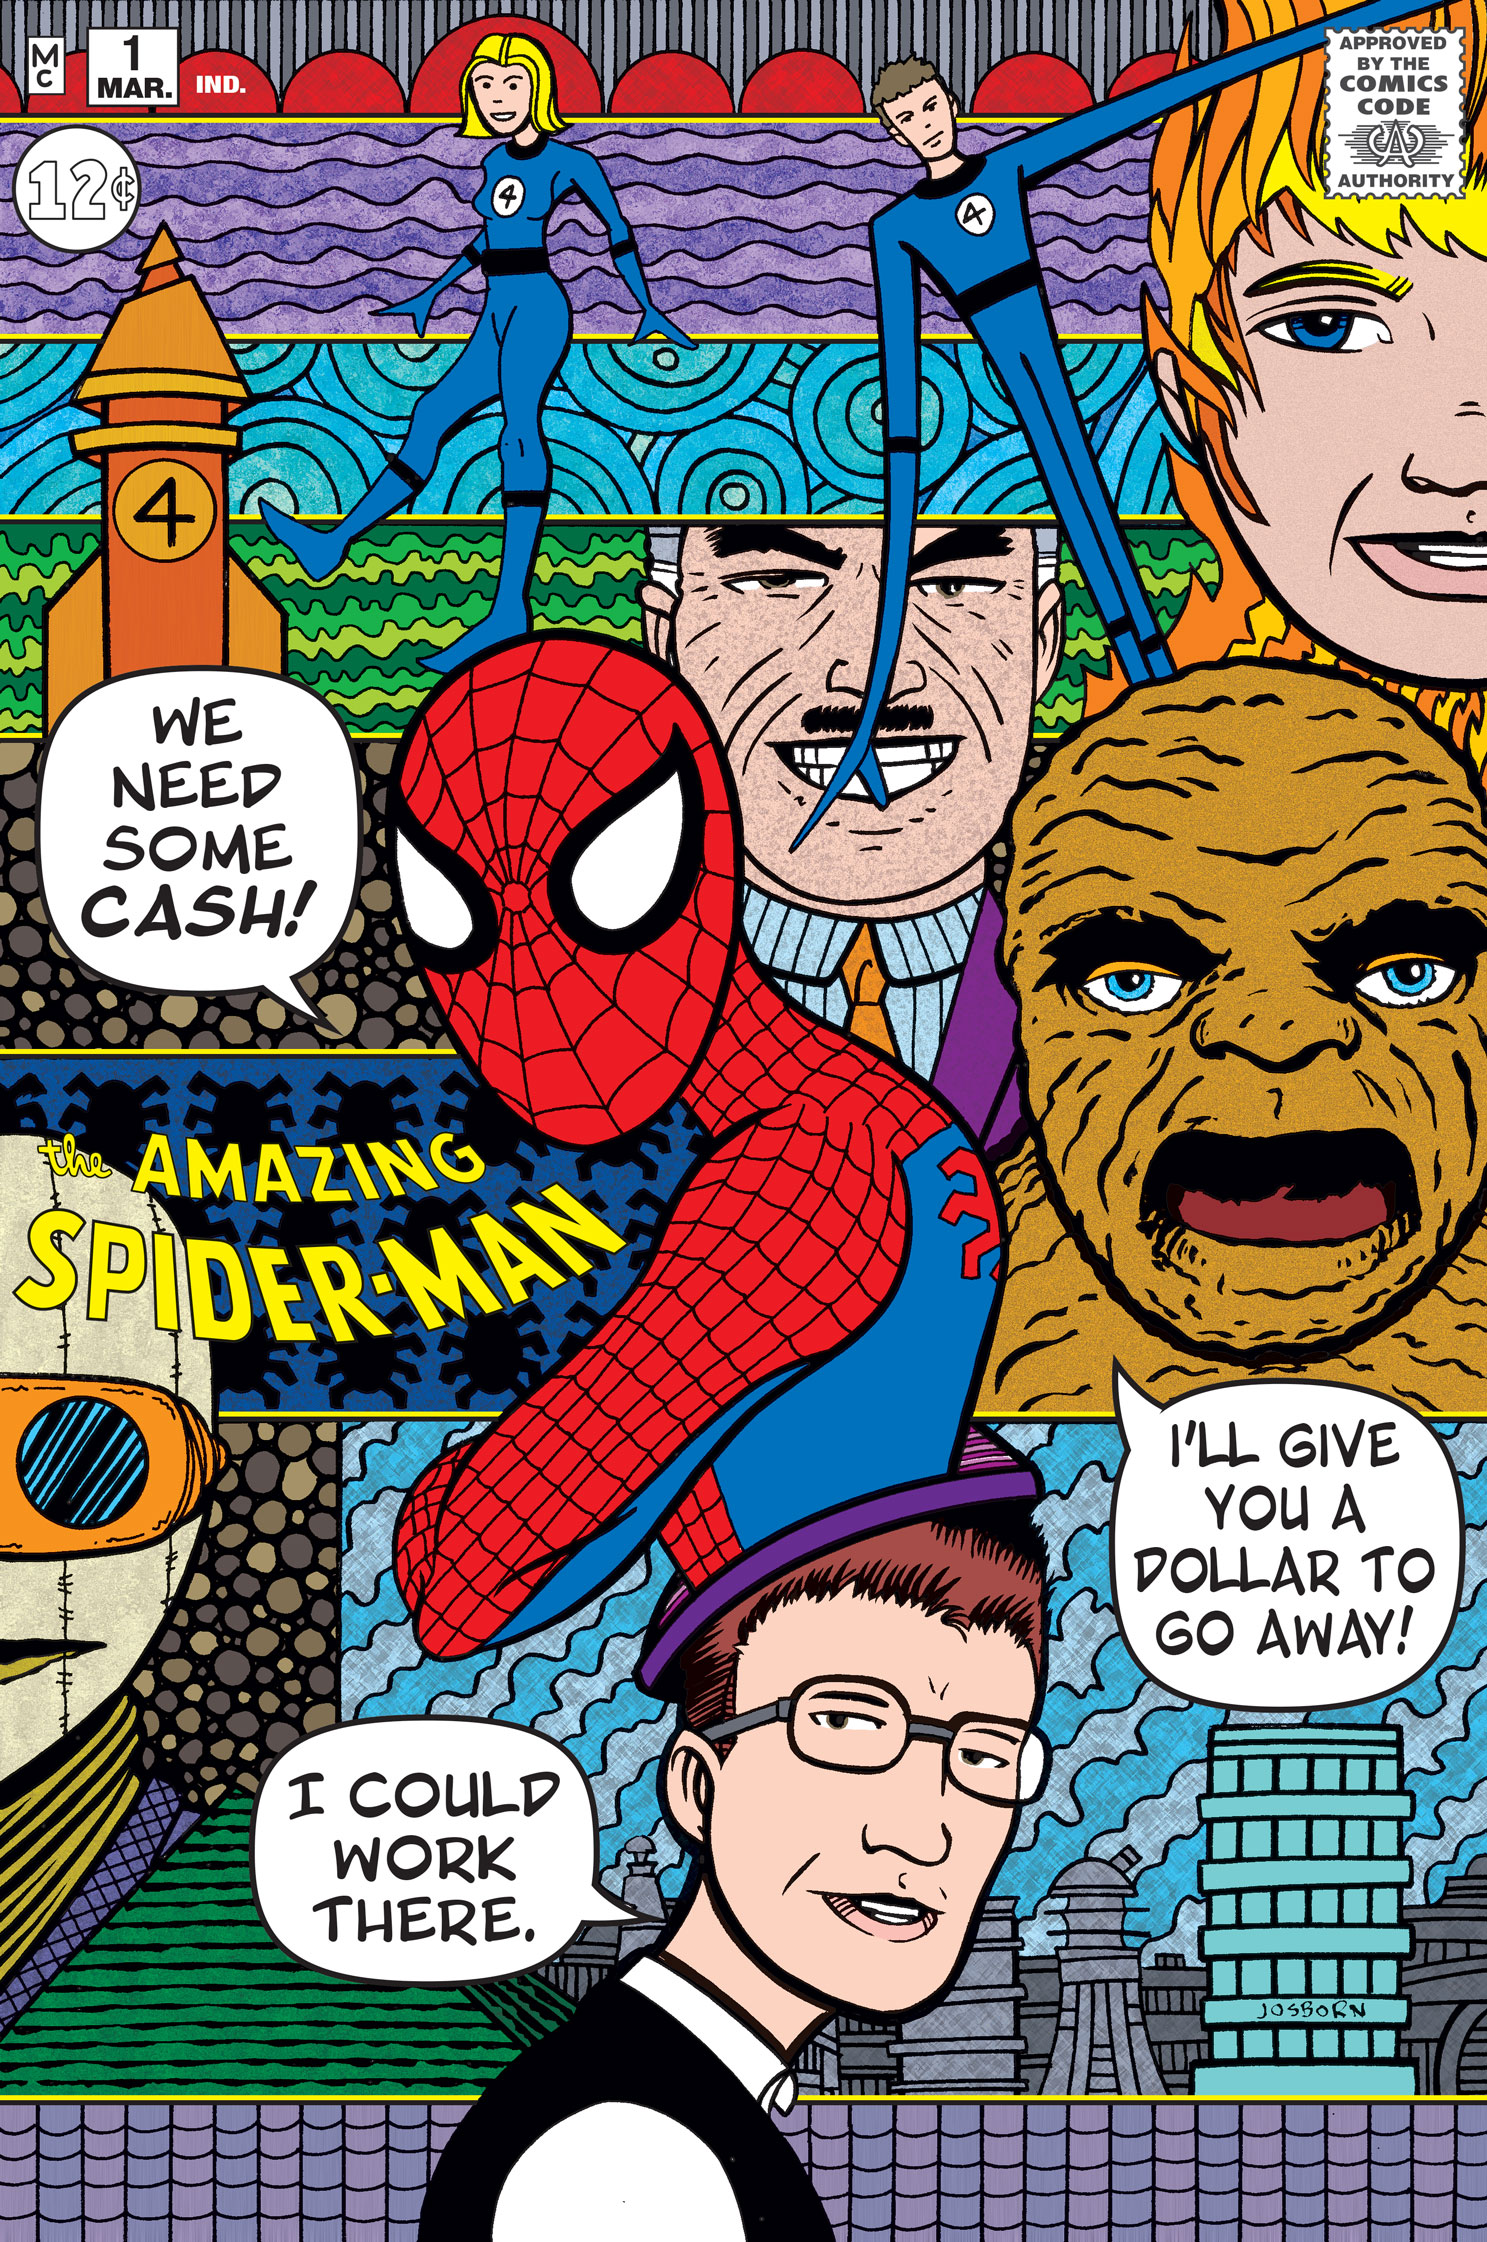
A failure rate of 50% is no fun. That’s my lesson for today. That was my failure rate for making my True Believers Amazing Spider-Man #1 alternate covers. I was making an edition of twenty of them and it took me thirty printouts to make those twenty copies. That’s not good.
Besides the time and talent it takes to make the art for my own alternate covers it takes a lot of time to make the physical end copies. I’m taking a comic book the already exists and am wrapping a new cover around it. It’s not a thing that many people do, and I do sometimes, but I thought I’d make an art project out of it.
When I was looking for some inkjet paper to print on I found this nice 165 pound double sided 11×17 paper on Amazon made by Koala. I decided to give it a try since it was a nice heavy paper and had 100 sheets in the box at a good price. I ended up liking it when it arrived and the fact that I could print on both sides meant that I could print the finished art on the outside cover and the pencil drawings on the inside cover. That was pretty cool.
First of all I have to set up the digital files for printing. That meant cover 1 on the right and cover 4 on the left. Of course the correct size was important. I was going to print the covers, cut them to size, and then fold them around the comic. It was important that the final digital file was the exact correct size. I measured the original comic precisely but it still took four tries at printing different size test pieces to get it exactly right.
I set up the second digital file of the inside covers (covers 3 and 4) slightly larger than the front cover file. Since I was printing on both sides of the paper I knew they weren’t going to line up exactly every time so I give myself some extra bleed on the inside front covers that I could trim off and never come up short on art. I also put a black line down the center of this file so I’d have a reference line for where to fold the paper. This came in very handy.
So I printed out the front covers on 11×17 inch paper, flipped the paper over, and printed out the inside covers on the back. When that was done I took the paper over to my drawing table to cut it down to size. I printed a back box around the front cover art so I’d be able to easily line up the edge with my metal ruler. I find this makes things easier. I run an X-Acto knife (number 11 blade) along the metal straight edge to cut off the excess paper. After I do that I fold the paper.
I recently got a bone folder (not made of bone but made of plastic) to help me fold stuff. It looks like a plastic knife that I run along a ruler to compress the paper to give me a place to make a fold. So I line up my metal ruler along the black center line I printed on the inside covers and then run the edge of the bone folder along the ruler while pressing down. I then grab my burnisher ( a flat piece of plastic) and while holding the ruler in place fold the paper along the line I just pressed in with the bone folder. It’s basically just folding a piece of paper in half but more precisely than it’s usually done. The bone folder makes things more precise than the edge of the paper clip I was using before. The bone folder was well worth the six dollars I spent on it.
I have to prepare the comic by removing its staples. I open the comic book to the center fold and use needle nose pliers to grab one end of the staple and straighten it out. Once both ends of the staple are no longer folded I flip the book over to the spine side and pull the staples out. That’s easy. Getting the staples back in is a little bit harder. But first I have to poke holes into the folded print that I made.
I separate the comic book cover from the rest of the comic and nestle it inside of my new alternate cover. That way I can take a pencil and mark where the staples should go. I put the tip of the pencil through the holes in the original cover and mark where the holes are on my new alternate cover. Then I remove the original cover and use a pushpin to make holes in my alternate cover right where the pencil marks are. First I make holes with just the tip of the pushpin but then I flip the book over and make the holes a little bigger by pushing the shaft of the pushpin through the hole from the outside in. This gives me a little more leeway to work with.
The next step is to wrap the original cover around the interior pages , wrap the new alternate cover around them, and put the staple back in place. Since everything doesn’t always want to line up again I found using a straight pin helps. I put straight pin through one of the staple holes rather than a staple. I find it’s easier to do this and then the second staple hole is lined up and ready for the staple to be replaced. So it’s straight pin, first side of a staple, remove the straight pin, put in the second side of the staple, then flip the book over and bend the staple back down. Do this twice and the book is back together.
So where did my failure rate come from? The printing process. The first day I made fifteen of the twenty book but didn’t notice that four of them were bad. They had light lines through the black areas. Scratches of some sort. Thew were perfectly straight and parallel I knew they were coming from the printing process. I’m not 100% positive but I think they were coming from when I flipped the paper over to print on the backside and there wasn’t a second sheet of paper in the printer the original print was being dragged over something in the paper holder that was scratching it. It was either that or the paper was flawed to begin with. Either way putting a second piece of paper in the printer made it not happen anymore.
So off my edition of twenty I got fifteen done the first day (they take about 20 minutes a piece to print and bind) only to have to redo four of them the next day. I got the final five plus the four redos all done the second day. Things would go wrong though. Sometimes I’d print something out, it would be fine, and then somehow I’d scratch it in the folding and binding process. I ended up with ten printouts that I couldn’t use. Plus test printouts from earlier on. But they were necessary and not part of the failure rate. It’s that 50% failure rate that bothers me. I’ve got to get that down or time will not be on my side.