Dark and Finished
Since I jump around in my personal art making from medium to medium and project to project sometimes I get certain stuff done and sometimes I don’t. For the last twenty months or so I’ve been working on my Great Gatsby illustrated project so that means I haven’t gotten other stuff done. I’ve also been getting one “Dreams of Things” cover done a week for about that same time which takes away from other stuff I might be getting done. That brings us to my ”Big Ink Drawings.”
My ”Big Ink Drawings” are made on 22×30 inch pieces of paper and, as you might imagine, are made with India ink. The paper is too big to fit on my scanner so I have to move my scanner out of its normal spot and on to a portable table to scan them in pieces. This means I don’t scan them often so that the drawings are usually stacked on my easel until I get a chance to scan them and put them away. If I’m working on my easel on any given day I move the drawings off and place them on my bed. It’s the only place big enough to store them temporarily.
Right now there are there are fourteen “Big Ink Drawings” in the stack. It’s the very end of July as I write this and only one ink drawing is dated from this year, 2023. In addition to that one four are dated from 2022, eight are dated from 2021, and one is undated. I have no idea why that one is undated. It may be from 2023 but I’ll have to check my calendar to see when I drew it. I just checked. It’s also from January of this year. I drew two in a row back then.
Some years I’ve gotten a dozen or two of these “Big Ink Drawings” done. When I don’t get things done in a particular series or type of medium it can make me a little sad or nostalgic for when I did get that stuff done. It’s an irrational feeling since I know that I’m getting other stuff done but feelings aren’t always rational.
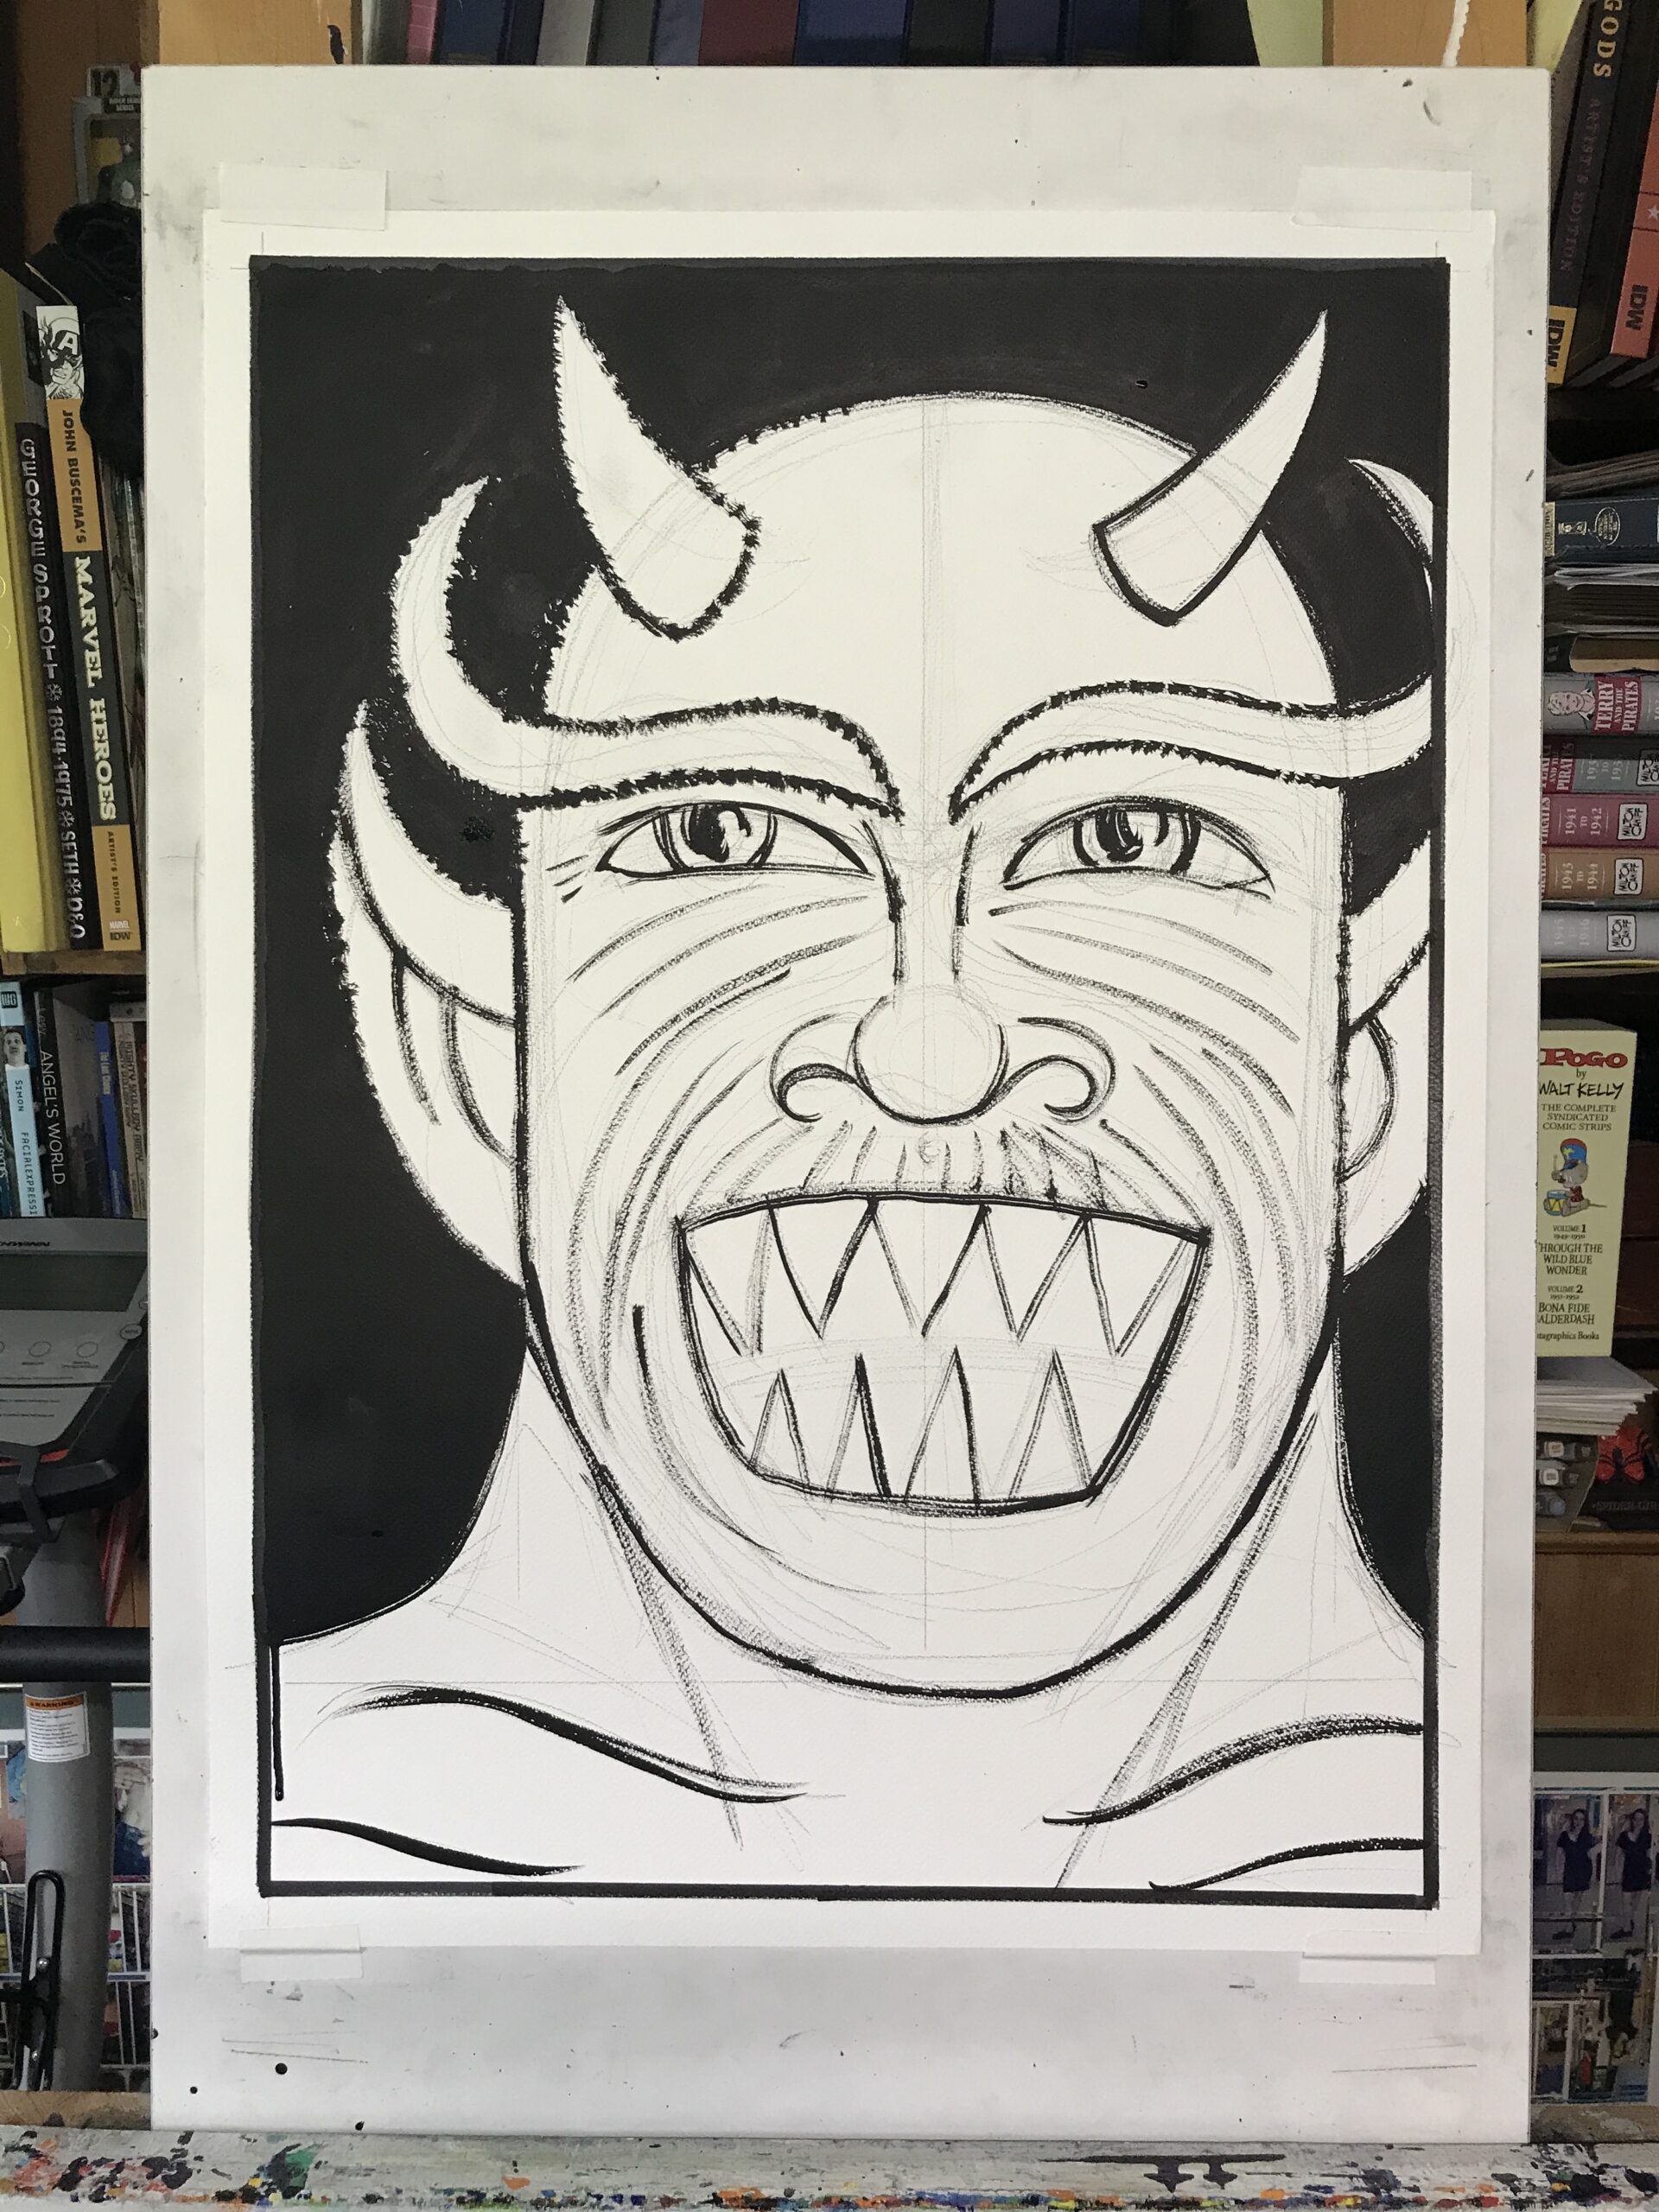
In order to start a “Big Ink Drawing” I first tape a piece of 22×30 inch watercolor paper onto my drawing board that sits on my easel. I then measure one inch from the edges of the paper and use a black marker to draw on a border. I always draw a border before I start any drawing because it helps me define the drawing parameters and therefor it helps with the composition.
Usually after I tape the paper down and draw the border I start the drawing. Not this time. This time the paper sat on my easel for a month or two. I’m not even sure if I had an idea in mind for the next “Big Ink Drawing” but idea or not the paper just sat there unused. That is until yesterday when I decided to make a monster face on the paper.
Last week I wrote about doing a couple of my “Monsters of Comics” drawings. They are done with markers and white pastel on a piece of paper torn from a comic book. My big ink monsters are similar except they are done only with ink. There is no white used in them.
I hadn’t made any “Monsters on Comics” drawings in a while either and it took me a while to relearn how to do them. If I get rusty with a technique it takes a minute to knock the rust off. I think that’s why I chose to do a big ink monster face. Even though the techniques are different the thinking is similar. I was probably in a monster state of mind.
Early Version
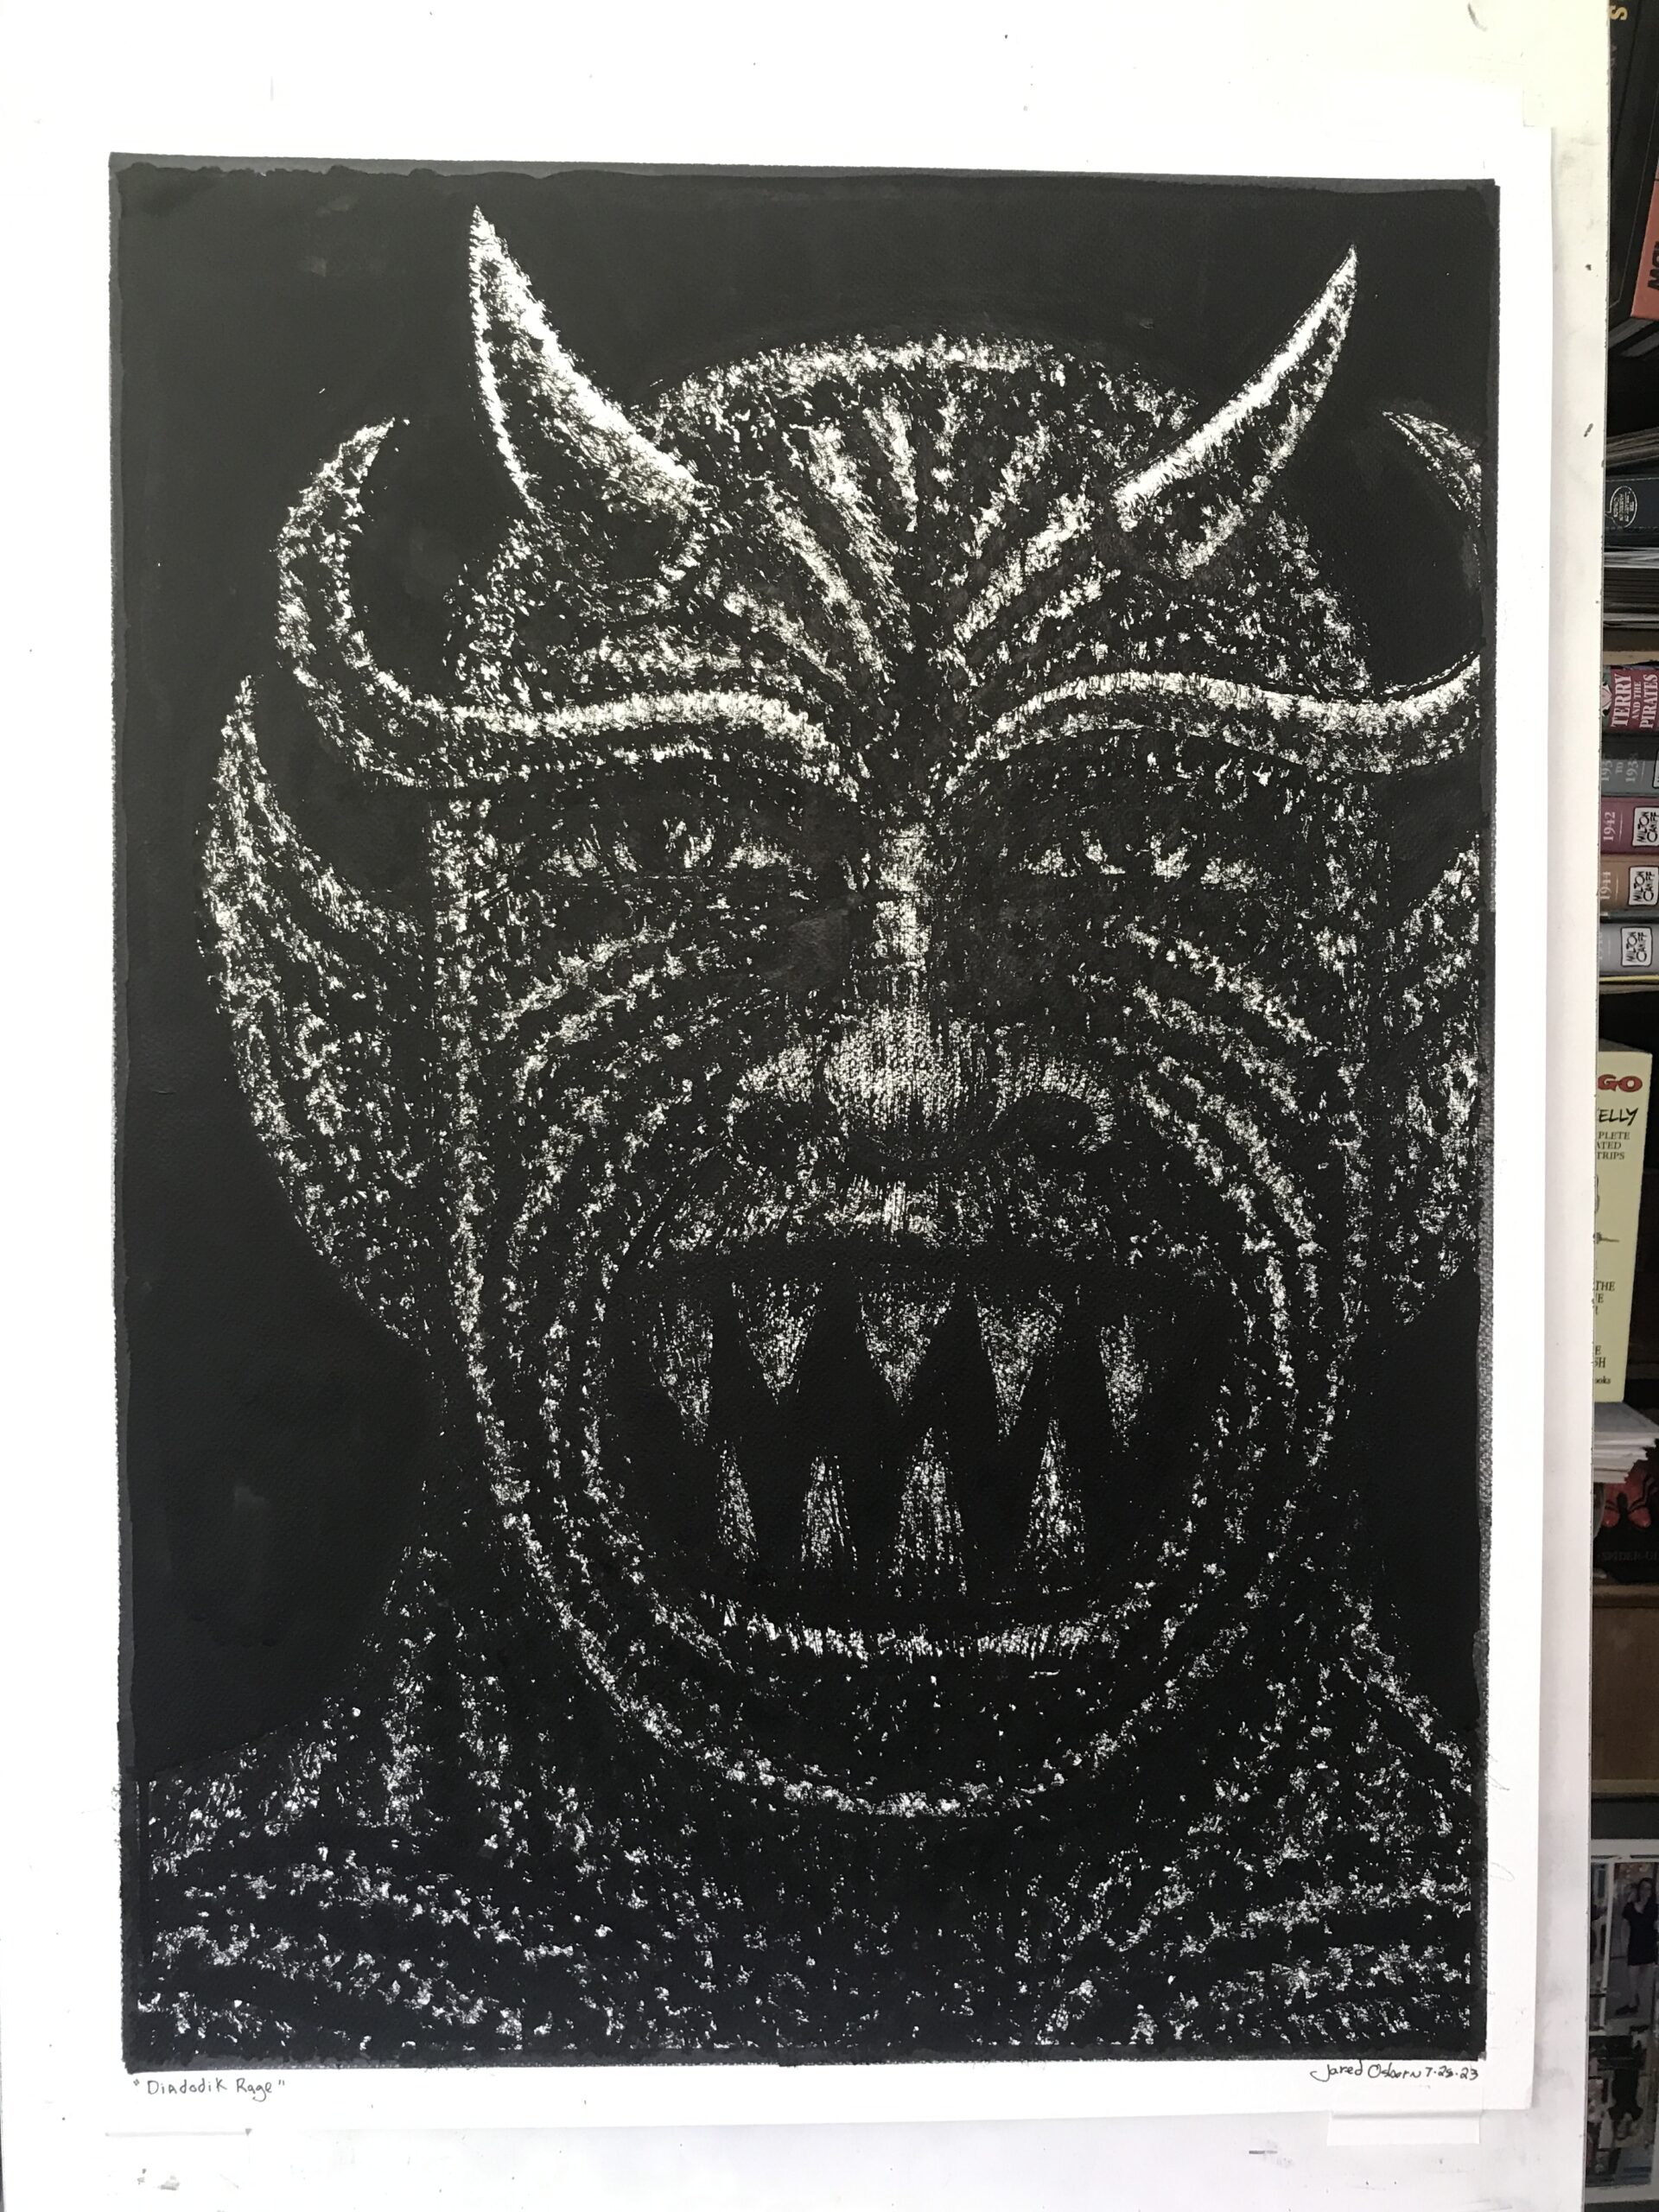
Using black India ink to make these monster face drawings helps make them scary. When drawing monsters you want them to be dark. Charcoal works well for this. I’ve noticed over the years that when a horror movie or TV show has a character who makes scary drawings they are almost always charcoal drawings. The rich blackness of ink or charcoal makes us stare into the abyss. It’s good stuff.
I make these big ink monsters using my “Busted Brush” technique. That’s when I uses a watercolor brush that’s been ruined by India ink. Sable hair watercolor brushes are the best brushes to use for ink drawings but the ink eventually ruins them. Watercolor brushes are made to come to a point but when they’re used with India ink the shellac in the ink eventually wrecks the brush so that it never comes to a point again. The brush breaks up into four or five points.
Most comic book inkers throw the brush out at this point and I used to also. But then I got tired of throwing away those expensive brushes. They cost about $25 a piece and last anywhere from two to six months. Instead of tossing them I threw them into a spare brush rack and left them there. It was years after I started doing that when I invented my “Busted Brush” technique.
When drawing one of these monster faces I don’t need a brush with a point. I’m not looking to make lines. Instead I’m looking to make multiple lines and marks. Usually when I’m using ink I dip the brush in ink and then twirl it along an ink stone to make sure the brush comes to a point. With the “Busted Brush” technique I dip the brush in ink and then mash it on top of the ink stone to make sure it spreads out into many points. I then use this wild and a little unpredictable brush to make marks and draw with.
Like most things it always takes me a little bit longer to make a monster face than I think it will. It also takes patience to make one. It takes until the end for it to come together. A monster face is supposed to be scary but in the beginning it usually looks comical. When it’s mostly still the white of the paper showing with the face only in lines it’s not scary at all. Plus the monster usually has big eyes and big teeth which looks funny.
It takes until the drawing is 90% done to start getting scary. Once the monster starts blending into the black is when our brains start seeing it as a monster. The teeth have to nearly disappear to stop being comical. It’s a weird transition and it takes patience to work towards.
It felt good to get a “Big Ink Drawing” done. Now I’m going to have to go and write the date on the undated one from January.