Art Writing “Big Ink Drawing ‘Fairy Dust’ Process”
I’ve been making some big ink drawings in the last few weeks. One a week for the last three weeks. I got some new 22×30 inch watercolor paper so I figured I may as well start using it. I take in progress photos of my big ink drawings (as long as I remember to) with my iPad. In recent months I’ve even taken to using the drawing app Procreate to her me with my big ink drawings. Turns out it works well for that.
Procreate is the best drawing app I’ve found for the iPad. By its popularity a lot of people agree with me. It costs about ten dollars which is a bargain as far as I’m concerned. It has good brushes, layers, and works well with the iPencil. It has a lot of the drawing functionality of Photoshop. You can even do serious digital painting with it but I don’t. I prefer to use it for sketching.
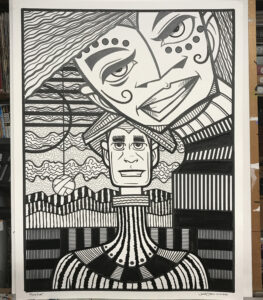
I’m going to start by showing a photo of a big ink drawing at the end of day one. Usually it takes me two days to finish one of these provided that I had the initial drawing all done. I take picture during day one but these just show the work in progress from the top to the bottom of the drawing. I’n not usually making big decisions on day one. I’m just doing the basic ink work. Putting the lines in and getting the thicks and thins just right. It’s on the second day that I add all the blacks, textures, and patterns to make the drawing come to life.

You can see in the first photo that it’a all there. All the shapes, all the line weight, and all the drawing is in there. Everything is clear. This is the drawing that I did at a smaller size brought to life on a 22×30 inch piece of paper. But it’s not done. This is when I take a photo of it, bring it into Procreate, and draw right over the photo to see what I can do with it.
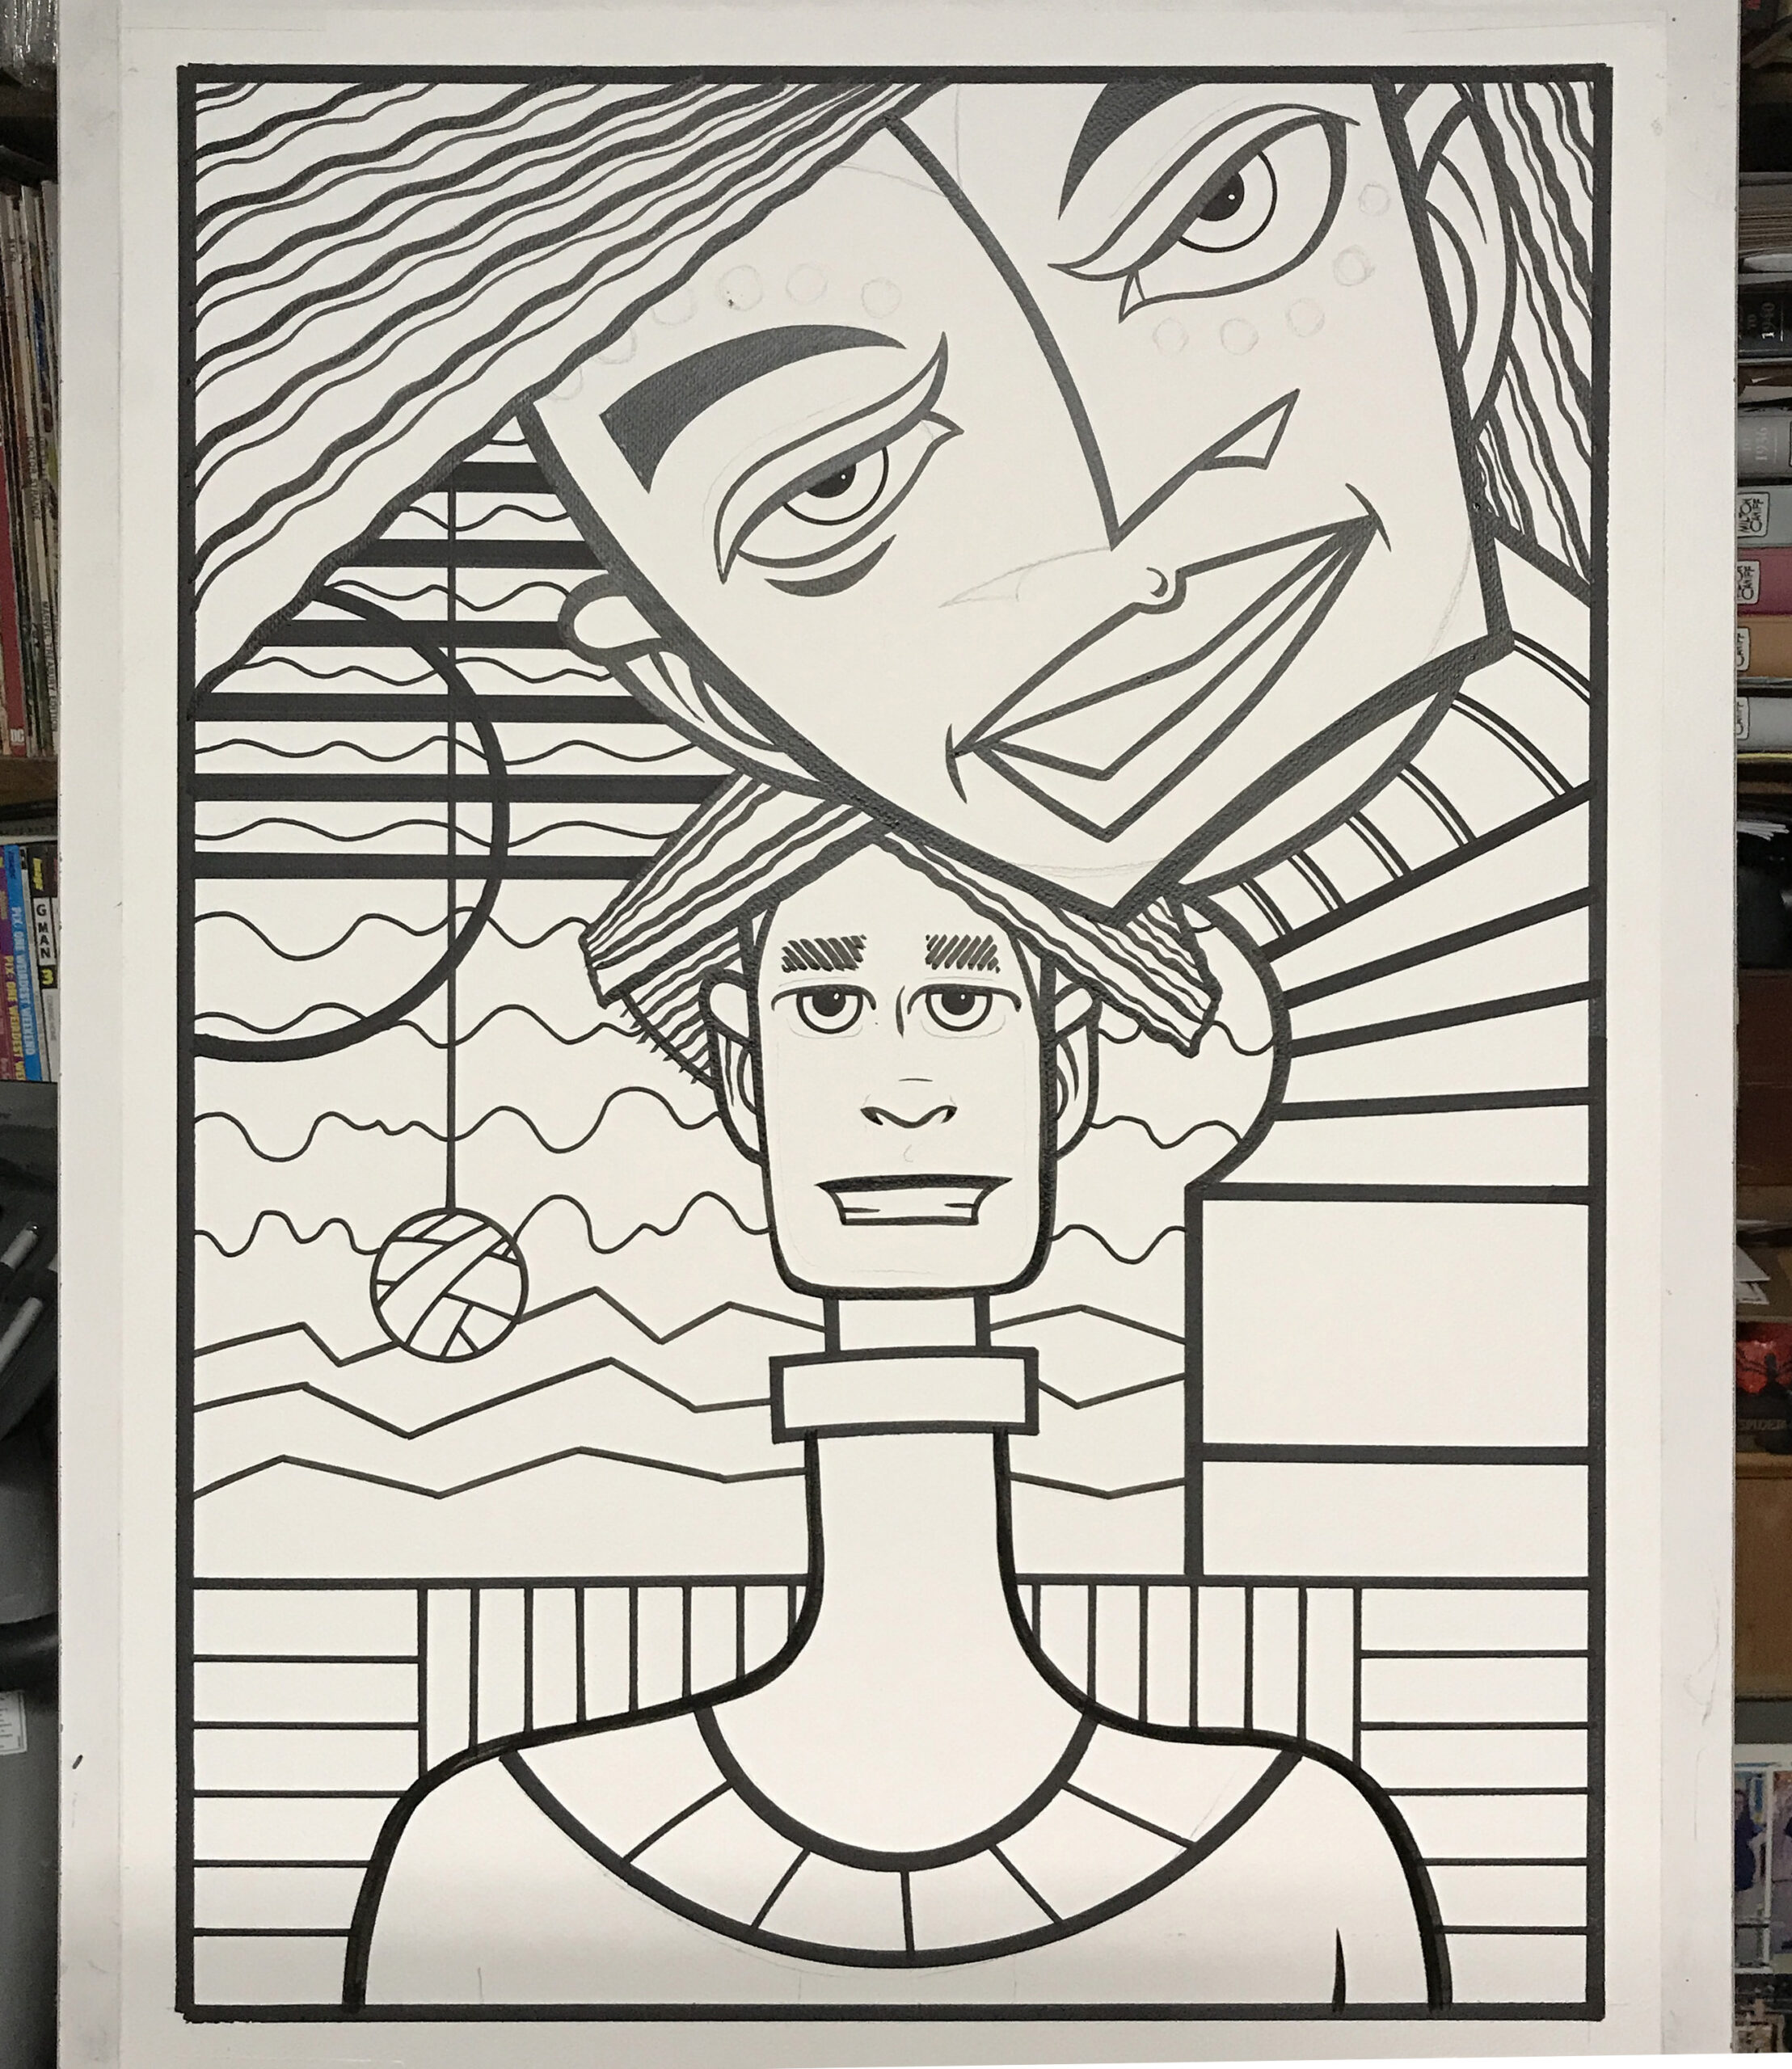
You can see what I did with it in the second photo. I added more lines in the smaller figures face. This makes him look a little more interesting as well as it makes him look older. That’s a general rule. The more lines you draw in a face the older that face looks. I even gave him some bags under his eyes. And a few more lines in his hair. Not to mention the stripes on his shirt. With the bigger face I rounded off his jaw line and made a weird beard out to the side bits. I also gave him some circles around his eyes. I tried all this stuff out in Procreate first before I did it on the real drawing. It helps to be able to mess around. I also gave him a left side to his nose.
At this point in the process I take another photo. Let’s call it number three. I load it up in Procreate and draw on it to see what I can do. Looks like I spotted some blacks. That’s easy to do in Procreate. All I have to do is drag a sample of the color black into the area I want to color and it fill is automatically as long as there are no breaks in the line. I spotted blacks all in the background on the bottom and right side and then filled them in on the actual drawing. Then I figure out what to do with those mountains. I made a series of ink lines that got thicker as the mountains moved back in space.
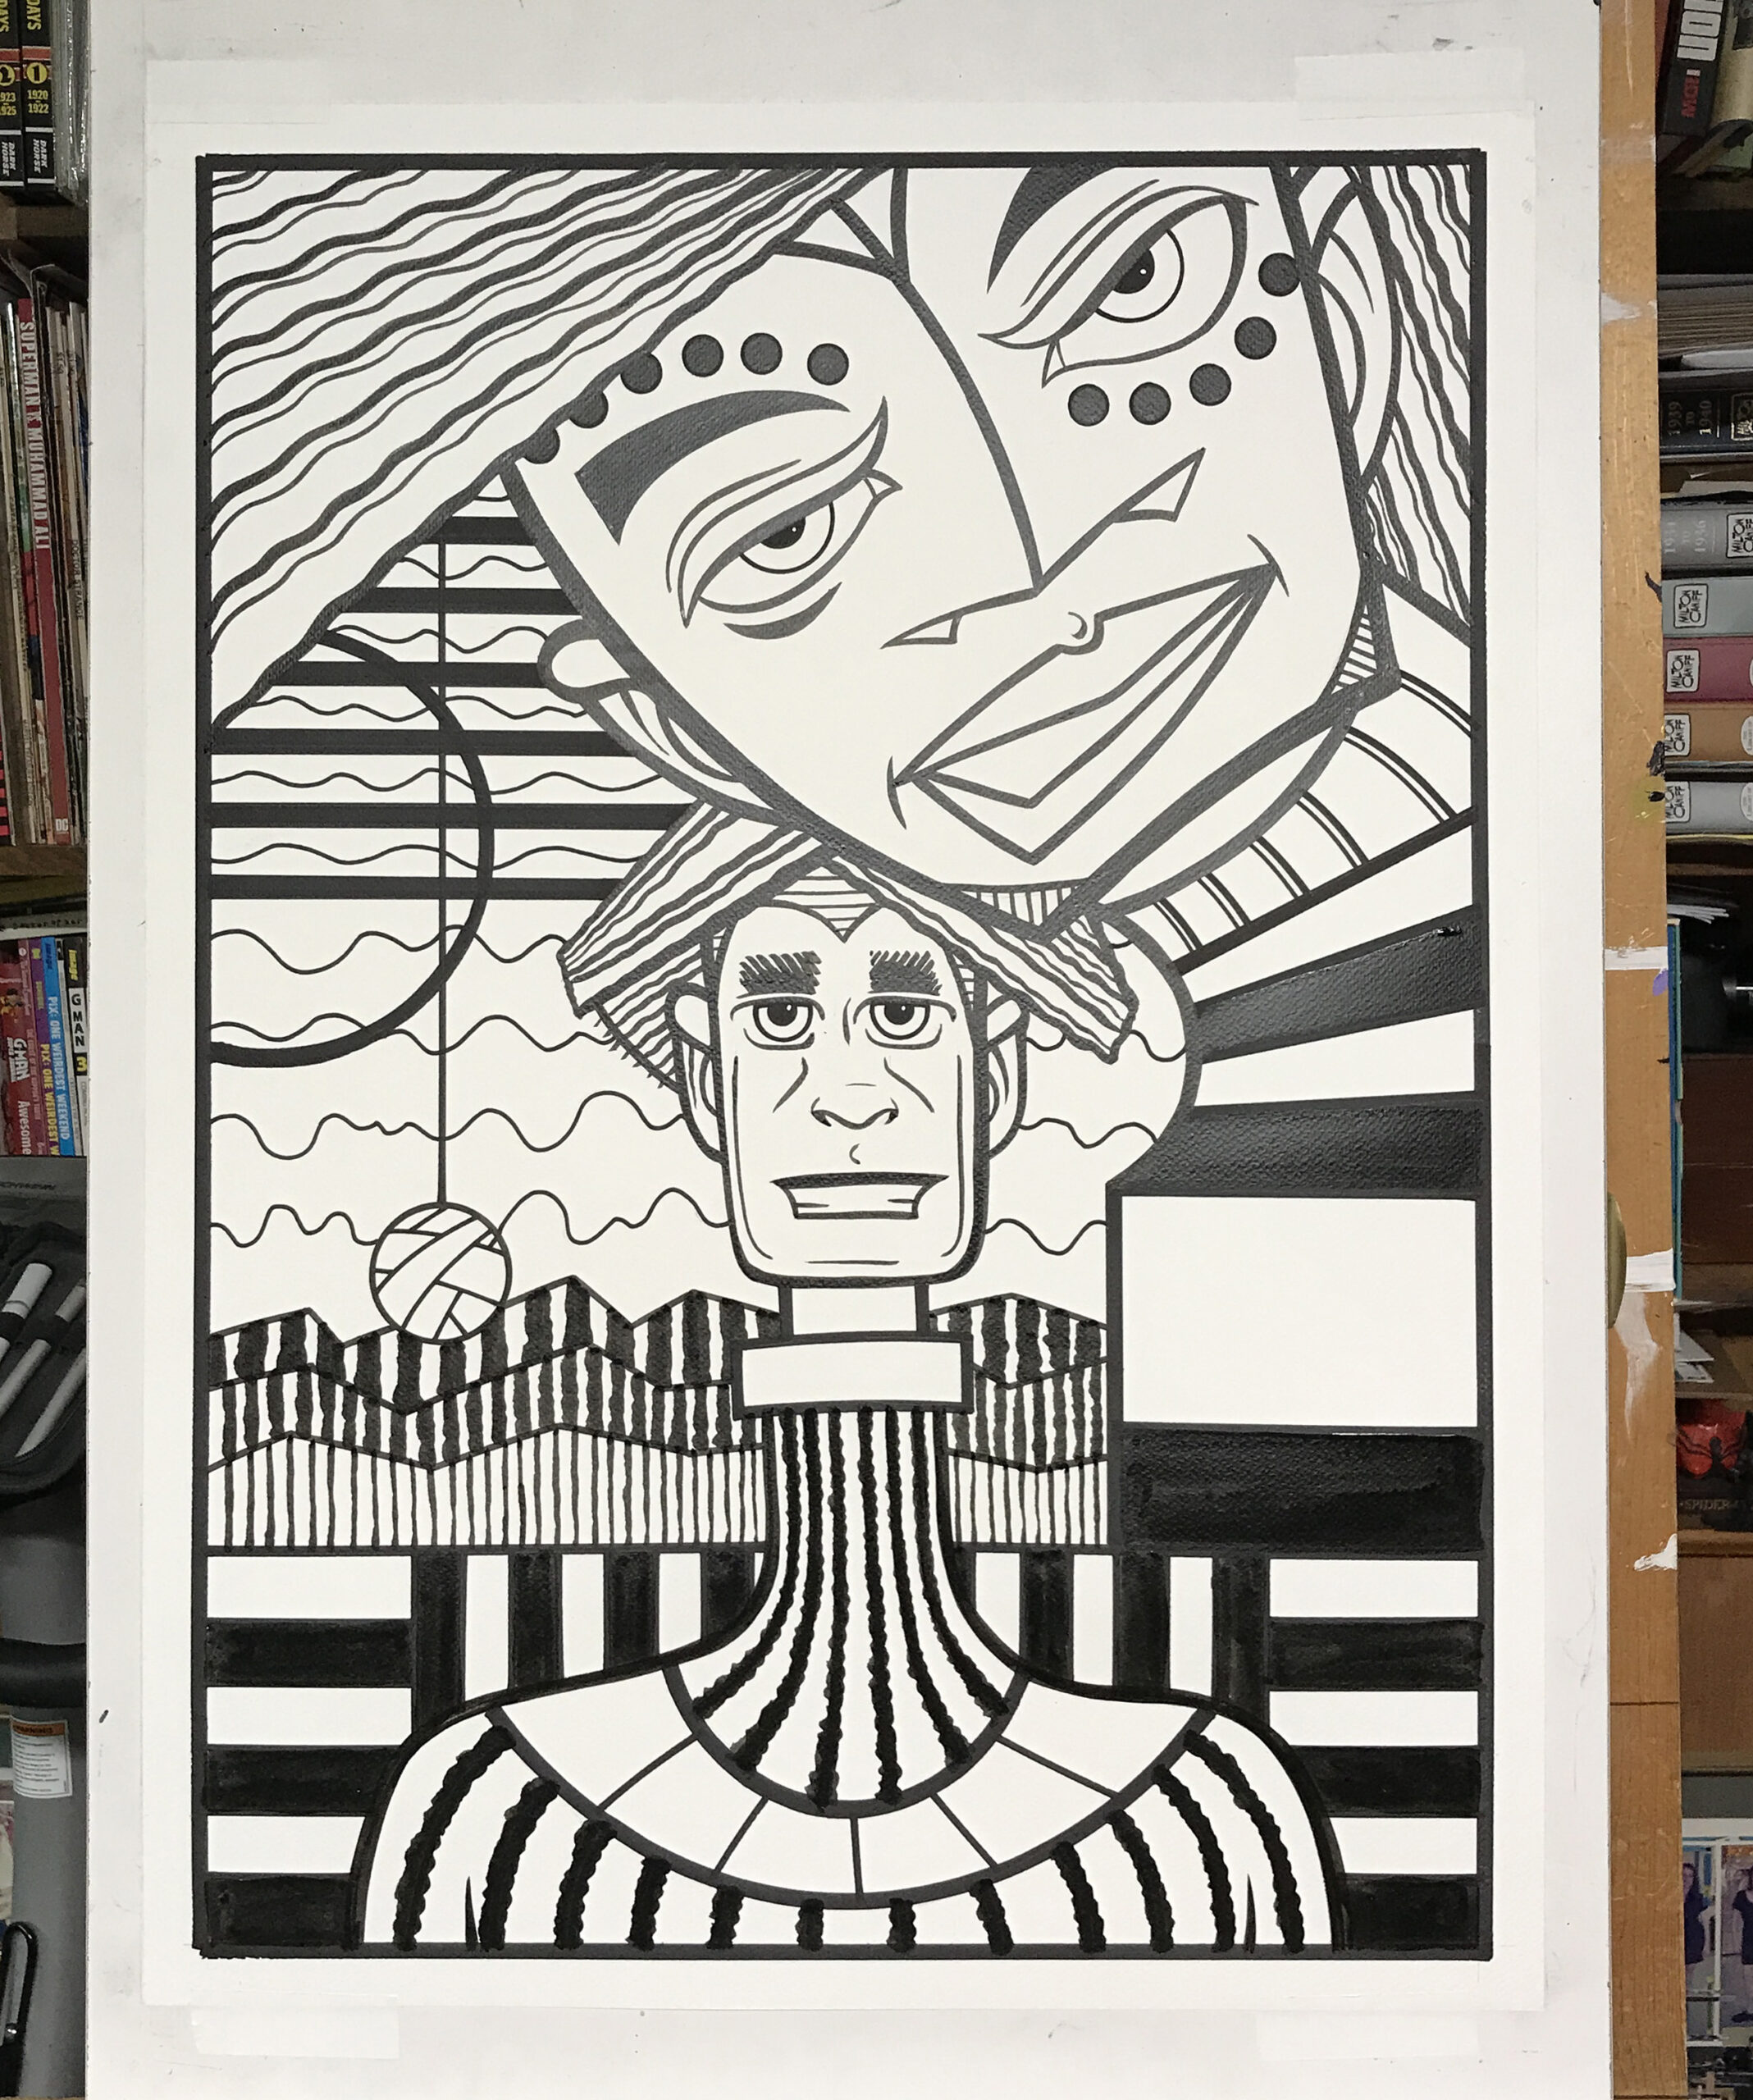
In photo four we can see more changes. I put lots of parallel lines in the “Shirt” of the bigger guy. Plus I put lines under his chin making it more of a beard. I think I meant to do this in the last step but forgot. I also defines his teeth, Then I added thin lines into the clouds in back thus making them more of a grey tone. And look at that. I spotted some more blacks on the smaller guy’s sweater. I call it a sweater because the texture makes it look fuzzy.

In the fourth photo we get small parallel lines in the bottom background and a few small perpendicular lines it the bottom guy’s hair. Not a lot of dramatic changes but this is really late in the drawing and I spend more time contemplating what I’m going to do than doing it. Procreate really helps at this stage to try things out so I don’t ruin the drawing by making a mistake. Looks like I also put some swirly cheek bones onto the big guy.
The only change I see in photo five is some more lines in the background clouds. This time thicker lines. I must have been stuck at this point and took one final photo to fool around with.

The sixth and final photo actually has some big changes in it. I added more stokes of ink for hair in the big guys hair, blackened in his eyelids and nostrils, and added some shedding lines on his lips. That’s a lot of changes to his face. I also added more lines and some circles to the bottom guy’s sweater. I thickened up the outline of his face too but I’m not sure if I didi it at this stage of the last one. It’s hard to tell from the photo. And when did I add those horizontal lines to his collar? It must have been a few photos back but I failed to notice them.
So that’s it. Day two and it’s finished. Day one is all about getting the technical aspects of the drawing correct but day two is about making it come alive. Day one is all about acting and day two is about reacting. Sometimes I like one or the other better but most times I like mixing it up.