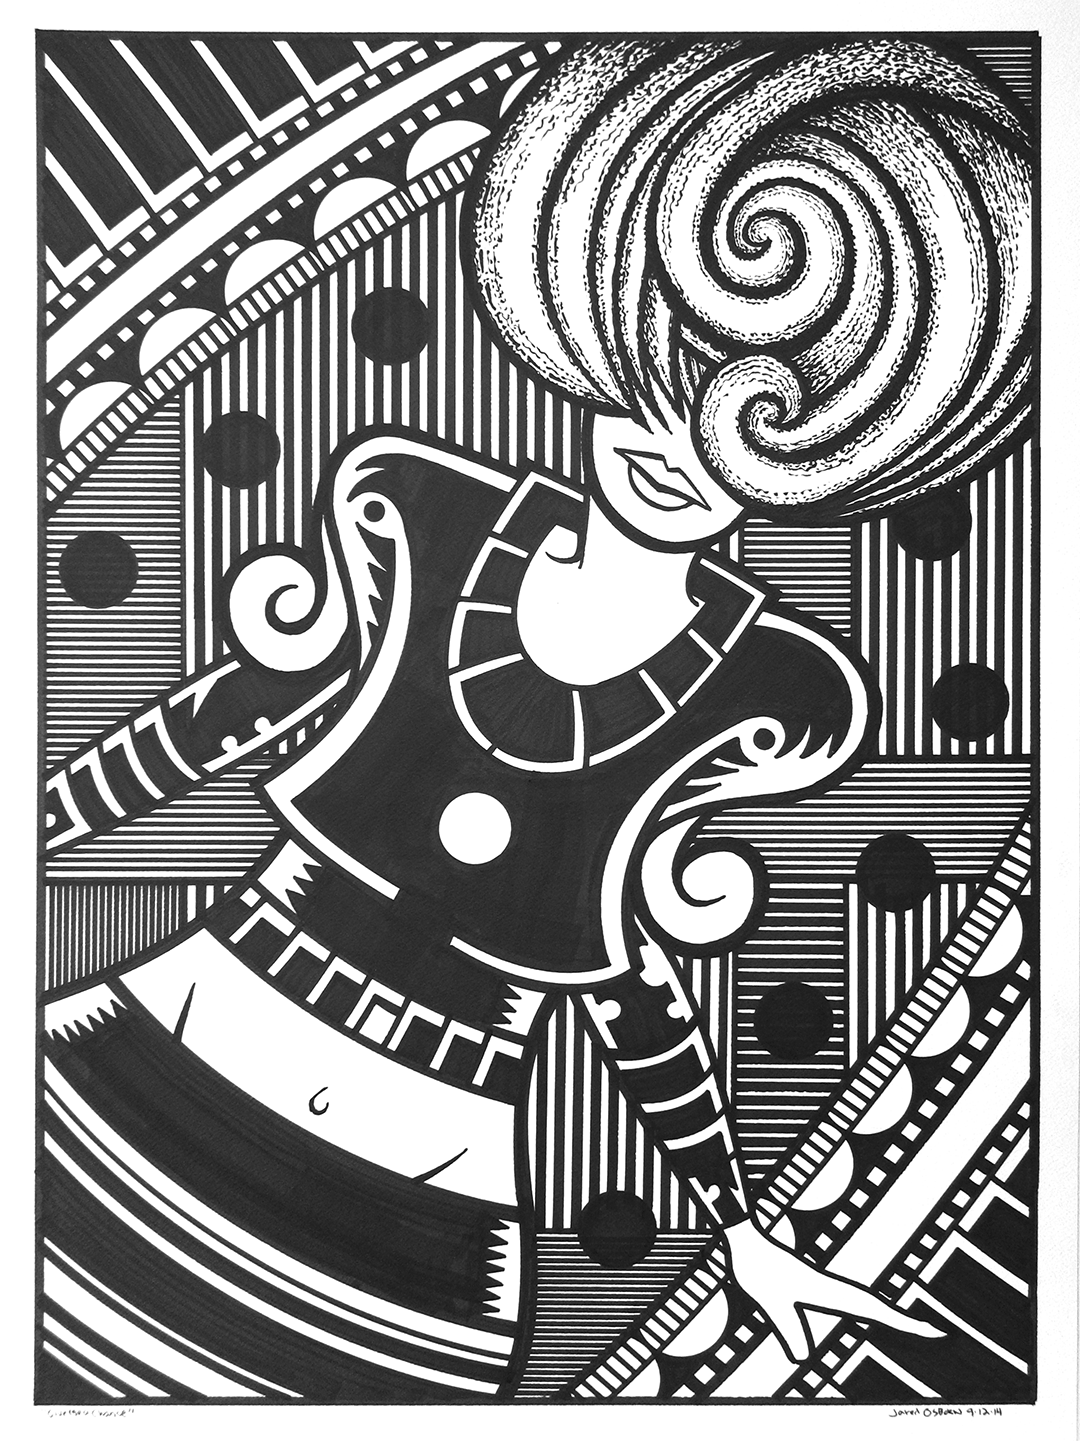
This week I dove into some large drawing. I’ve had such a busy end of the summer that I didn’t get much of a chance to make some of my own art so when I had a little bit of time I decided to make some large black and white marker drawings. As a matter of fact I made three of them but this is the one I drew yesterday and it’s titled “Give Me a Chance”.
I only started making these large drawings a couple of years ago and for a second time, as in my “On the Rough” drawings, the process was dictated by the paper. The very first of these large drawing was done on some very nice 140lb watercolor paper. The paper was nice and creamy and I remember using some marker on it but it was mostly brush and ink. The drawing came out okay but I wasn’t overly enthused by it.
Then I bought some of this much cheaper 22×30 inch 140lb watercolor paper and things changed. Not only was it a dollar or two a sheet rather than six to eight dollars a sheet but it was much harder to draw on let alone get a nice smooth brush line on. It has a fairly rough surface which is often hard to deal with. So I went the way of markers rather than a brush. A whole bunch of different Copic markers.
That very first large drawing I made mostly with a brush also had some straight lines that I made with a Sharpie marker. Since I had made that I got into markers a lot more and knew that just a Sharpie wasn’t going to cut it. I started using my two Copic markers, the sketch marker and the regular one, but even with each marker having two different tips on them it wasn’t quite enough. I ended up buying an extra wide Copic marker plus some Copic calligraphy tips which I used to replace the regular Copic marker tips.
I basically ended up with seven different markers to work with. The regular marker has a chisel tip on one end and a fine tip on the other. The sketch marker has a rubber brush on one end and a small chisel tip on the other end. The calligraphy marker has a small flat end and a large flat end. The extra wide marker is an inch and a half wide. That’s good for filling in large areas of black. I also have some tiny .5 and .7 Copic markers that I almost never use on large drawings but I have used on occasion.
“Give Me a Chance” is a good example of what these large marker drawings have become. They’ve become very much about black and white graphics. When I made that first large drawing it was a lot like my smaller drawings. It was a lot about the line. With this rougher paper I couldn’t make my usual pretty brush line so I had to find something else. What I found was large black shapes and a mechanical line. I couldn’t make a thick to thin brush line but I could use a ruler or a French curve to make a nice mechanical line. So that’s what I did.
In this picture she have a woman who looks like she’s dancing. Or maybe just posing but there seems to be a little more movement than that. When I make these large drawings I start by making a small drawing of the image. Not all of the elements are in the small drawing such as the black shapes and patterns but all the basic line work is there. This particular small drawing was even sitting around for two years before I made a big drawing out of it. First I scan in the small drawing, blow it up in Photoshop, print it out in pieces, tape those pieces together, tape the printout onto my 22×30 inch paper, and then use graphite transfer paper to transfer the drawing onto the larger paper.
This graphite paper transfer method always makes for a lousy drawing once it’s on the big paper. It looks like a mediocre tracing because that’s what it is. If I was going to make a drawing that depended on my usual line work I’d have to redraw the tracing at this point. But since these drawings depend on a more mechanical line I really don’t have to. Since I’m using straight edges and French curves I just have to know where the line is going to go in general and then the straight edge will make it exact. That’s how I did the lines and circles on the upper left and lower right of this one.
None of the black shapes in the woman’s shirt, skirt, or arms were in the original drawings. This is the stuff I like to figure out at full size. Sometimes when I scale up a drawing the details that work at the small size don’t work well at the large one. Plus with the crude tracing method I use to transfer the drawing most of those details will be messed up anyway. It’s best to leave them out until I need them.
The parallel line patterns in the background also weren’t in the original drawing. The shapes that the patterns fill were there but I wasn’t even sure what I was going to do with those shapes. At first I wanted some of the shapes to be solid black but then I knew I couldn’t pull that off with the woman having so much black in her clothes. So I got out my Haff hatching machine and the Copic Calligraphy tipped marker. Those two tools work very well together.
The hair on the woman in unusual for these drawings. It’s not graphic as much as it’s textured. I haven’t done a lot of that with these but it was appropriate here. Those large and smooth swirling lines are hard to do on this rough paper so I decided to go with a rougher textured line. Since it was her hair a texture that stands out and sets it apart seems to work fine. It ended up being one of my favorite parts of this drawing.
So that’s my art work for this week. It’s what I got done. Sometimes it’s important to just get something done.
Discussion ¬