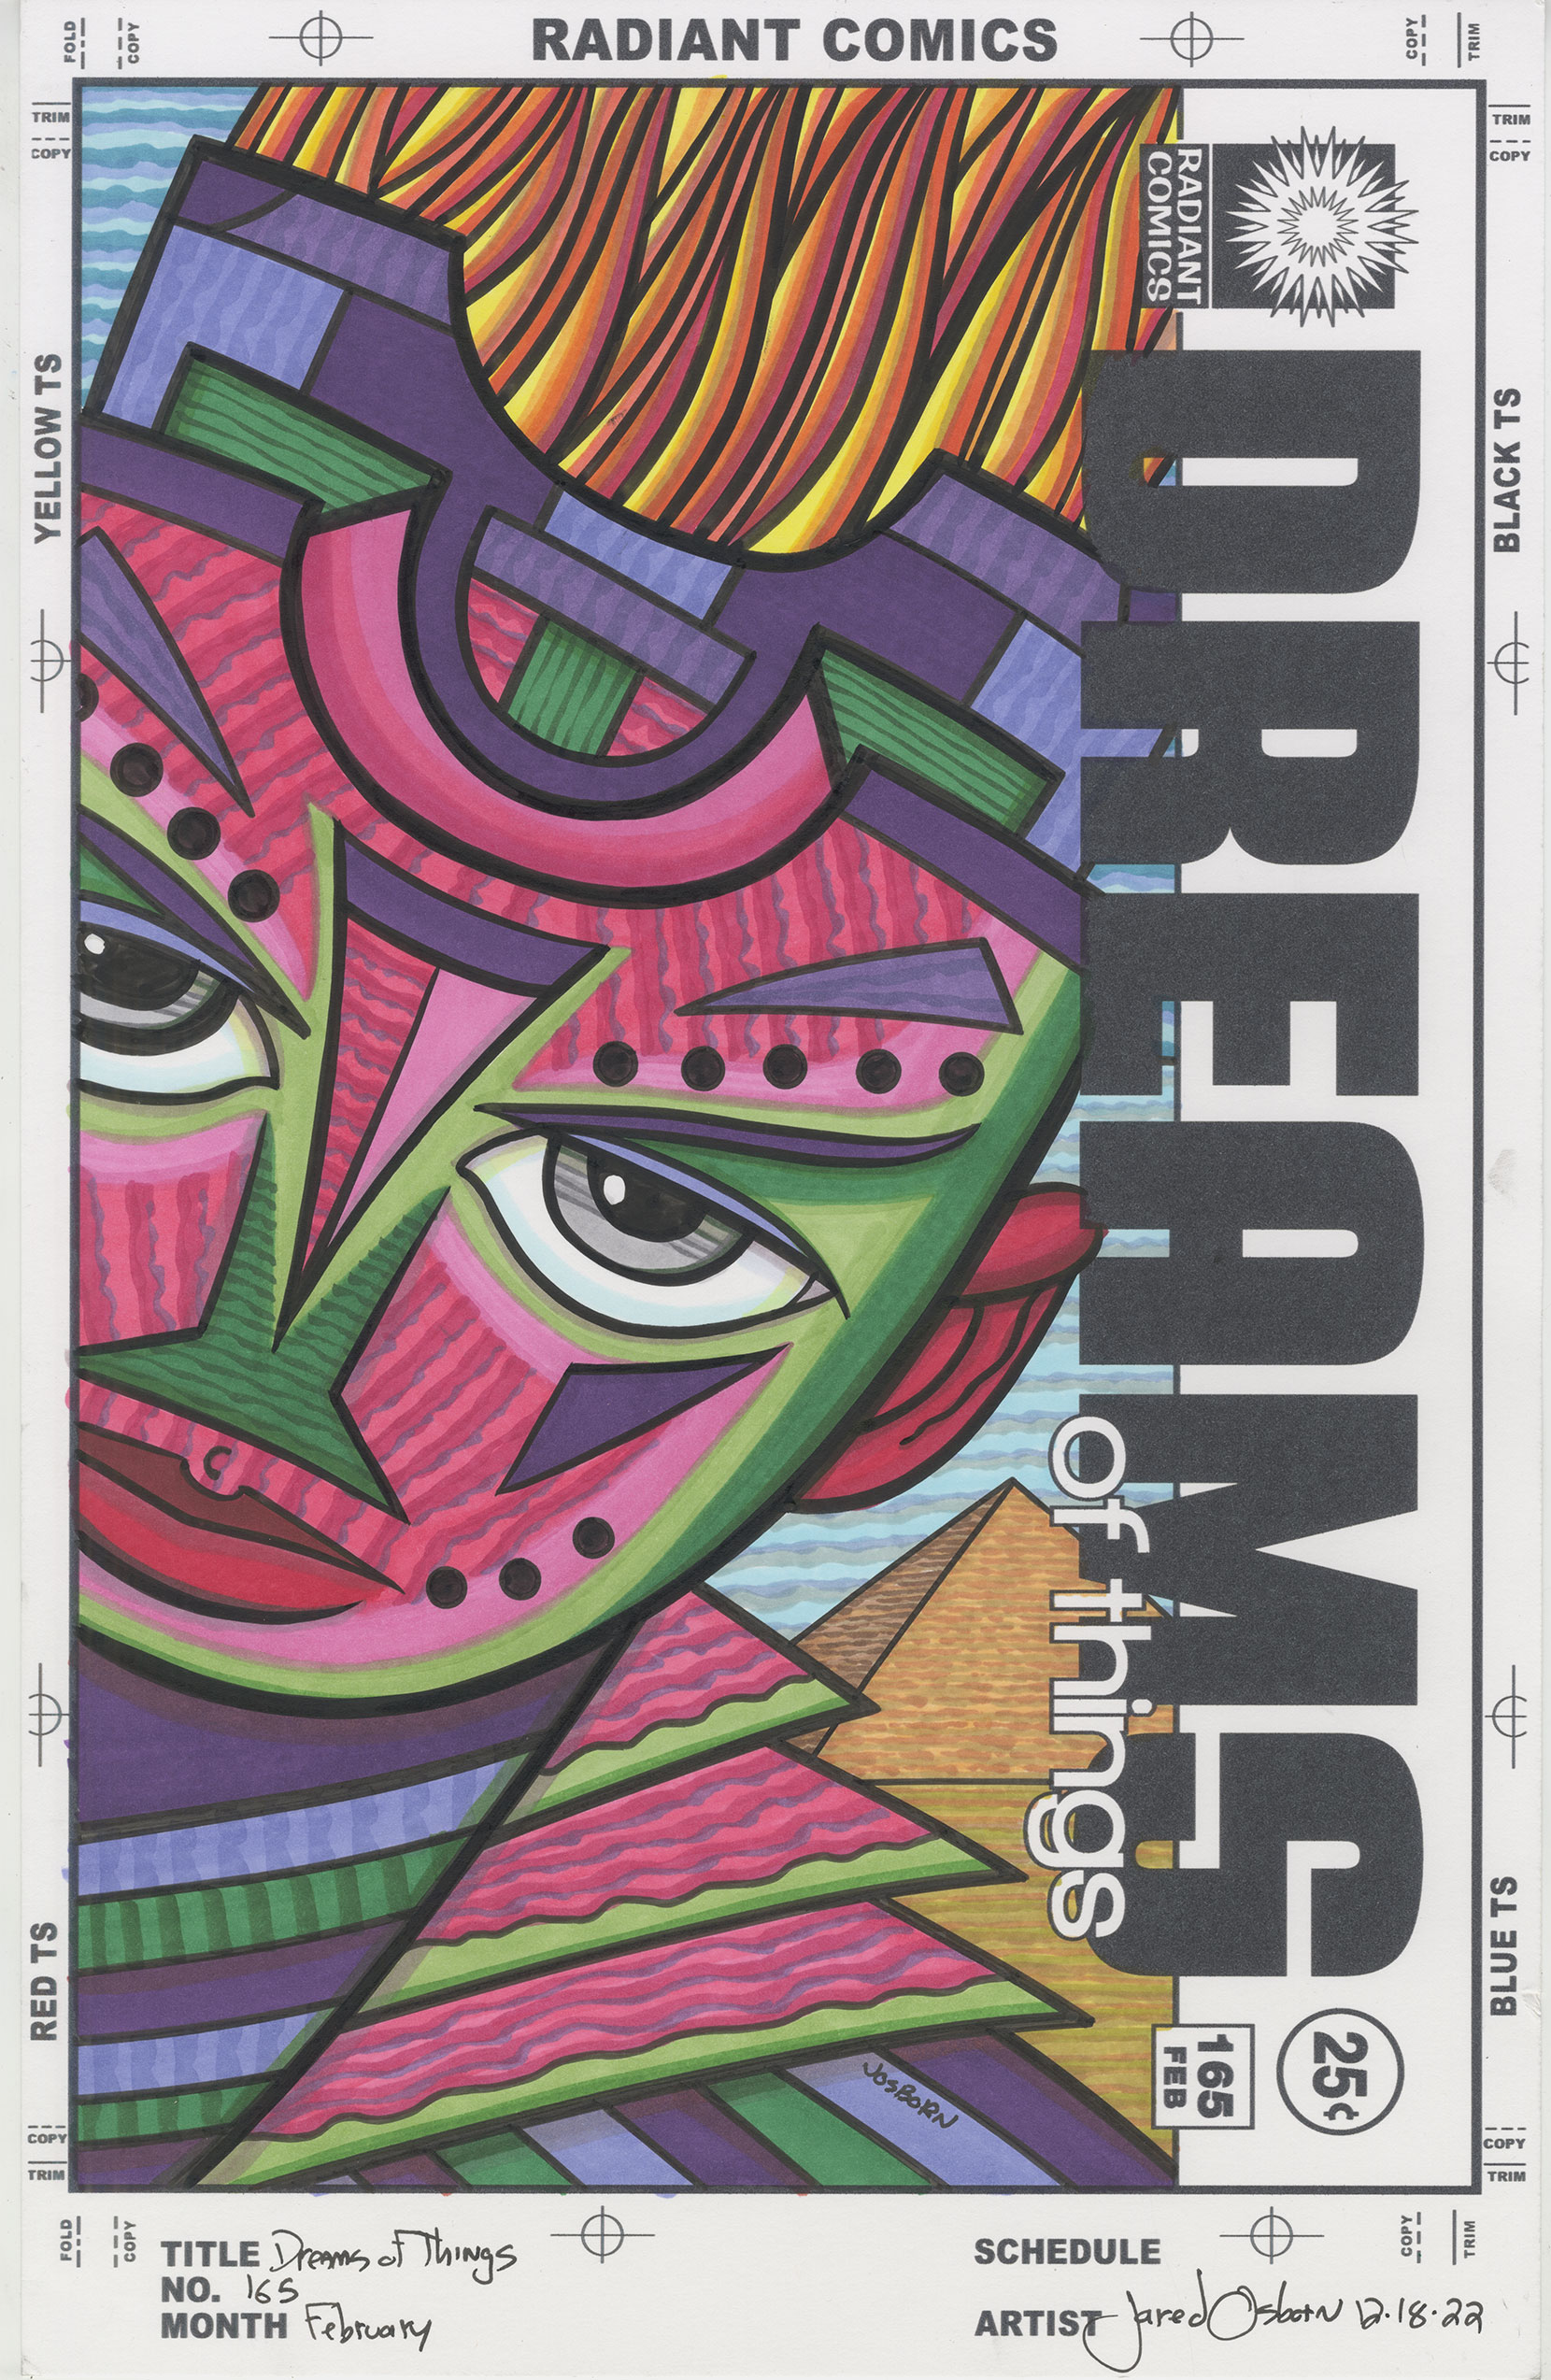
I’ve been hitting the computer hard these last couple of days doing some non-creative work in service of creative work. It’s more fun to do creative work but sometimes I have to do other non-creative stuff to further the goals of the creative stuff. This time it was setting up my “Dreams of Things” covers to comic books that don’t exist so that they can be made into prints.
All of my “Dreams of Things” covers are done physically. I draw them on paper with pencil and ink and then color them with markers. After I’m done with them I scan them into my computer so I can use them digitally.
I’ve done 250 “Dreams of Things” cover over the years and I always meant to set them up so that I could make prints out of them. Until last May I never did. They just kind of sat there on my computer without me ever working on them. That’s because it’s a lot more fun to make new covers than to set the old ones up for printing.
Last May when I decided to start setting them up I made some Photoshop Actions to help me with the process. Those are macros or automatic actions that can help with repetitive tasks. They are really helpful.
When making the “Dreams of Things” cover I print out the logos and trade dress right on the paper I will be drawing on. I like the way these mechanical logos look against the hand drawn comic and real comic book covers were done that way too. The mechanical logos were pasted on after the artwork was done in real covers but the end result was the same. Mechanical logos on the art.
The problem with doing the logos this way and then making a print is that a printed out logo that is then scanned back in can make the logo a little fuzzier than I want it to be. Plus on a lot of the covers the black color of the logo isn’t quite as dense as I want it to be. I think I was having problems with my printer at the time and just had to go with the slightly grey logos.
As a result of the grey and fuzzy logos I decided to digitally paste a new version of the logo over the old one. It had to cover the old one perfectly so I had to fiddle around until I got the logo just the right size. I knew this part of the process would take the most time but I also knew that it had to be done for the prints to look good.
Sometimes the covers have a horizontal logo and sometimes they have a vertical one. So I had to set up a template which had both on different layers so that I could chose to copy either one. Step one of my action is to choose the correct logo.
To set up the covers I have three files open in Photoshop. The file with the two logos, the file of the cover to be set up, and a file for the set up cover to go in and be printed out of.
I choose the correct logo from that file and then move over to the scan of the cover file. I hit the button to start the action and it pastes in the new logo and also types the issue number and month of the issue. I’m replacing those too because they are a little bit fuzzy. The action also does a little bit of color correcting to get the color more accurate.
The logo and numbers get pasted in but they are always a little bit off. I have to nudge them into place to cover up the old logo. Sometimes this takes ten seconds and sometimes it takes a few minutes. I also have to type in the new number and month because the action can only type in place holder text. It doesn’t know what month I want.
After the logo is covered over with a new digital version I save the document with all the new layers in it. That’s in case I have to go back and changes things. After that is saved I flatten the image so that the layers are gone and everything is flat and on the same level. I “Save As” that document and put “Flat” as the end of the file name. This is the one I need for the next step.
Now I start the action with the flat art files open and it copies the art, closes the file, and then stops and asks me to choose the printing template. After I chose the printing template it pastes the cover into it. The top layer of the template has a border and I have to shift the art slightly so that it matches the new border. I do this ten times until I have ten ready for printing 11×17 inch prints on ten layers.
I’ve been doing them ten at a time and it takes about 45 minute to an hour to get ten of them done. Sometimes I can go fast but at other times things come up that can slow one down.
One of the things that has slowed me down is missing scans. It seems they come in batches too. Usually after I finish a cover I scan it into the computer. Turns out I didn’t do that all the time. About every thirty covers there are missing scans. I don’t know why they come in batches but I’ve had to scan in three covers at a time about three times. It was getting weird.
The last step is to hit an action that turns the 11×17 inch prints into 8.5×11 inch prints. This is the size that I was printing them out at last May but since the art and original scans are at the larger size it only made sense to set them up that way first. I may not be printing them out at the larger size right now but when I’m ready to they’ll be all set up. That’s always a good thing.