The Finished Painting
So the painting, “Stainless Sky”, that I wrote about last week when I was in the middle of making it has been finished. It took a while to complete but I got it done. The “Mid Process” piece that I wrote last week was written after a day of painting and it took two more days of painting to finish this one. A lot of those last two days was taken up by looking at the painting and wondering what to do next with it. What did I want? I wasn’t sure what I wanted most of the time I was working on it but by the end I figured it out. I was happy about that.
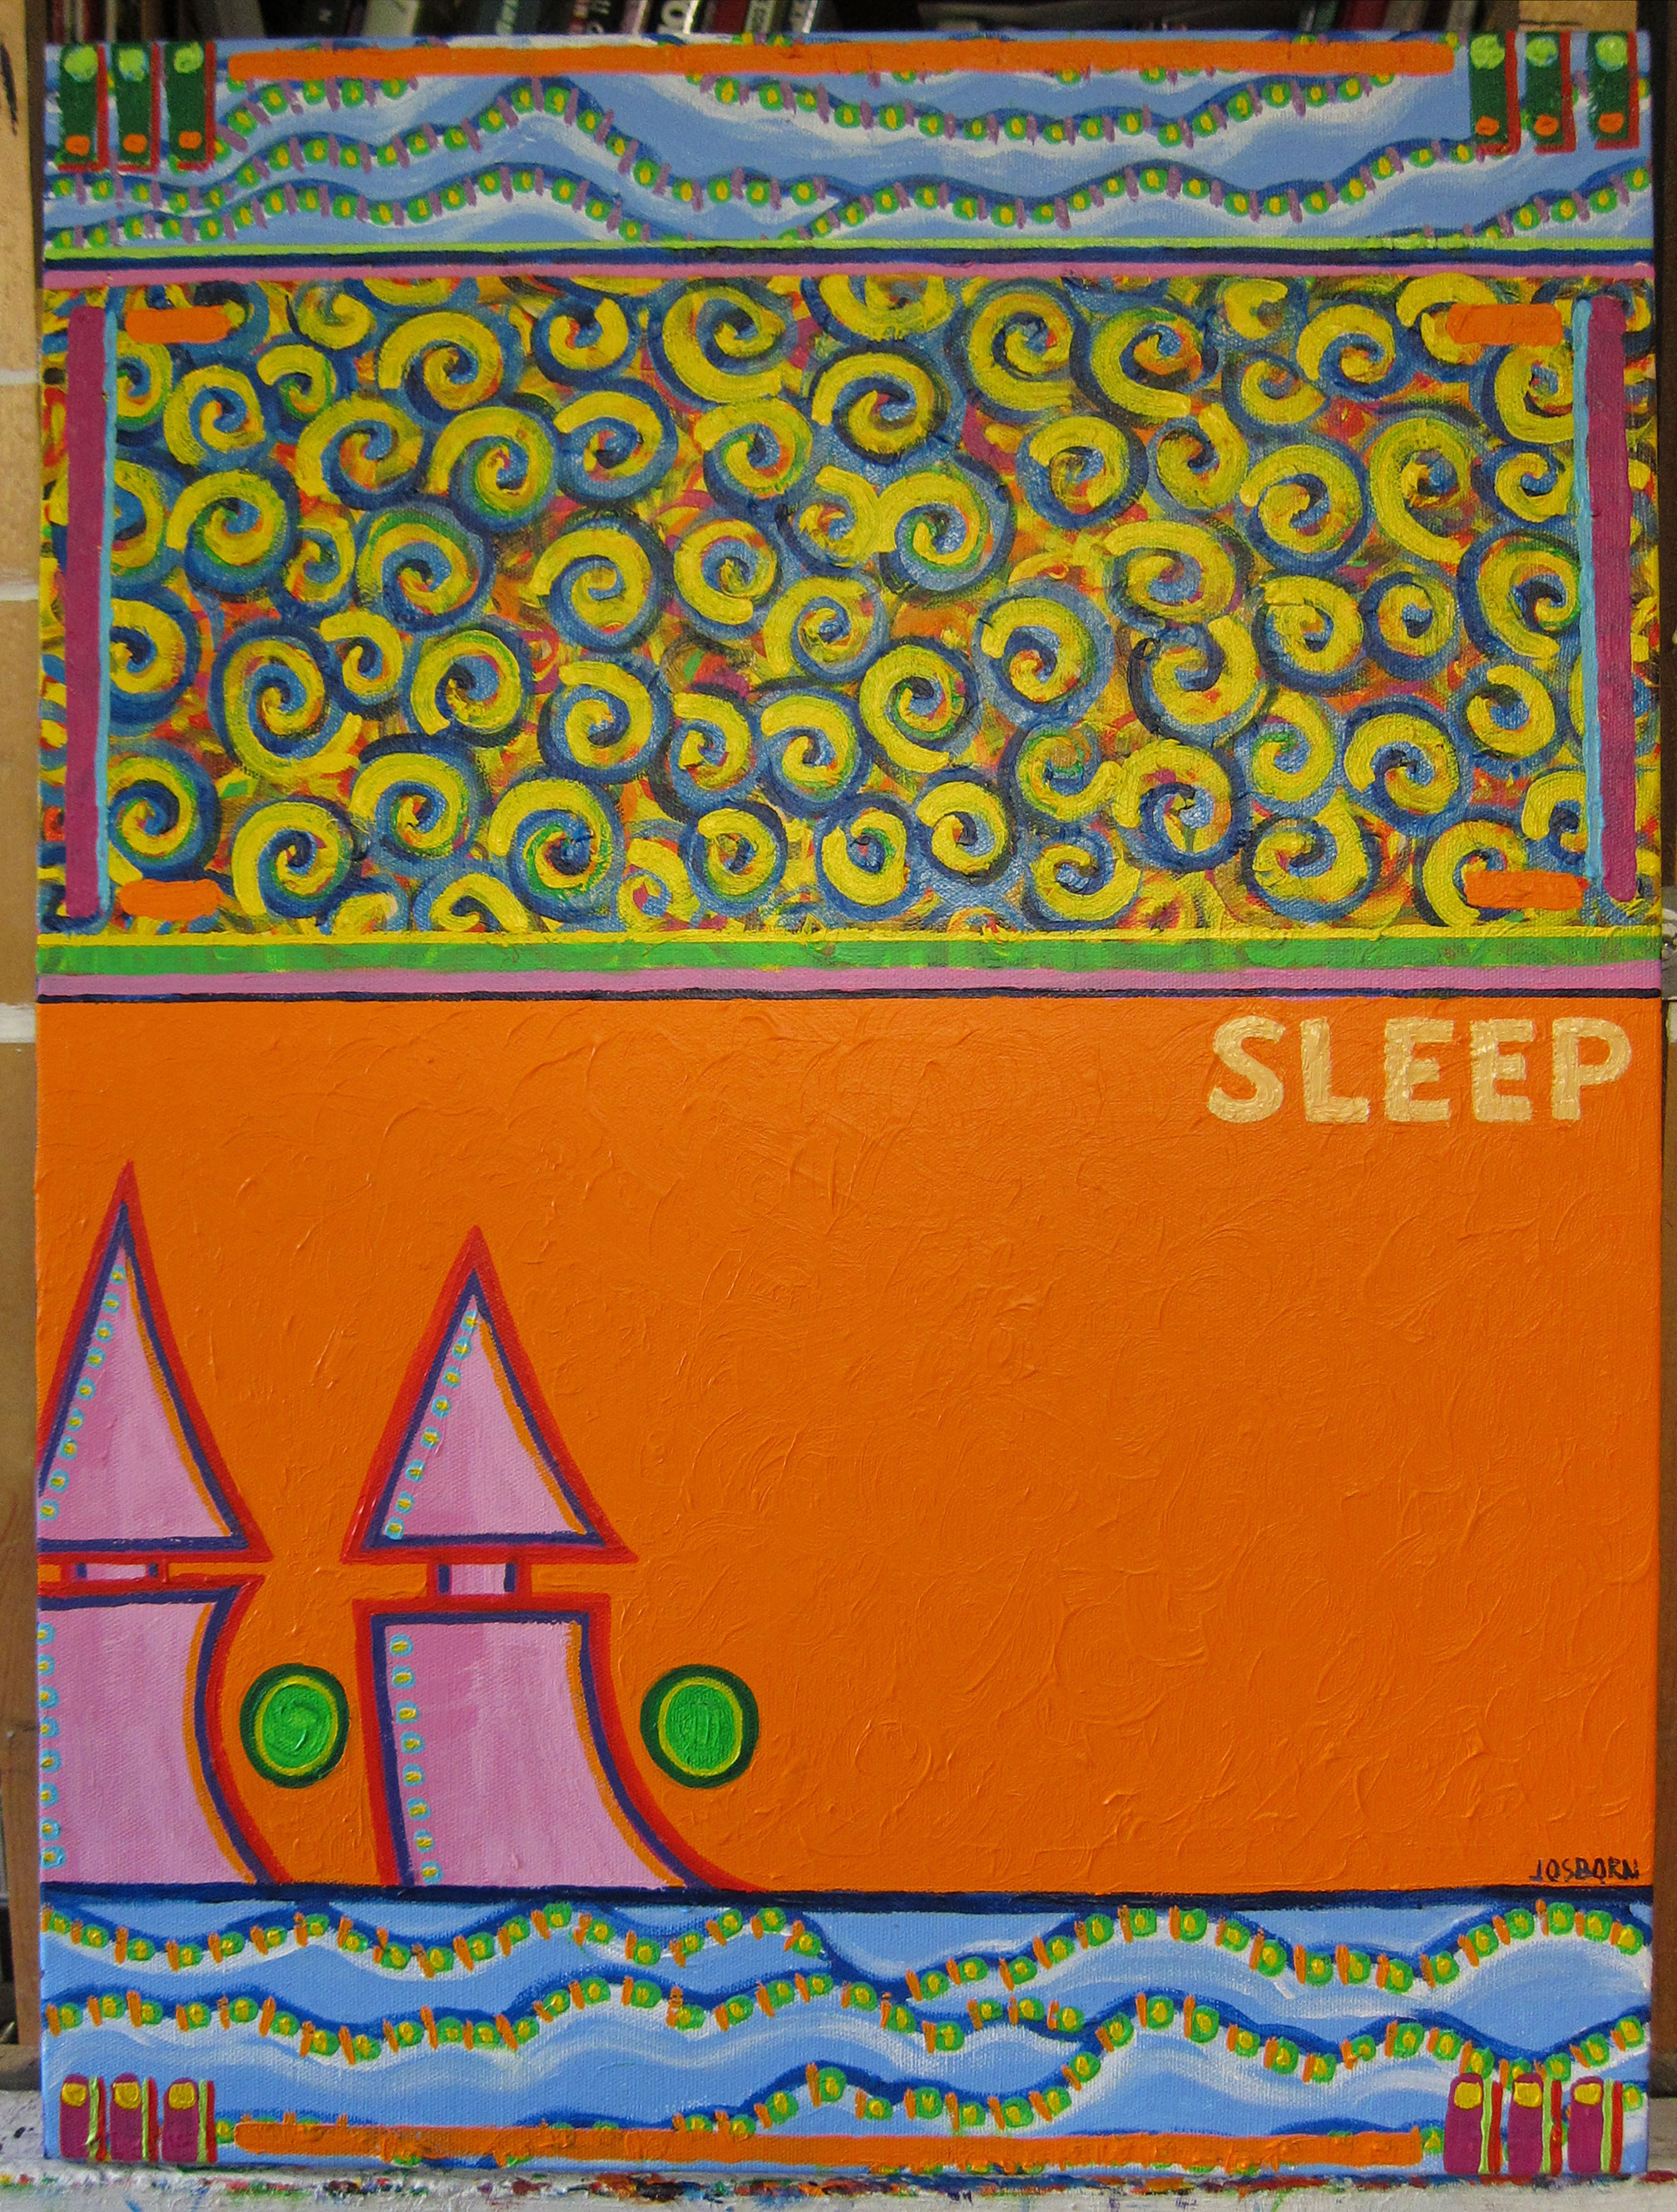
The first thing I notice on the finish piece is the swirls. They’ve changed quite a bit. On last week’s photo you can see three colors in the swirls: red, brown, and green. I added more layers of color before I was finished with those swirls. There were the toughest part to finish. I use swirls all the time but this go around I couldn’t figure out what I wanted from them. There are probably about six or seven colors in there counting the three original ones as I kept going darker and lighter with the color trying to suss it all out. It wasn’t until I put on the yellow paint and made the negative space on the inside of the swirl into a positive shape that I found my direction. Now the yellow shape is balanced well with the dark blue part of the swirl. I was missing that balance for a long time.
The purple and blue lines on either side of the painting in the swirl area serve to keep the eye contained on the painting. I find that on the “Half way through” painting my eyes tend to fly off the painting on either side of the swirls. Those lines work like a frame and make a painting within a painting.
I calmed the white and blue could areas of the painting down. In the half way through one the white is strong on the top and the blue strong on the bottom. Too strong I thought. Once again I wasn’t sure what I wanted to do with those areas so I started using little brush strokes of paint to tie in colors from the rest of the painting and get the blue and white to sit back and behave. It took a while. I have three different colors and brushstrokes sitting on top of the dark blue lines to knock them back. First it was the little green brush strokes, then later the yellow dots on top of the green, and finally even later still the orange lines in between. I like the way they snake along and tame the blue.
The orange has a couple of more layers than half way through. Plus it has some circular brush strokes in it now. I wanted the orange color to be built up a little more than when it started out. I wanted it to have some presence as paint. Sometimes if paint is put down too thin it doesn’t have enough oomph. I wanted some orange oomph so I put on two more coats of orange and put it down with heavy circular brush strokes. It doesn’t quite have the same impact as some of my oil painting textures but it did the job.
Getting the shapes and outlines right on those two towers took some time. They started out as just a couple of light to dark pinks on the inside with a darker outline but I knew that wouldn’t stand. The first thing I did was work the pink inside shape. I wanted to make that a positive space and not a negative space as defined by the outline. It was sitting behind the outline and I wanted it too sit on top of it. At lest that’s where I started. I then went in with a dark blue inner outline and a red outer outline and totally got rid of the original magenta outline. The transparent red plays nicely with the heavy orange and the dark blue helps define the shape. Then I put an orange line on top of one side of the blue line so it doesn’t define things too much. It took a while for me to get that balance the way I liked it.
The green ovals were a little easier. They almost finished themselves as I didn’t do much too then except keep them monochrome and sort of the same as the towers. My only big decision with them was if I should make them perfect circles or not. In my original drawings they were perfect circles so my instinct was to keep them that way but I decided against it. I’m not sure about it though. That’s the one part of the painting I look at and go, “Hmmmm…”.
The long orange brush strokes on the top and bottom keep the eye contained and unify the color. The brush strokes of color on the top and bottom of the painting and the swirl box almost painted themselves. They were put on at the end of the painting process and by them I had things figured out. They were like putting in the last few pieces of the puzzle. I had fewer choices by that time so they were easier to make.
The final thing I put on the painting was the word “Sleep”. It just came to me in a flash. That happens sometimes. I was looking at the painting for the millionth time trying to figure out what was next and decided it needed a word right in the space the word now occupies. And almost as fast I decided the word had to be “Sleep”. I wasn’t tired. I didn’t need a nap. It just came to me. I have no explanation for it but I like it. It took a bit of time to paint too. It looks simple enough but I laid that orange paint down thick and now had to paint some type over it. I couldn’t pencil in the type either. It was all paint on paint. I did figure out to use some masking tape to make straight guidelines for the top and bottom though. Then it was all putting the letter down and fixing mistake after mistake. But I got ‘er done.
Discussion ¬